Web Onboarding
Onboarding refers to the process where new users sign up and log in, ensuring that all systems are properly prepared so they can execute test cases smoothly for the first time.
Why it matters / Use Cases:
- It ensures that new users can automate test cases effectively using a properly prepared system.
Prerequisites
- Access to ZeuZ Server with permissions for Testing → Test Case → Guided.
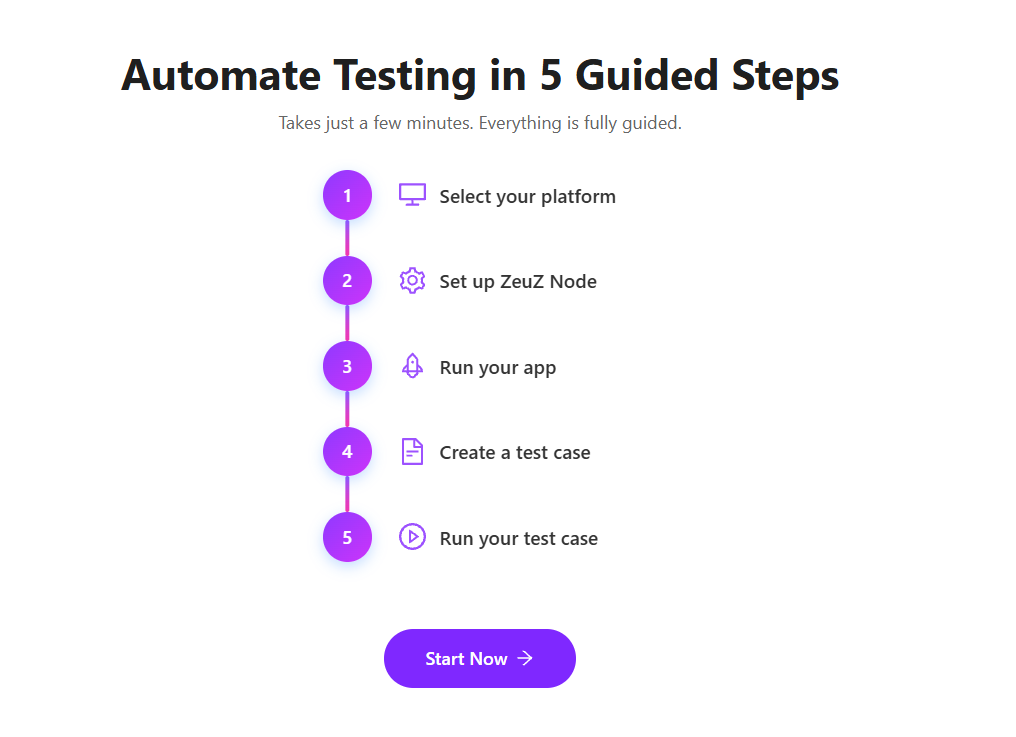
Quick-Start
- Click on the Start Now button available in the "Automate Testing in 5 Guided Steps" page.
Features
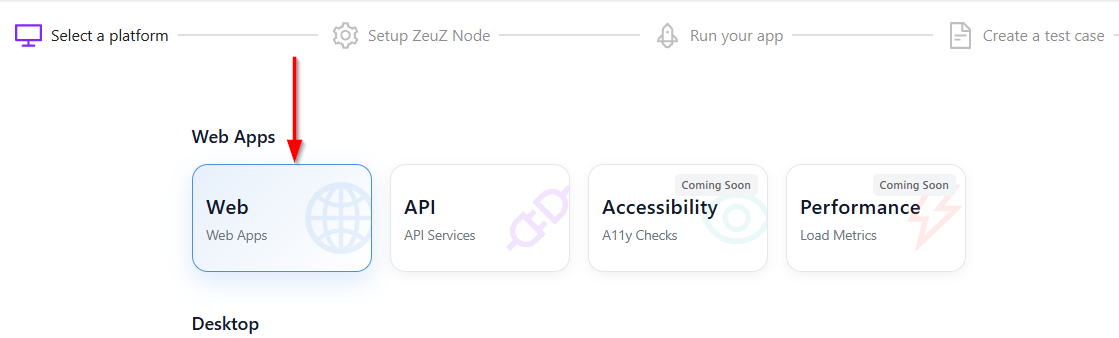
Select a platform
- Click on the Web button in the "Web Apps" section.
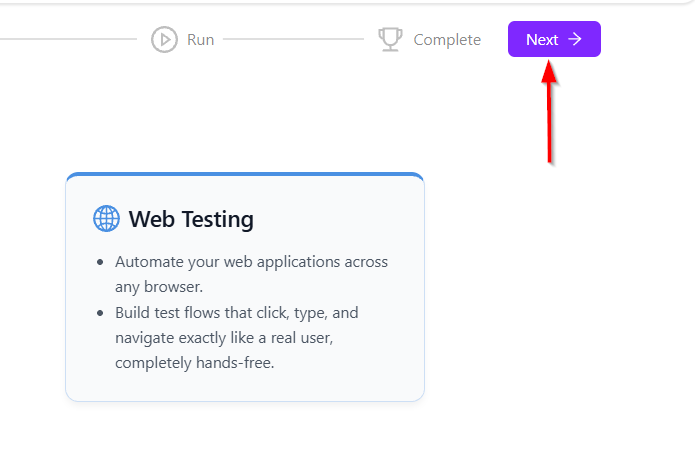
- After selecting the Web apps, click on the Next button located at the top-right corner.
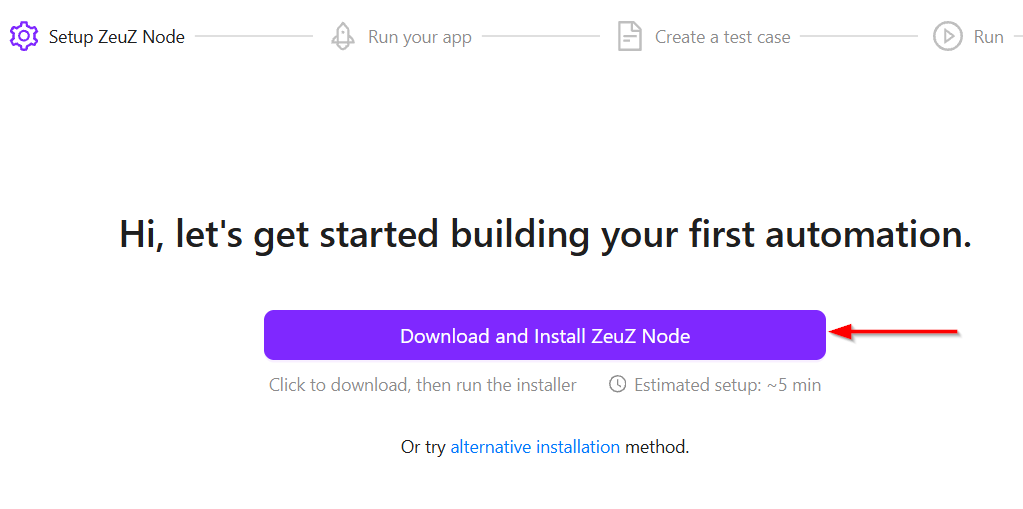
Setup ZeuZ node
- To set up the ZeuZ node, click on the Download and Install ZeuZ Node button.
- Launch the application, which will also download the necessary dependencies required for Web automation.
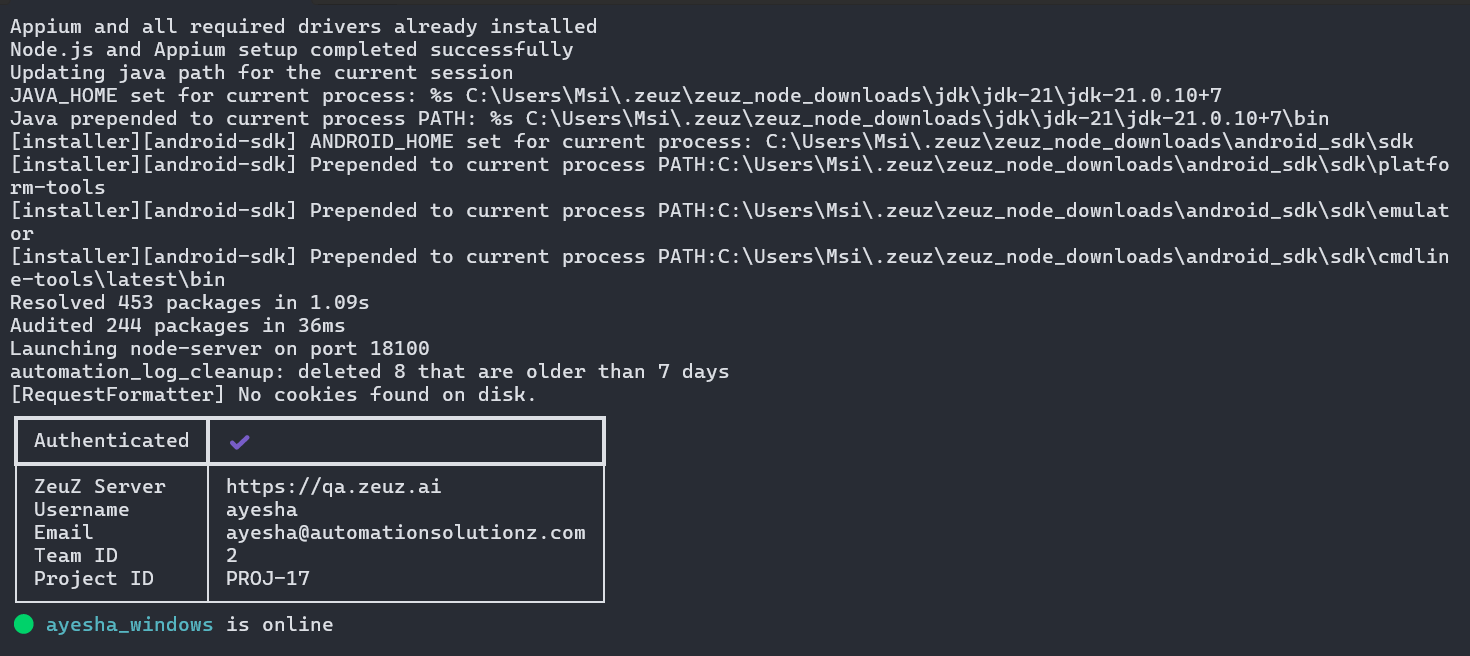
- Once the setup is complete, a Node Disconnected message will appear initially. After a few seconds, the status will update to show that the node is Online, displaying the username, platform, and authentication details. At the same time, the background page will also change.
Run your app
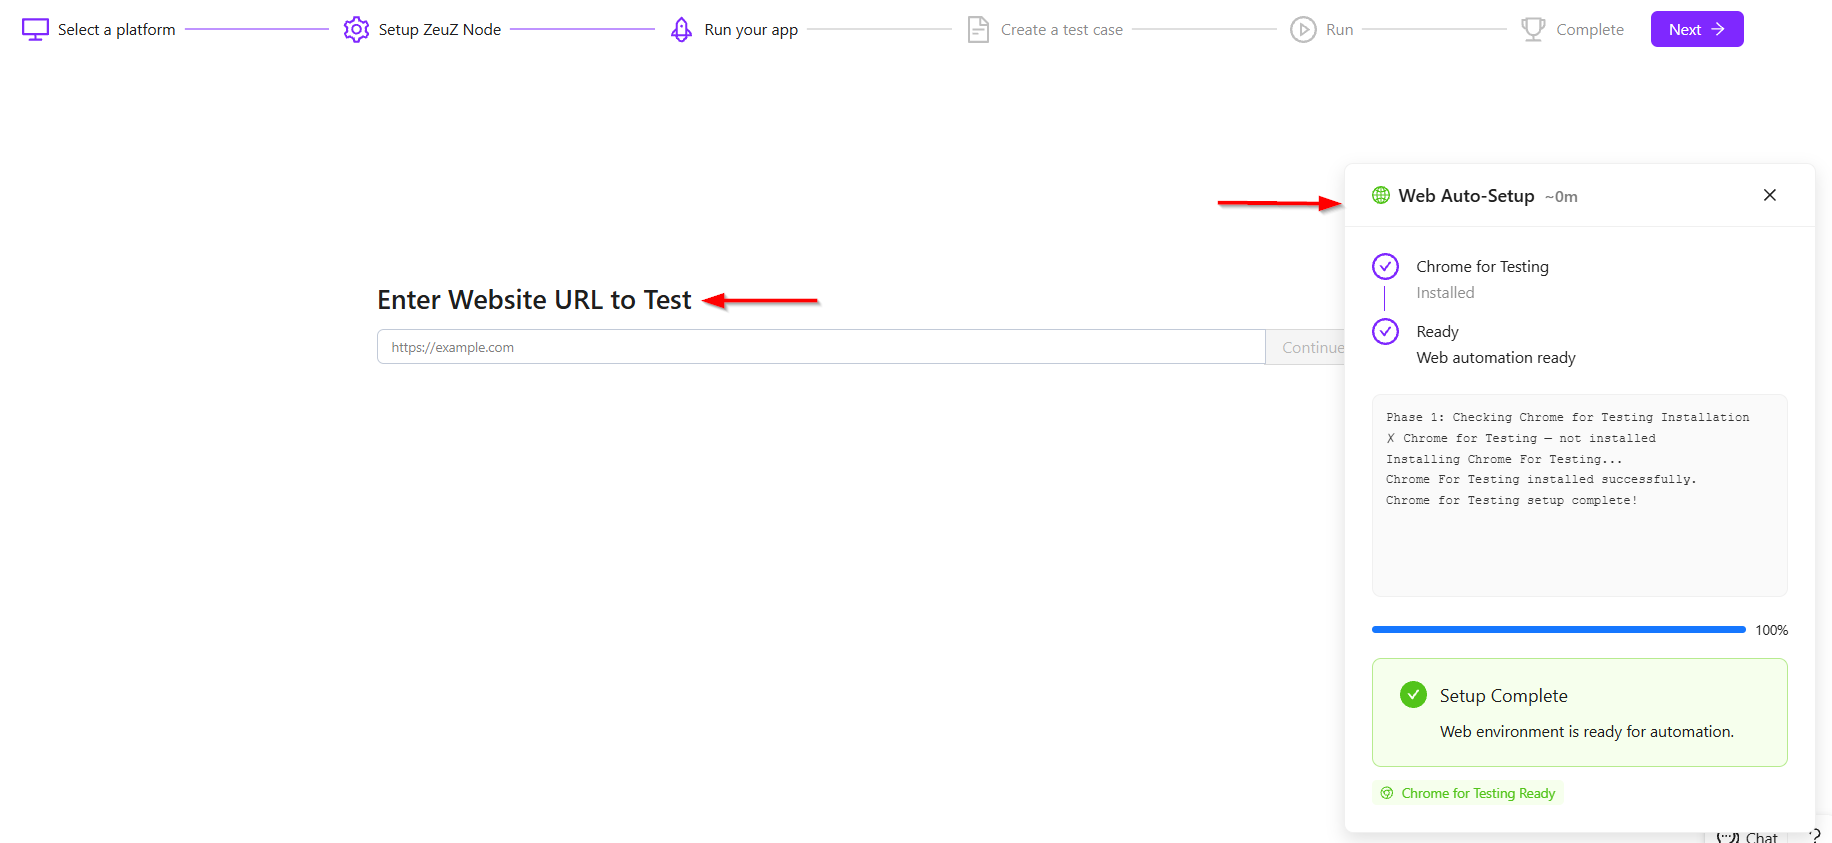
- On the left side, there is an input field labeled Enter Website URL to Test, where the user can provide the website address, such as
https://zeuz.com. A Continue button is placed next to the field to proceed to the next step. - On the right side, a setup progress panel is visible showing the automation environment status. The panel confirms that Chrome for Testing has been successfully installed and the system is marked as Ready, indicating that web automation is prepared.
- The log section shows the completed setup steps, including checking the installation, installing Chrome for Testing, and confirming successful setup.
- At the bottom, the progress bar has reached 100%, followed by a green confirmation message stating Setup Complete and Web environment is ready for automation.
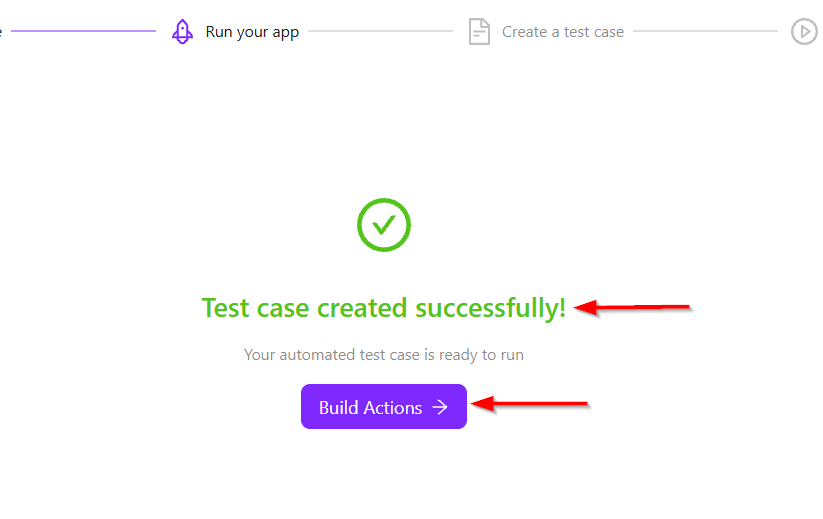
- After entering a website address and pressing the Continue button, the message Test case created successfully! will be displayed, and the Build Actions button will appear.
Create a test case
- After clicking the Build Actions button, it will redirect to the next platform, and the message First action running started successfully will appear.
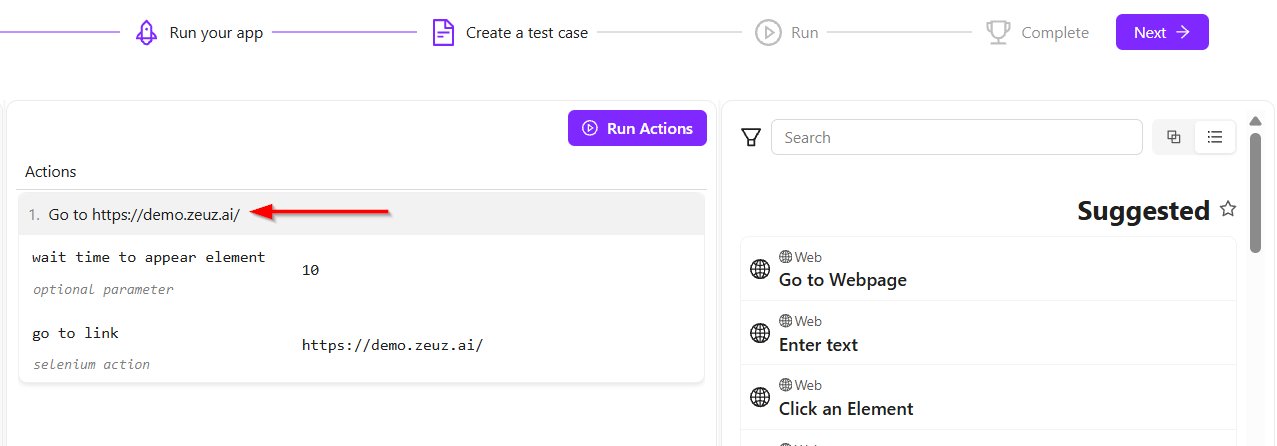
- On the given platform, the actions are displayed on the left side, while the Action Catalog or Action Category is available on the right side.
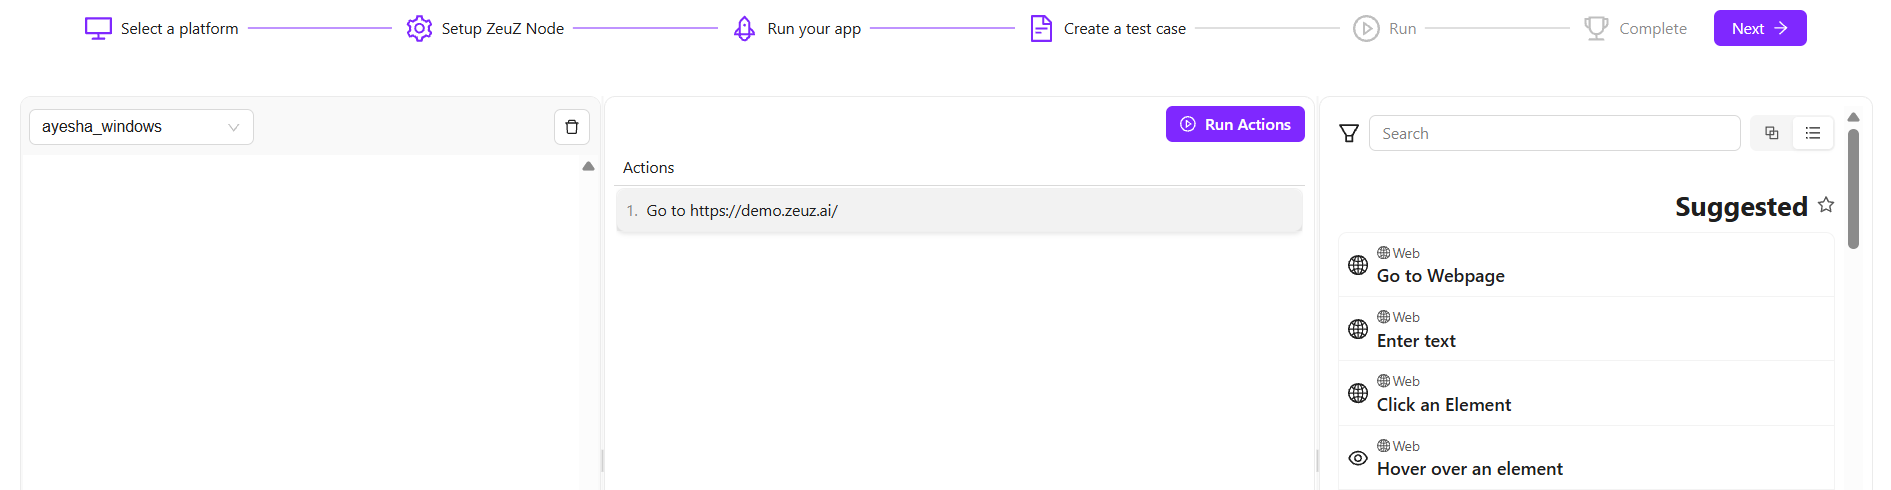
- On the left side, the action definitions can be seen. By clicking on an action definition, different available parameters can be viewed. The values can also be modified as needed.
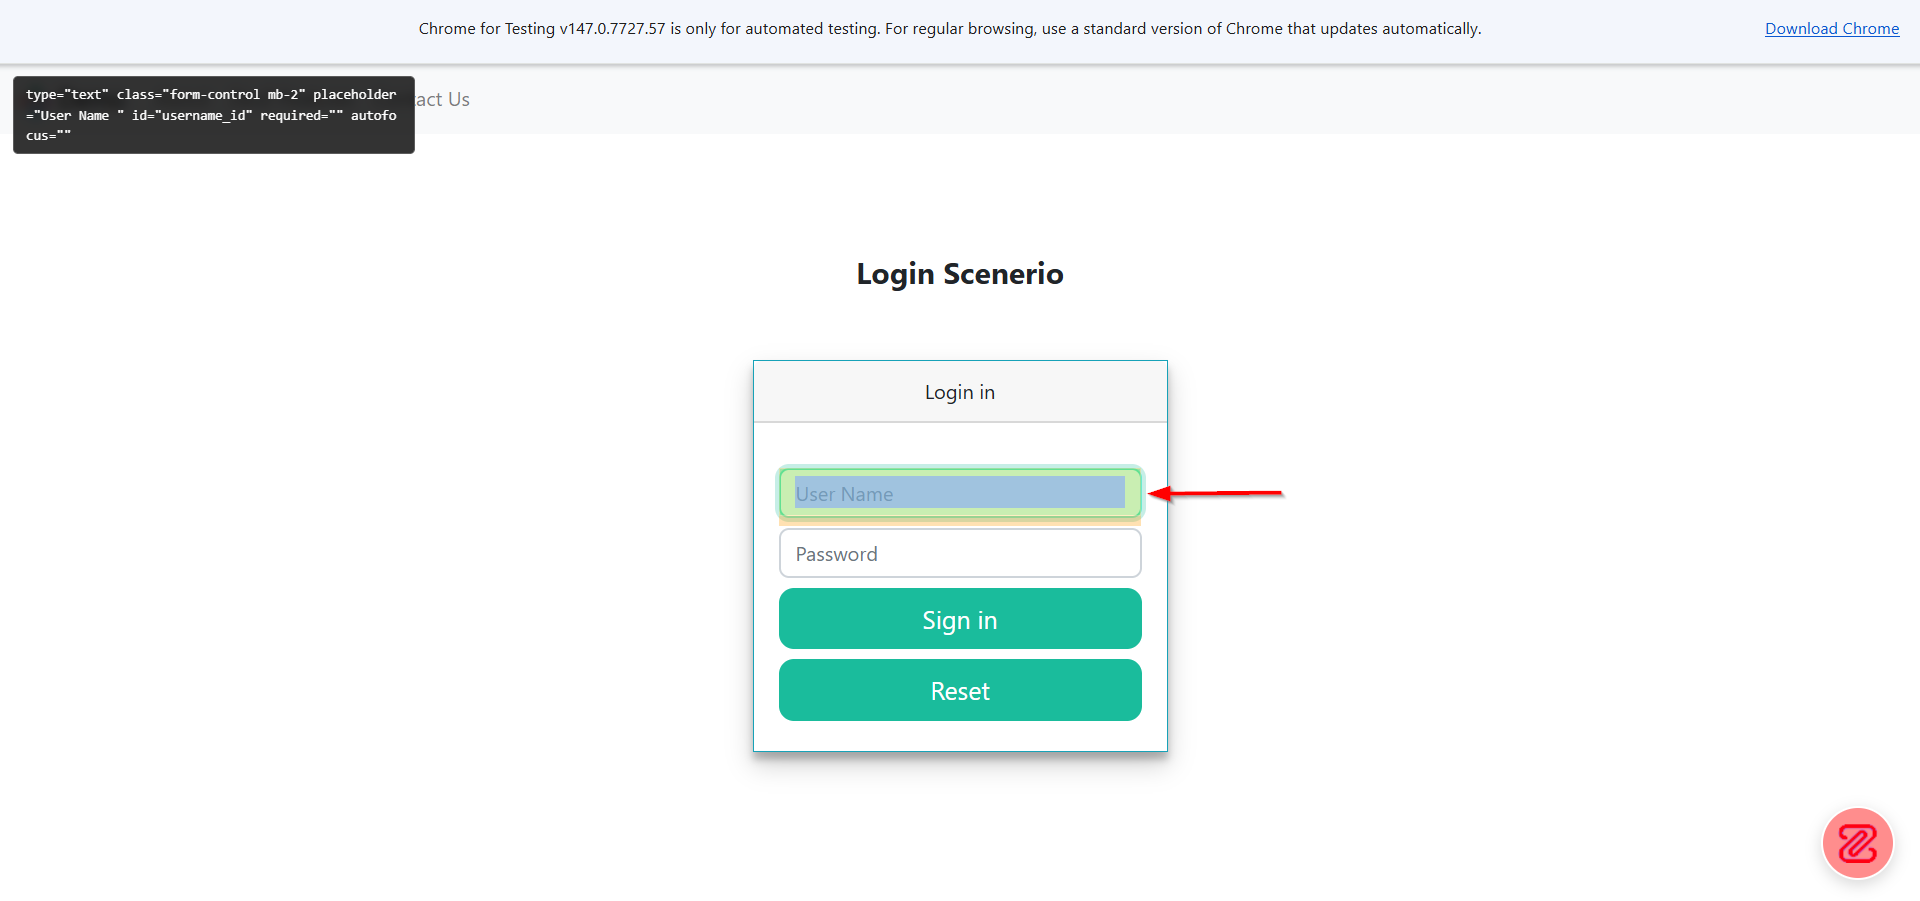
- Now, if we go back to the automated browser and click on the ZeuZ icon to activate it, we can then select the object we want to interact with.
![]()
- For example, the first steps may be to enter the username, enter the password, and then click Sign In.
- First, click on the username field. A message stating Element data was recorded will appear.
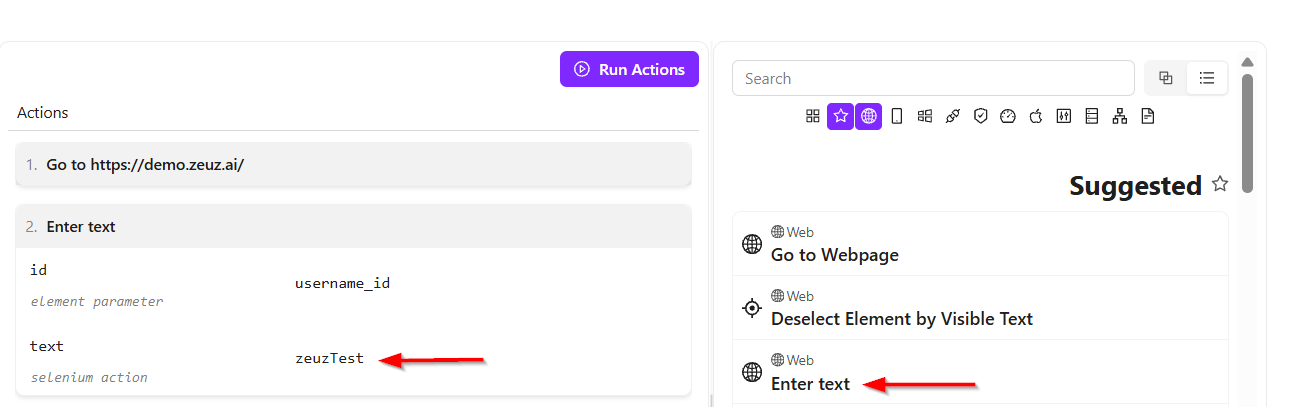
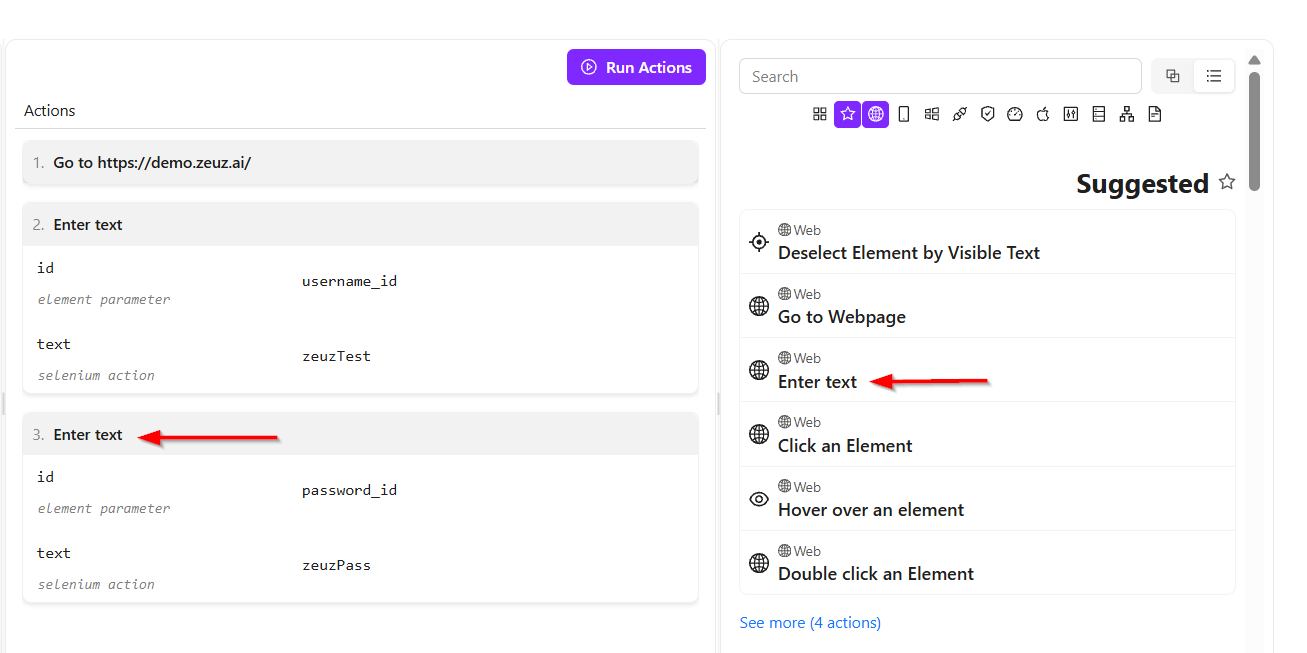
- Then return using Command + Tab. On the right side, select Enter Text from the suggested actions, since text needs to be entered into the username field, and then expand this action.
- Next, enter the desired text value in the input field. In this case, the username will be provided.
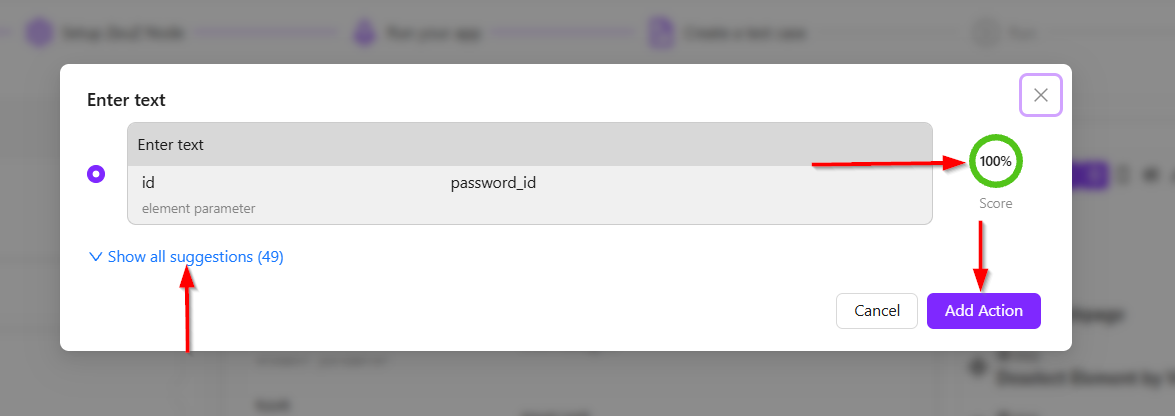
- Now, go back and repeat the same process for the password field. Select the Enter Text action again and click Add Action.
- In the pop-up window, the available suggestions can be seen, along with the Show All Suggestions option. In the background, the ZeuZ AI engine analyzes different possible ways to locate the object on the screen and assigns a confidence score to each method.
- For this example, the system shows a 100% confidence score, which means the selected locator strategy is expected to work reliably. However, other suggestions can also be selected if needed.
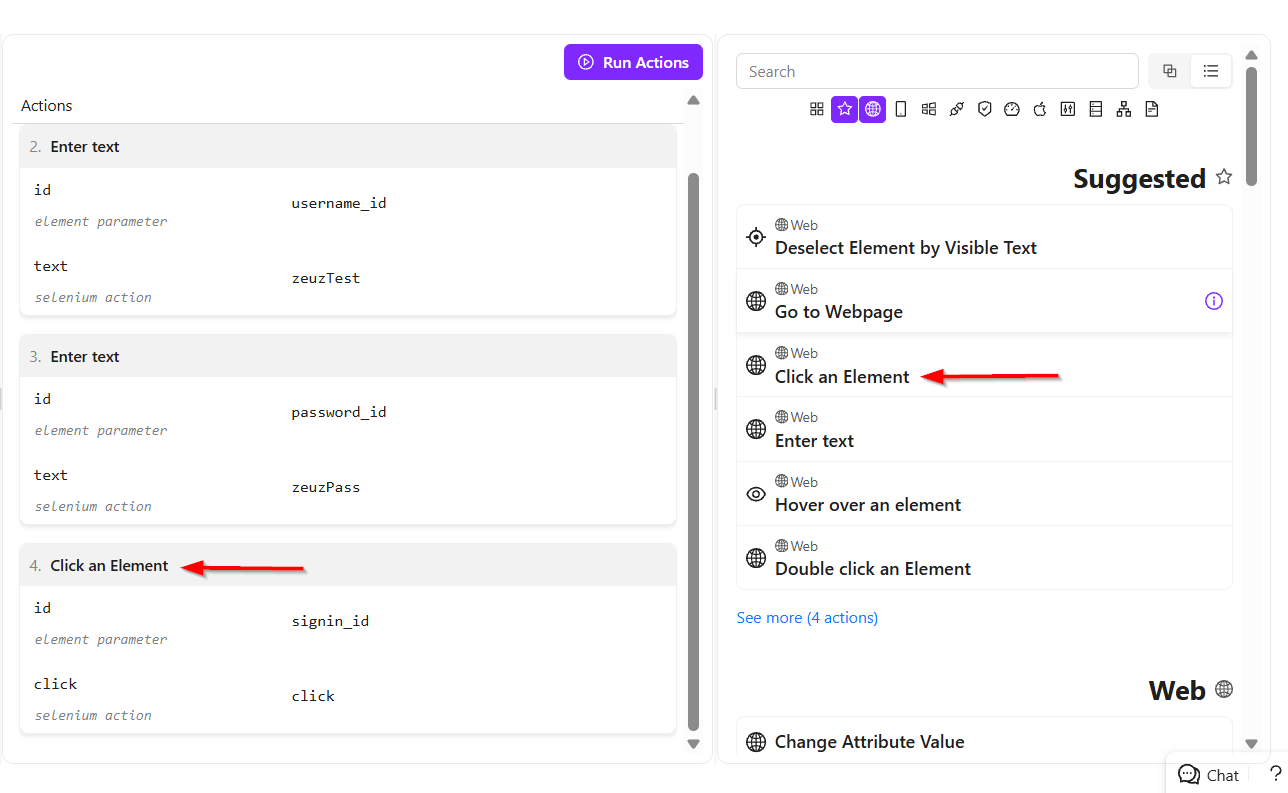
- Click Add Action, expand the action, and enter the password value.
![]()
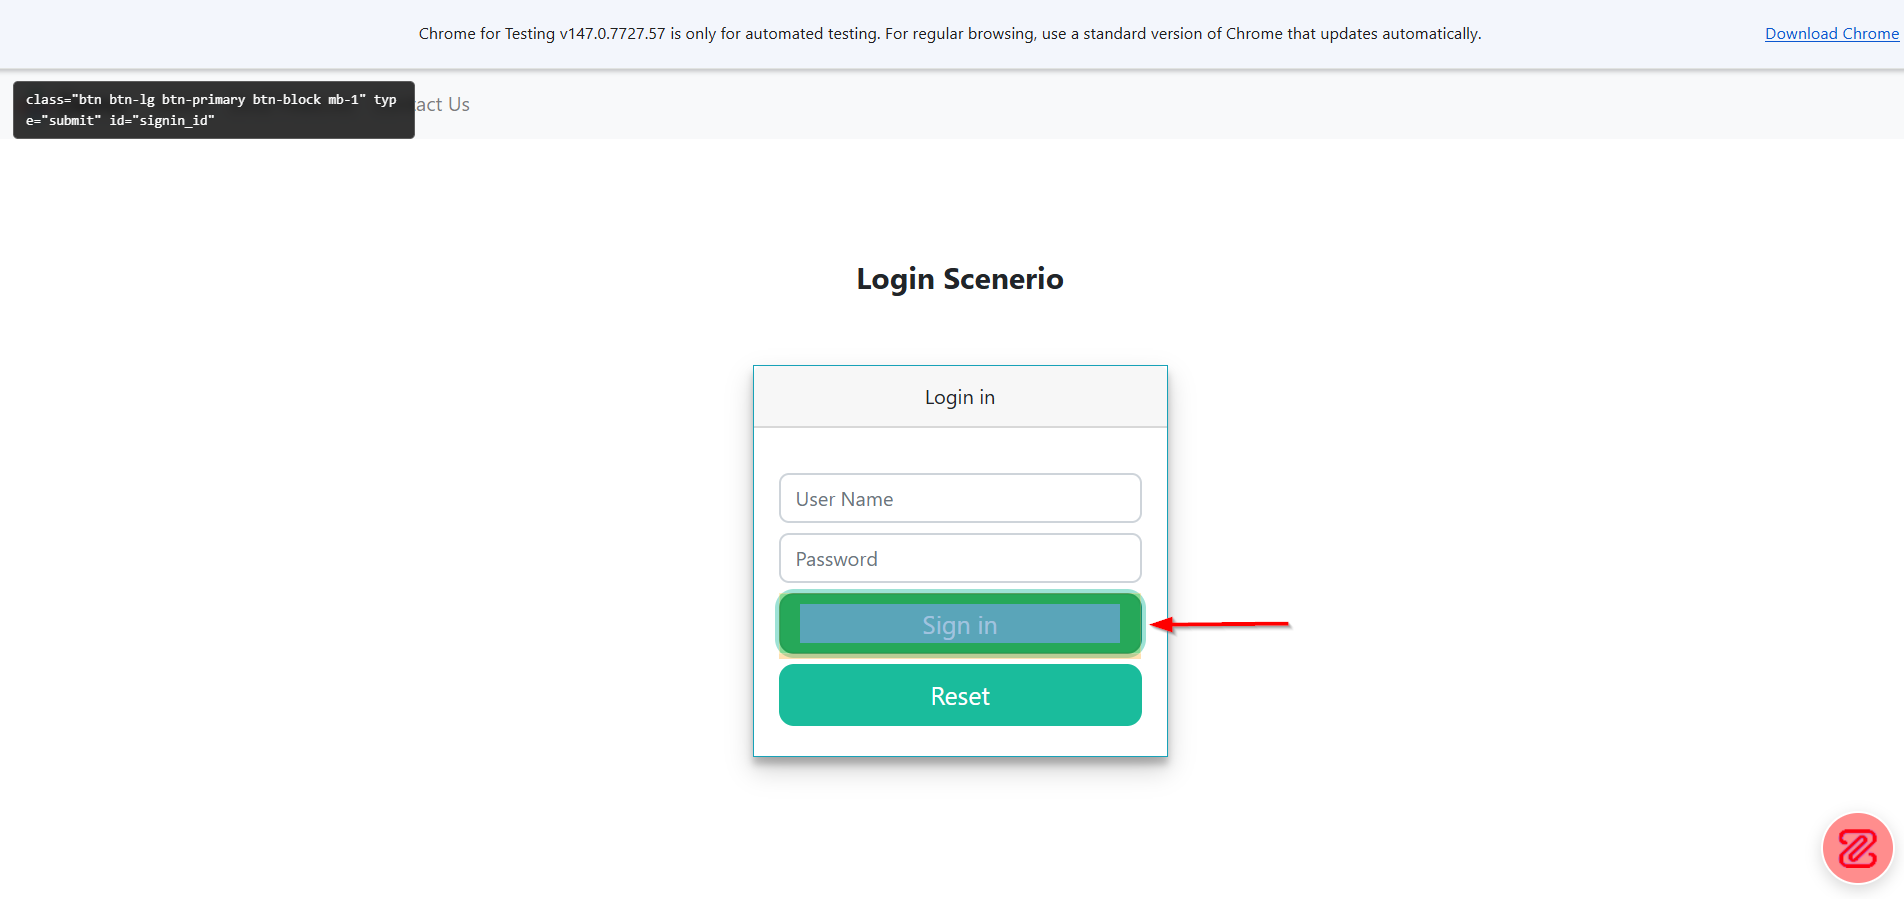
- Next, go back to the browser and click on the Sign In button. Then select the Click on Element action and click Add Action. The action will be added automatically.
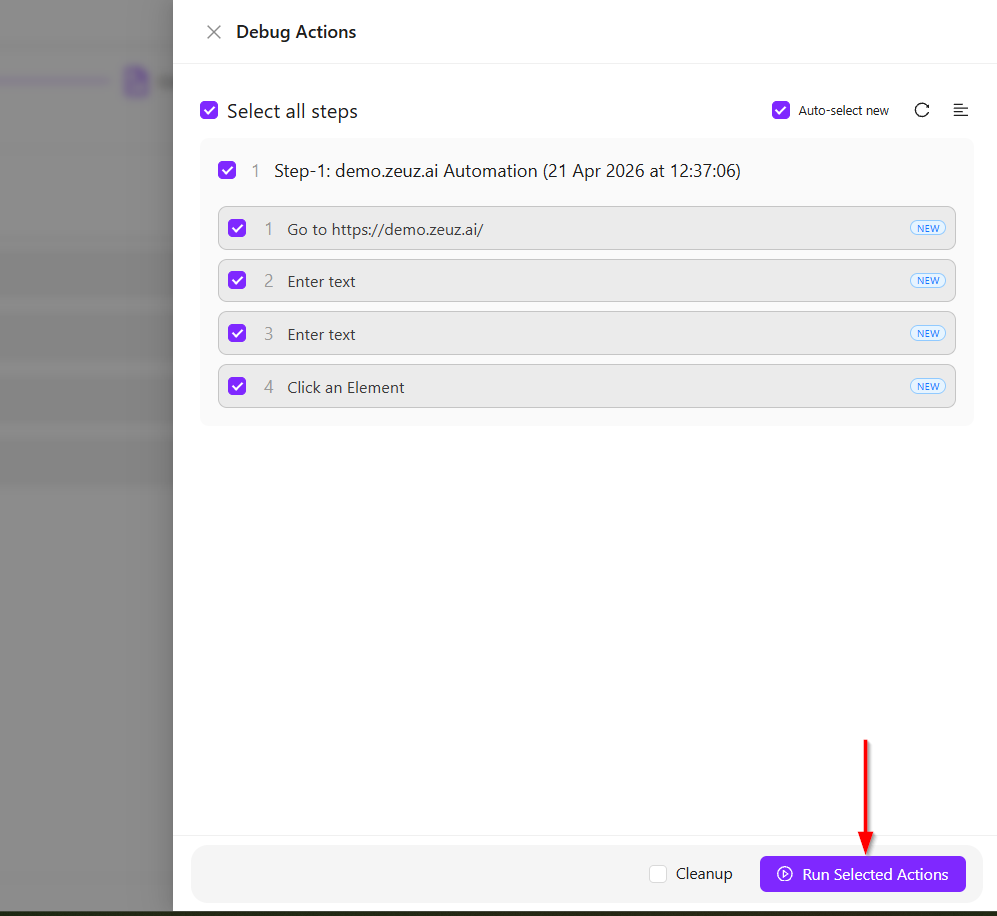
- After that, all actions can be collapsed since the detailed view is no longer required. Then click the Run Actions button.
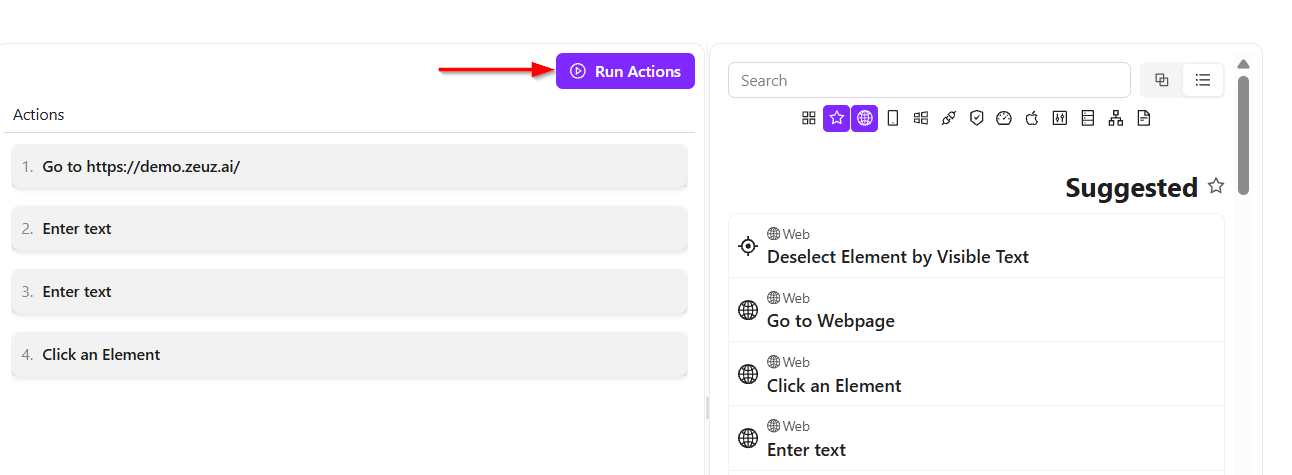
- Before running, ensure that all actions are selected and the required step is also selected.
- A test case is made up of one or more logical steps that can be reused across multiple test cases. For example, if a login step is common for many test cases, it can be created once and reused in different test cases.
- Once all actions are selected, click the Run Selected Actions button and return to the automated browser.
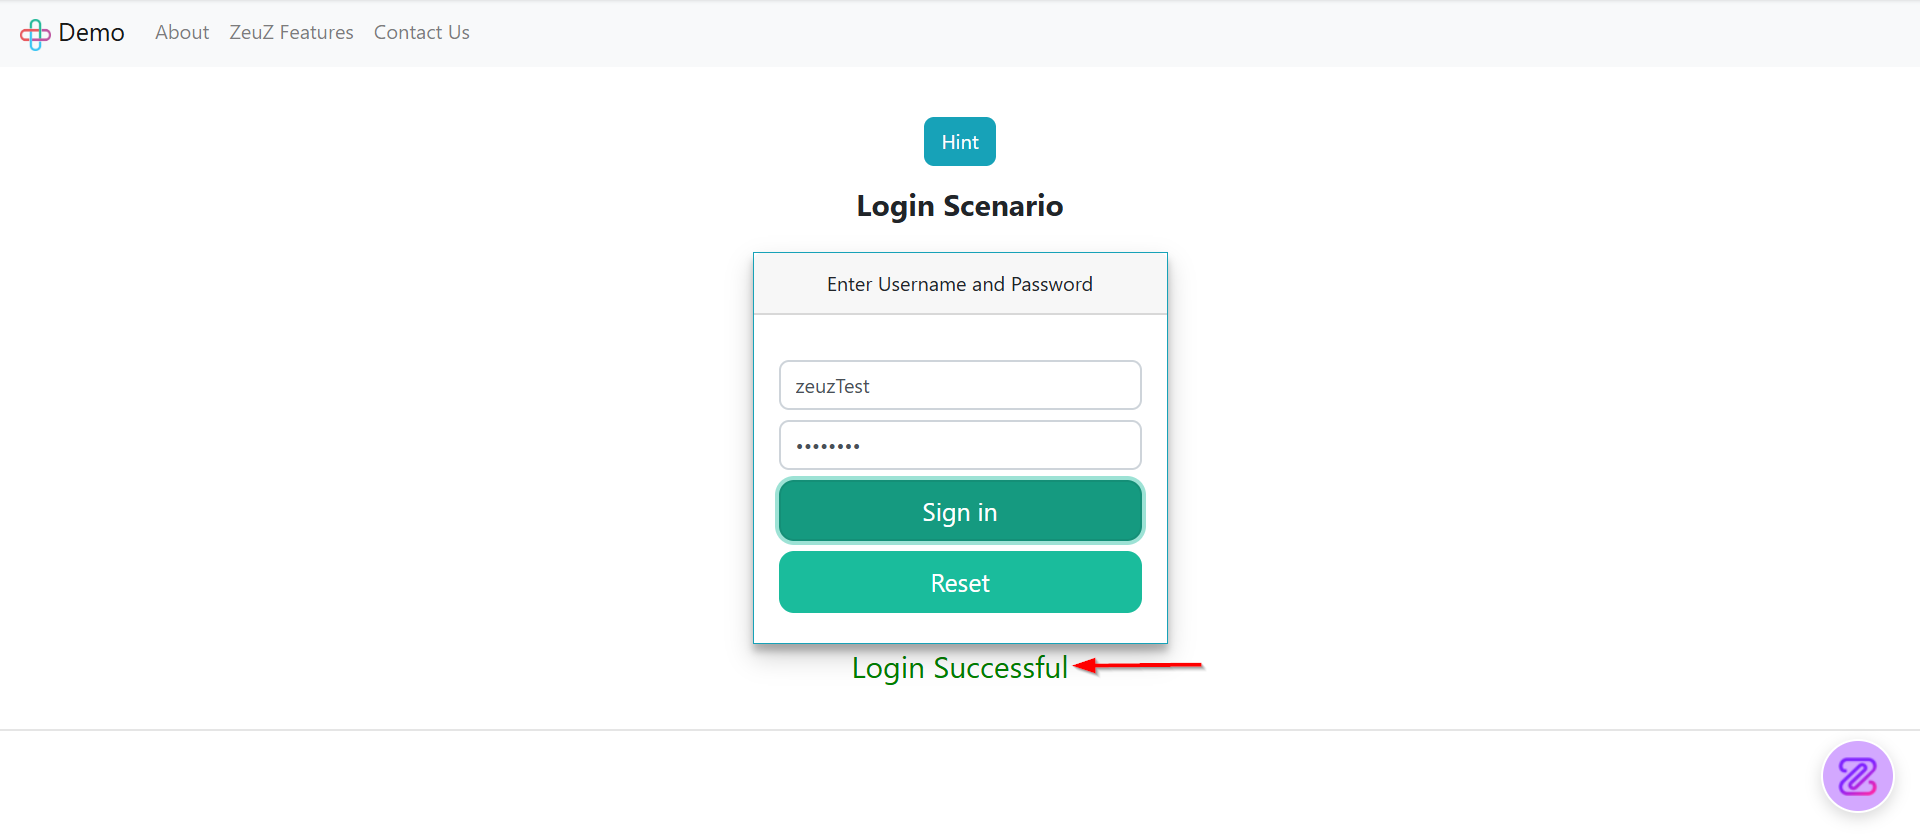
- The browser will reload the webpage, enter the username, enter the password, and click Sign In automatically. As a result, the Login Successful message or button will appear.
Validation
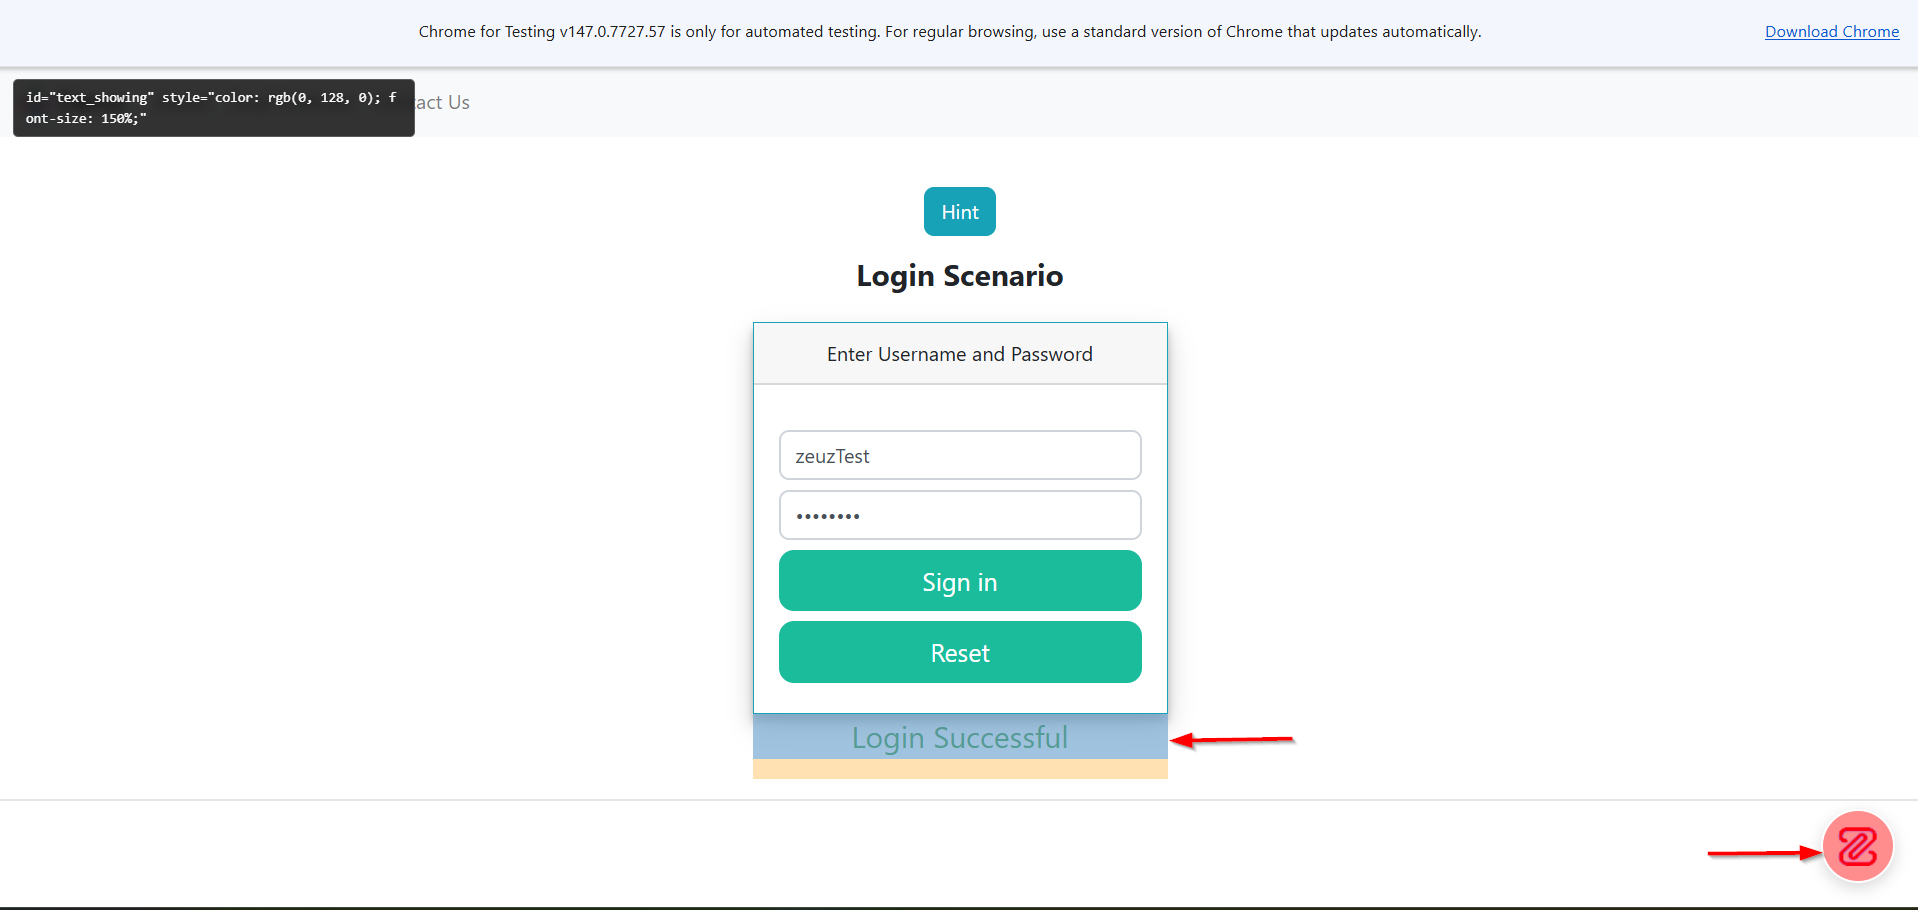
- To validate a particular text, first copy the required text, then return to the server and close the slider panel.
- Next, reactivate the ZeuZ icon. In this case, the goal is to validate the message Login Successful. With the icon activated, click on the text message.
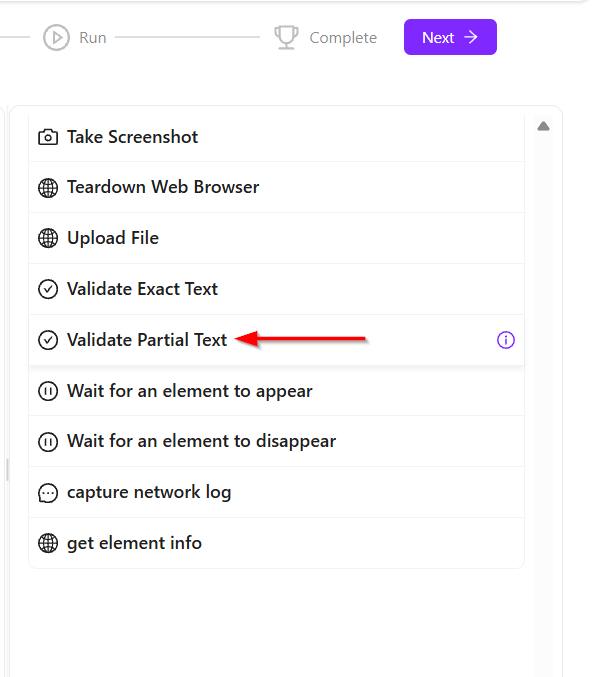
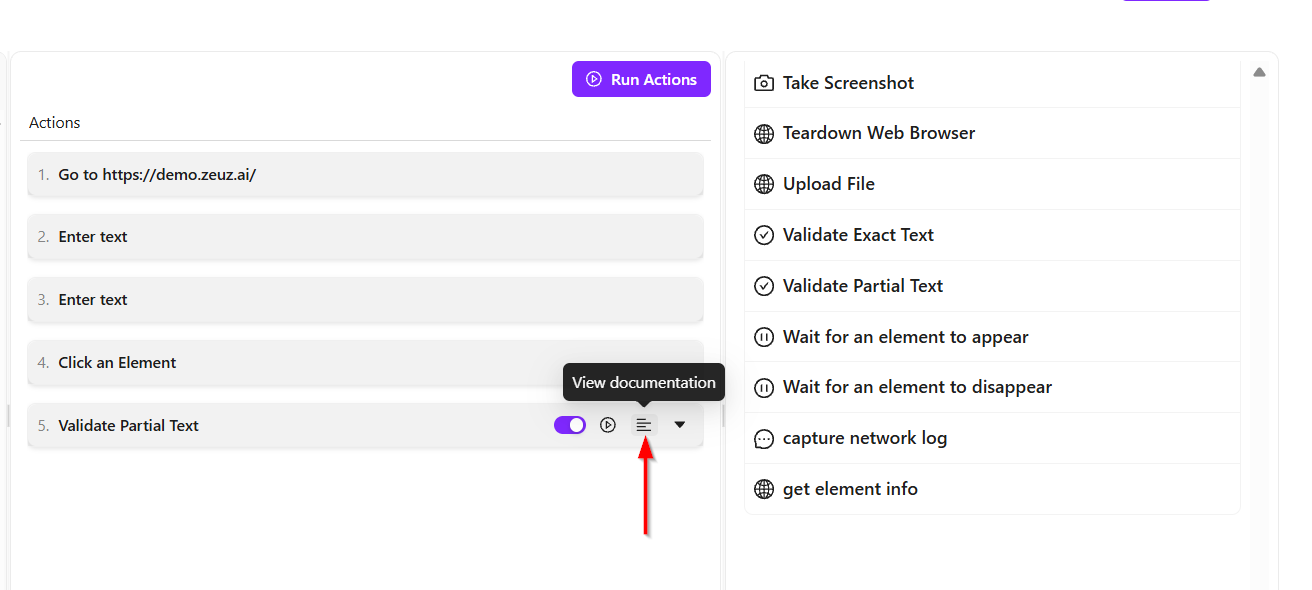
- Then return to the ZeuZ platform. From the suggested list of actions, expand the available options. The Validate Partial Text action can be seen. If it is not immediately visible, it can be searched manually under the Web category.
- Click to add the Validate Partial Text action.
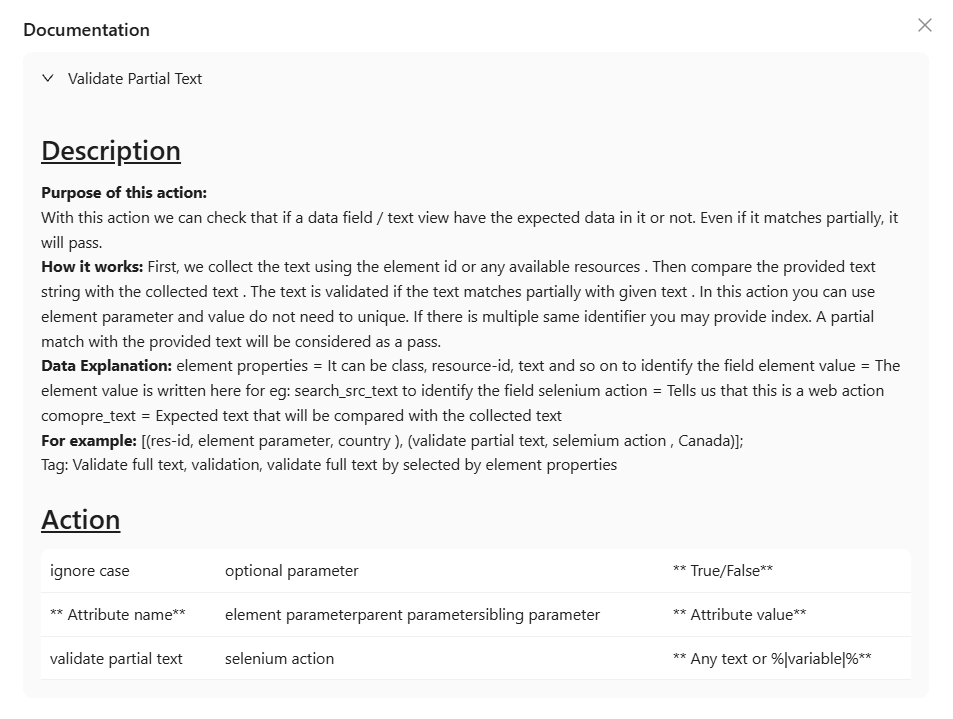
- An additional useful feature is that every action includes built-in help documentation. By clicking the Info icon, details can be viewed such as how the action works, its purpose, and the different configurations that can be adjusted.
- Once the Validate Partial Text action is added, a field labeled Any Text or Variable will appear. ZeuZ supports variables, which can be simple values such as strings, text, or numbers, as well as complex nested structures such as JSON objects.
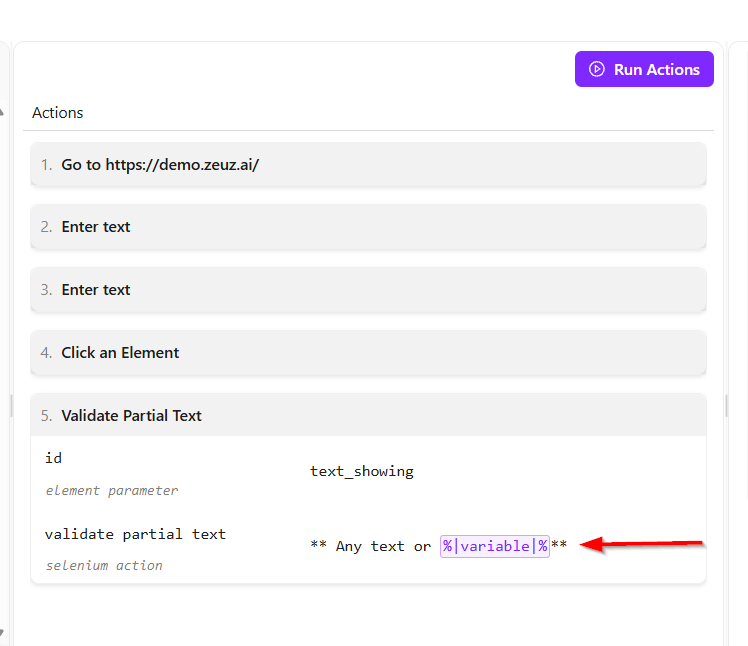
- In this example, only the word Successful needs to be validated. This means that if the developer changes the message in the future to something like Successfully Logged In, the test case can still pass because partial matching is being used.
- After adding the action, click Run Actions. The previous actions should be deselected so that only the new validation action remains selected.
- Then click Run Selected Actions. No visible change may occur on the screen, which is expected behavior.
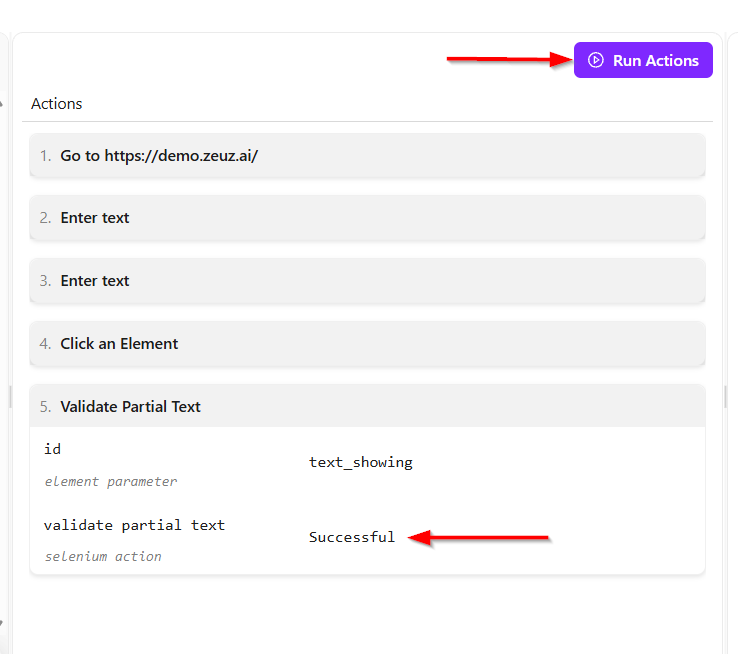

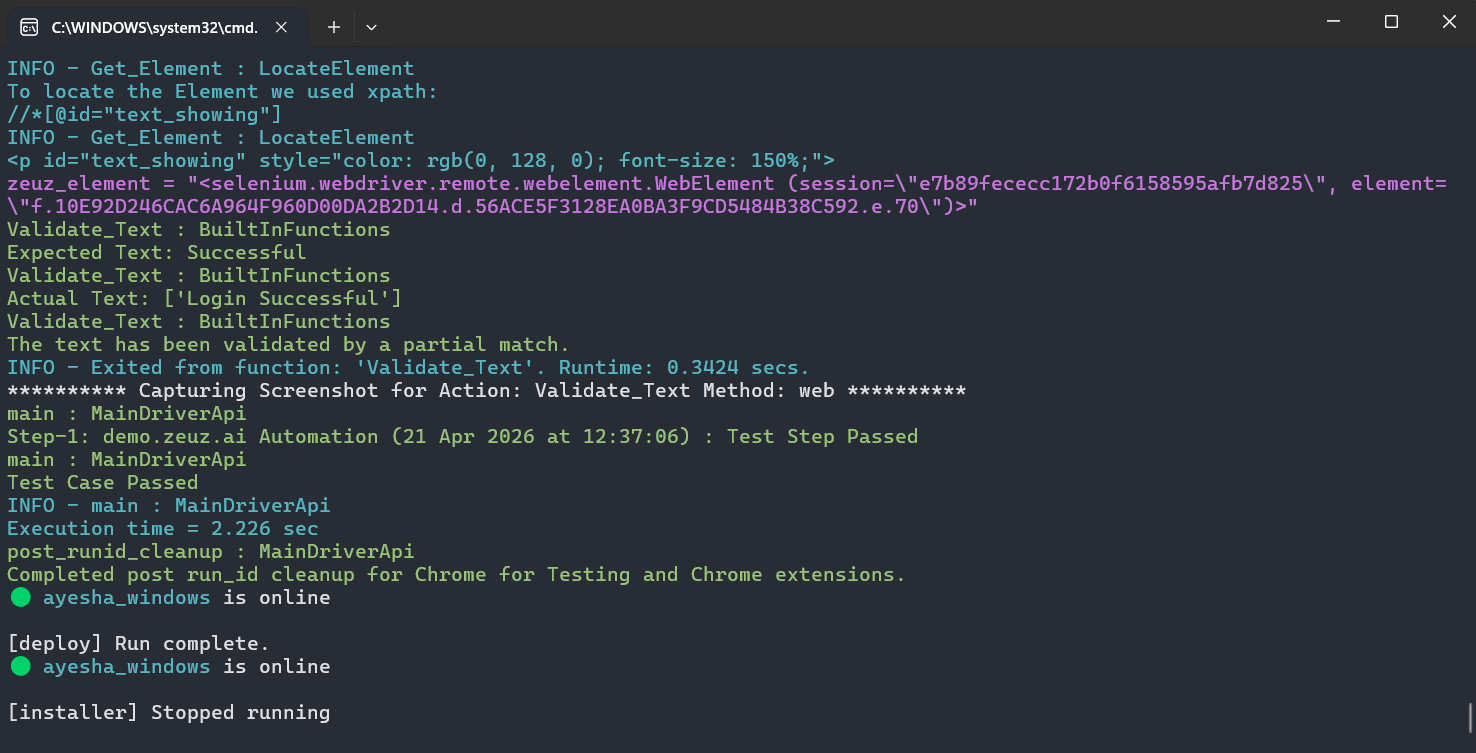
- However, if the terminal is opened, the logs from the ZeuZ Node can be seen. The log will show that the expected text was Successful and the actual text was Login Successful. Since partial text validation was used, the validation passed successfully.
Web with Chatbot
- Features such as Select a platform, Setup ZeuZ Node, and Run your app are explained above under the Web Without Chatbot section.
- After entering the website URL to test and clicking the Continue button, it will redirect to the platform called Create a test case.
- After entering the website URL to test and clicking the Continue button, a message saying Test case created successfully! will appear, indicating that the automated test case is ready to run. Then, click the Build Actions button, which will redirect to the test case creation platform.
- The URL entered in the Enter Website URL to Test field will be opened and redirected automatically.
- After that, the test case creation platform will open, and the first action that was entered will be displayed there.

- Now, on the left side, there is a chatbot panel where instructions can be provided, and it will perform actions by following those instructions.
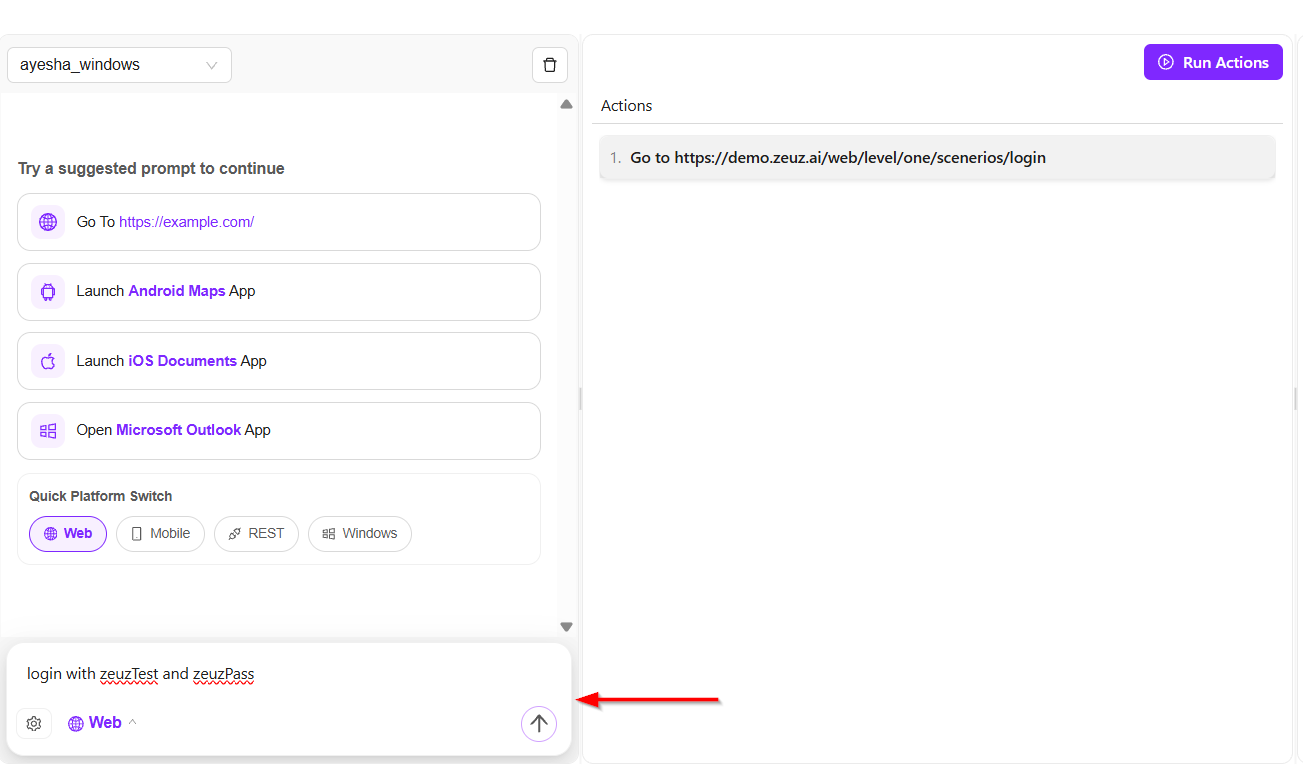
- Then, the required actions will be added according to the provided instructions, and after that, the Run Actions button needs to be clicked.

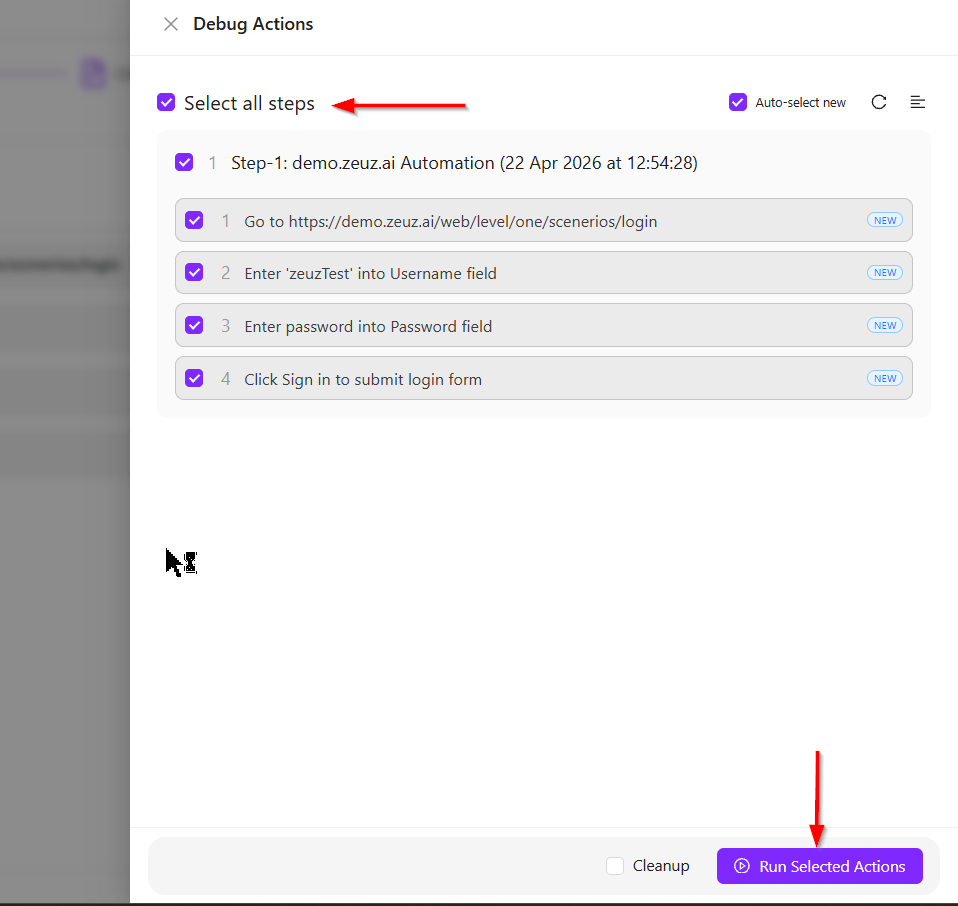
- Select all the required steps, and then click the Run Selected Actions button.
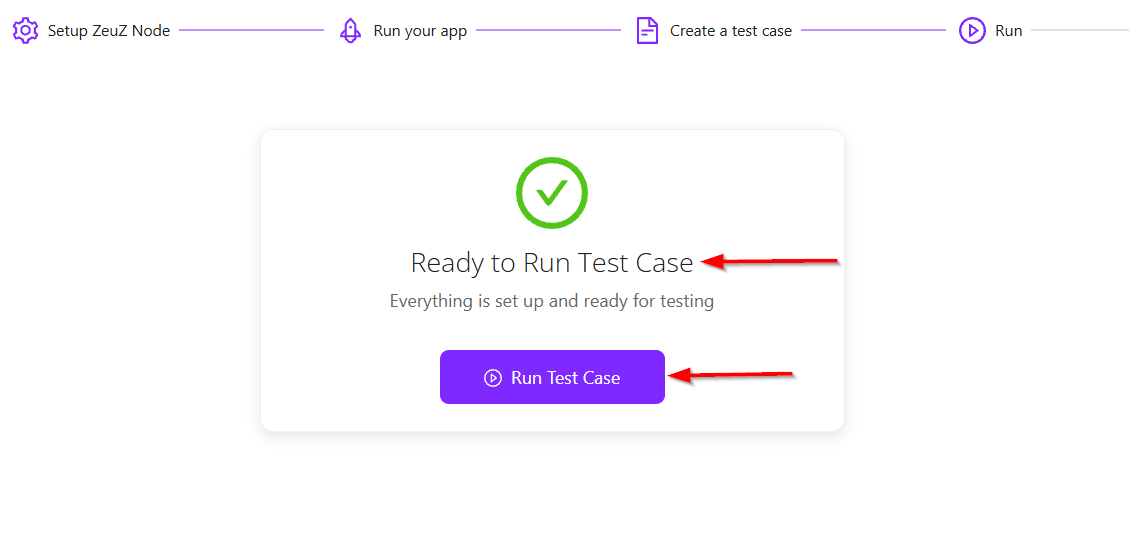
- Then click the Next button available at the top right, and it will redirect to the Run platform. A message saying Ready to Run Test Case will appear, and then click the Run Test Case button.
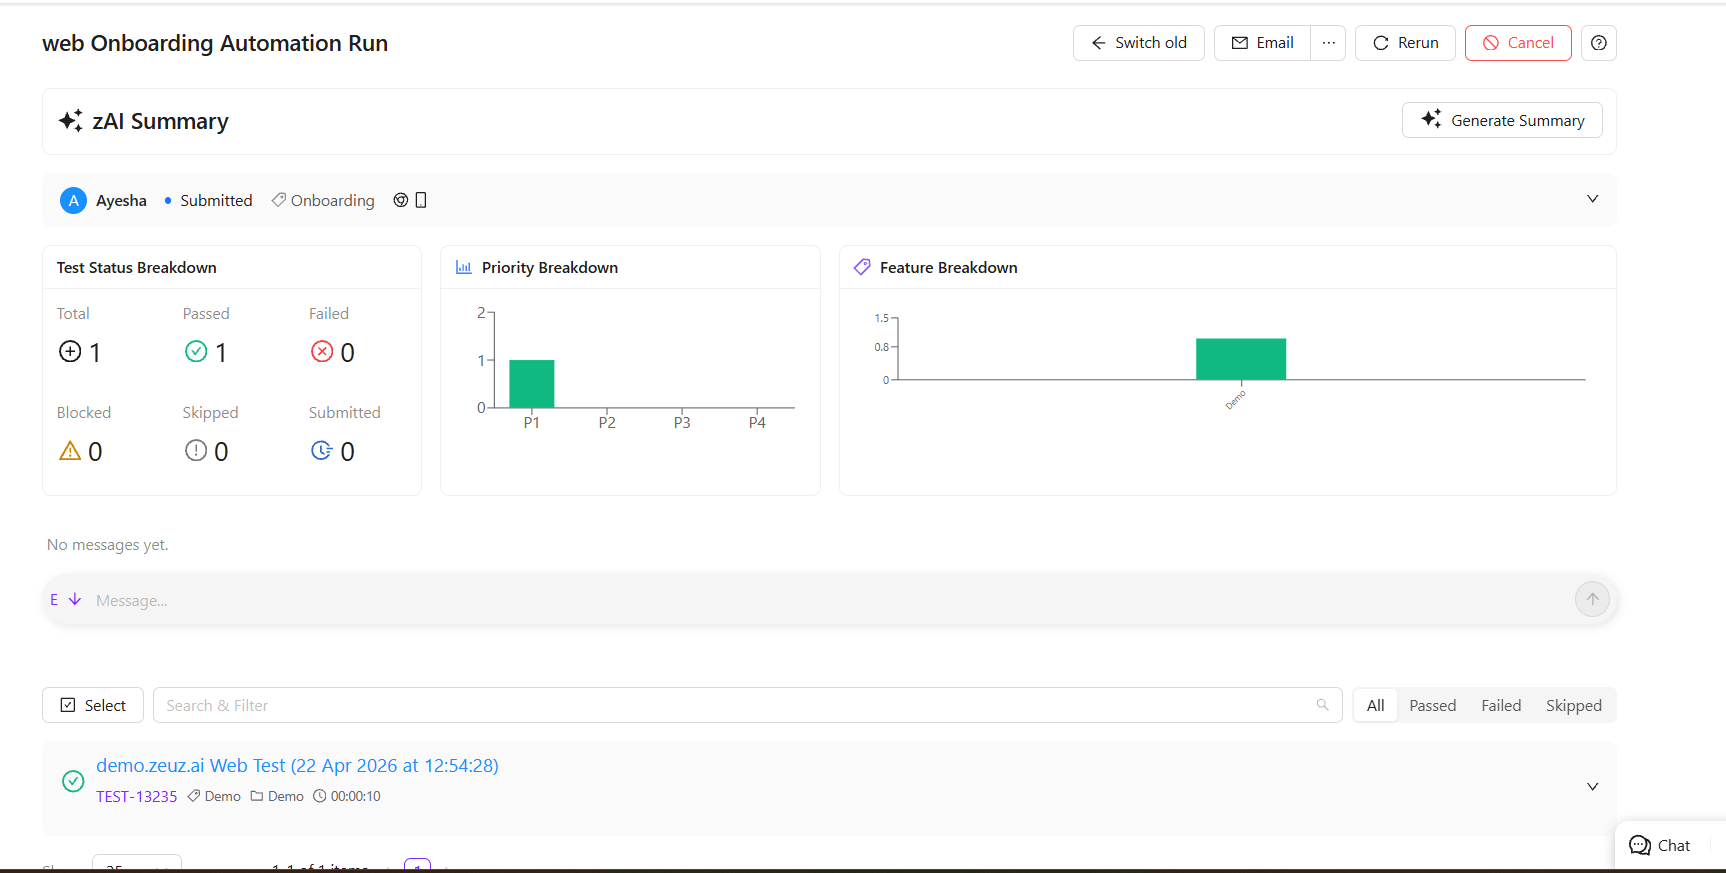
- After the test case runs successfully, the Run ID details page for that test case will appear, showing the overall summary of the test case.
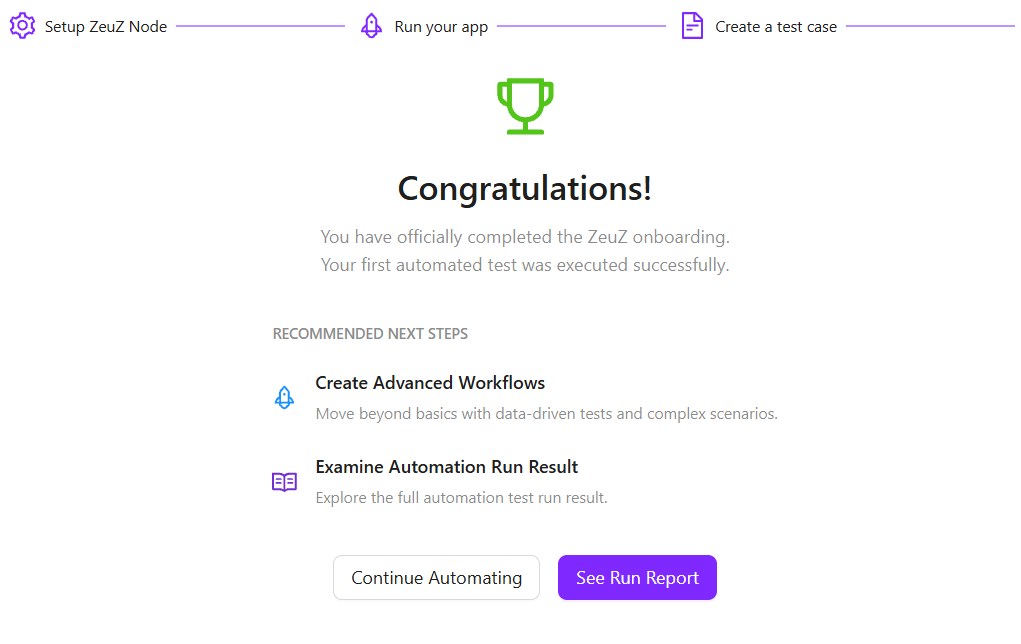
- Then, it will redirect to the complete platform and display a “Congratulations” message. It will also recommend next steps, such as Create Advanced Workflows and Examine Automation Run Results. Below these options, two buttons will be available: Continue Automating and See Run Report.
FAQs / Troubleshooting
Why is the onboarding test case not starting?
The onboarding test case may not start if required steps are not properly selected or mandatory configurations are missing. It is important to verify that all required inputs are provided before initiating execution.
Why is the "Continue to Next Step" button not visible?
This may happen if the test case has not completed successfully. Ensure the execution status shows “Test Case Completed Successfully!” before expecting the button.
What does “Test Case Completed Successfully” mean?
It indicates that all onboarding steps have executed without errors and the workflow has finished as expected.
Why are recommended next steps not showing?
Recommended steps may not appear if the system has not fully processed the run result. Refreshing the page or waiting a few seconds usually resolves this.
Changelog
- Guided, platform-aware setup (Web, Android, iOS) with auto node setup, auto test case creation, and first-run execution. [202603]