User Management
Users are individual members who have personal accounts within the platform. Each user can log in, perform tasks, and access features based on the permissions granted to them. Their level of access is determined either by the Groups they belong to.
User Management refers to the process of creating, organizing, and controlling user accounts within a system. It involves tasks such as adding new users, assigning groups, activating or deactivating accounts, and managing permissions to ensure secure and efficient access.
Why it matters / Use Cases:
- Individual Accountability: Ensures secure and controlled access for each user.
- Activity Tracking and Accountability: Provides accurate activity tracking and clear accountability.
- Personalized Task Assignment: Supports individualized task assignments tailored to each user.
- Project Collaboration: Enables efficient collaboration within projects.
- Inherited Permissions for Consistent Access: Automatically inherits permissions from Groups and Roles to maintain consistent access.
Prerequisites
- Access to ZeuZ Server with permissions for Admin → Users → List.
- Users must be created and active before assigning tasks or roles.
- Each user should have at least one role that defines their access permissions.
- Users may belong to one or more groups for streamlined permission management.
- Each user must have a unique identifier for login and notifications.
- Ensure the administrator has configured access rights according to organizational policies.
Quick-Start
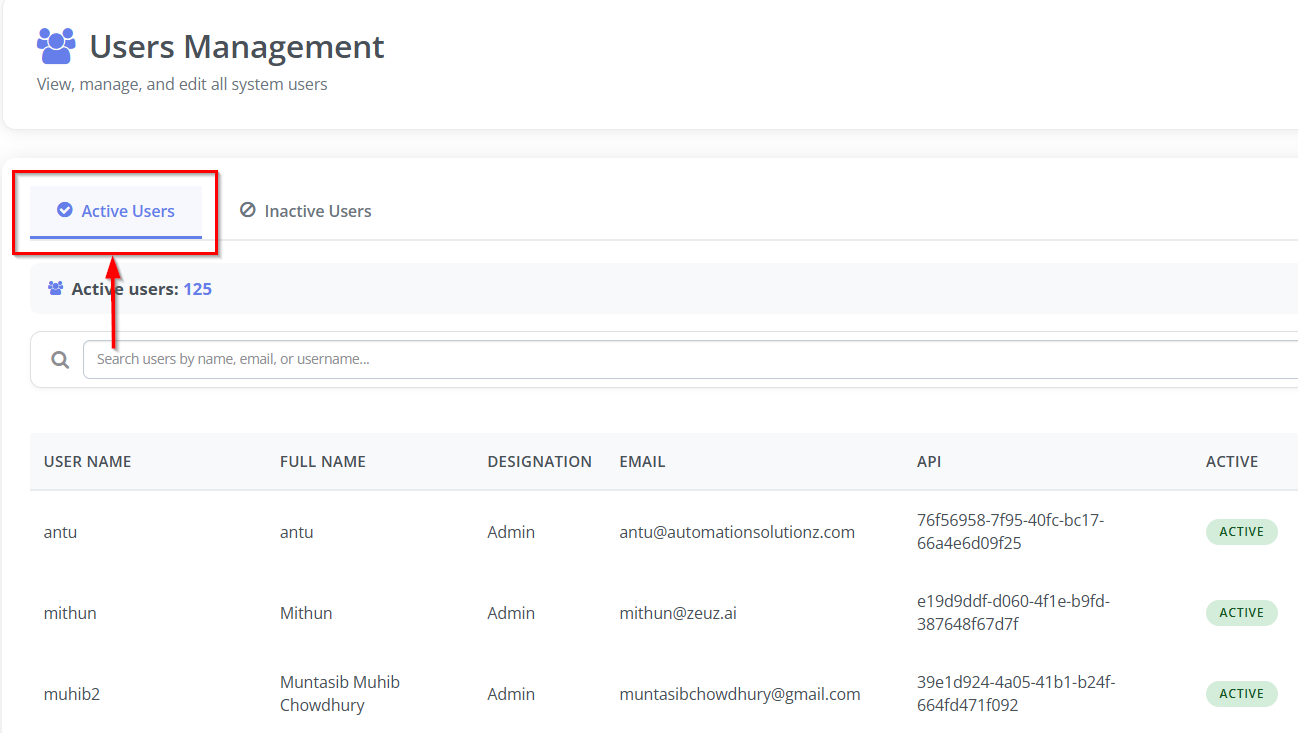
- Active Users: Allows administrators or managers to view the currently active users.
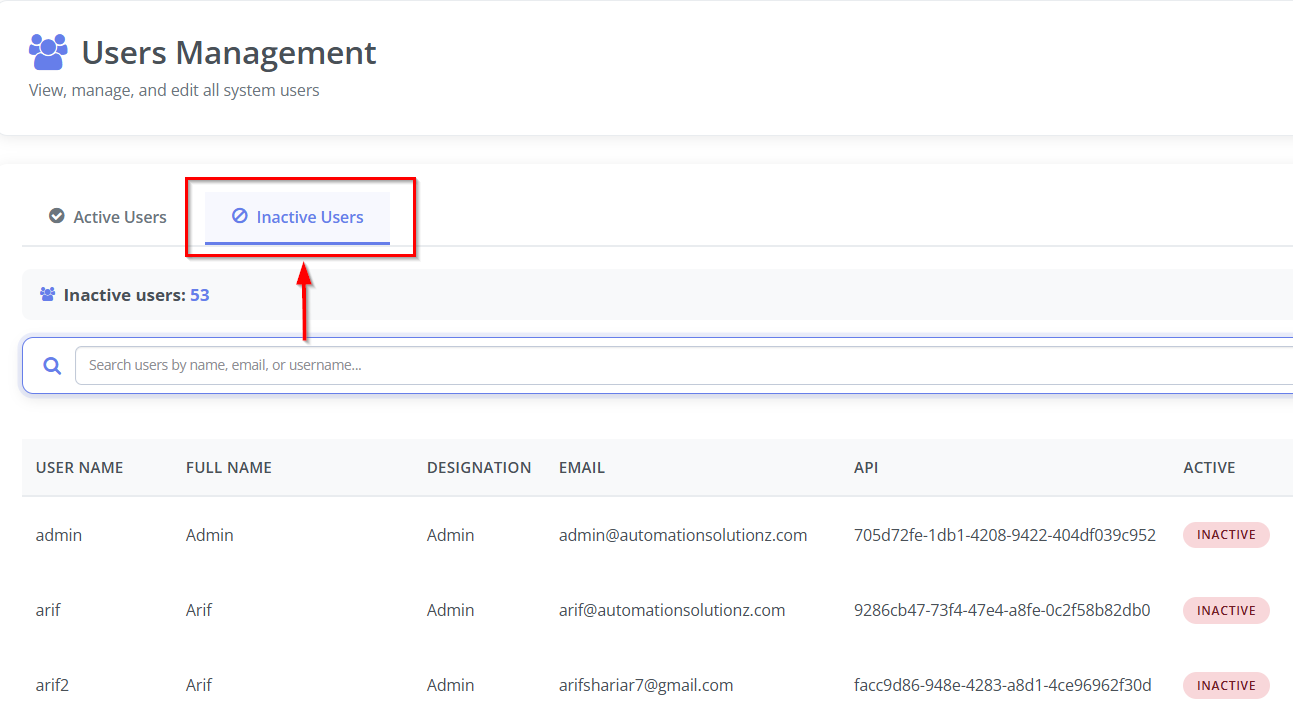
- Inactive Users: Inactive users tab to manage users who are currently inactive.
- Search Users: Quickly locate users by name, email, or username using the search bar.
- Create New User: Use the “+ CREATE NEW USER” button to add a new system user.
Features
Create new user
-
Click the + CREATE NEW USER button.
-
Navigate to the Create/Edit User page.
-
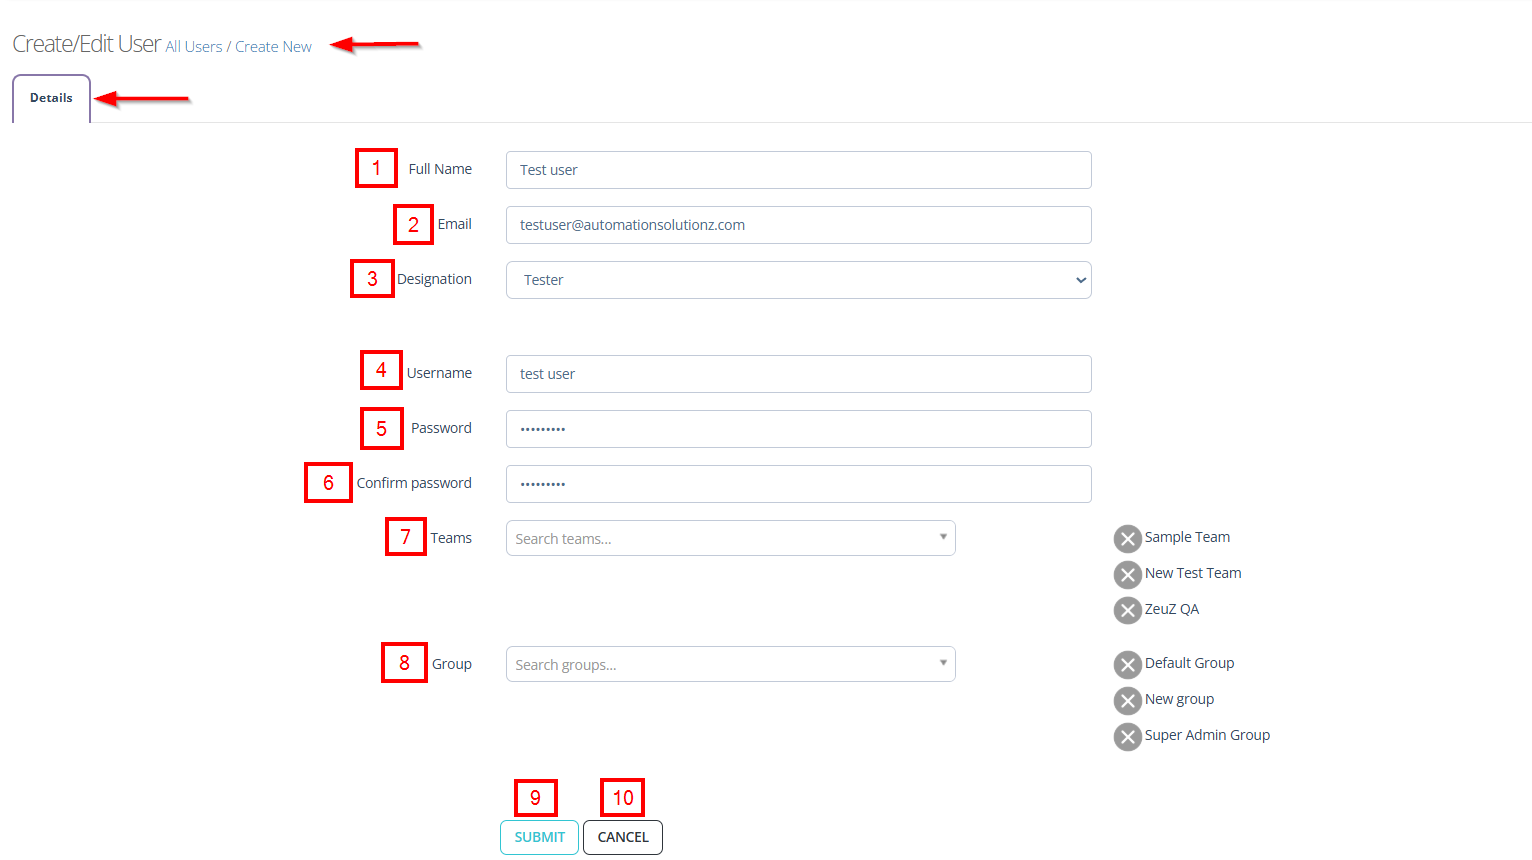
Fill in the following information on the Details tab:
- Full Name: Input field to enter the user's complete name (e.g., Test user).
- Email: Field to provide the user's email address (e.g., testuser@automationsolutionz.com).
- Designation: Dropdown to select the user's role or designation within the organization (e.g., Tester, Developer, Admin, Manager).
- Username: Field to set a unique username for login purposes (e.g., test user).
- Password: Field to create a password for the user account.
- Confirm Password: Field to re-enter the password to ensure correctness.
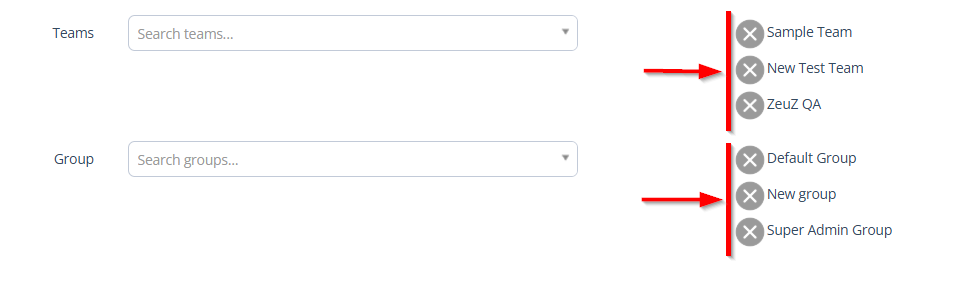
- Teams: Searchable dropdown to assign the user to one or multiple teams (e.g., Sample Team, New Test Team, ZeuZ QA).
noteTo remove a required team, click the Cross (X) sign next to that team.
- Group: Searchable dropdown to assign the user to a specific group for permissions and access control. Users can also be assigned to multiple groups (e.g., Default Group, New group, Super Admin Group).
noteTo remove a required group, click the Cross (X) sign next to that group.
- Submit Button: Saves the new or edited user details.
- Cancel Button: Discard changes and exit the form.
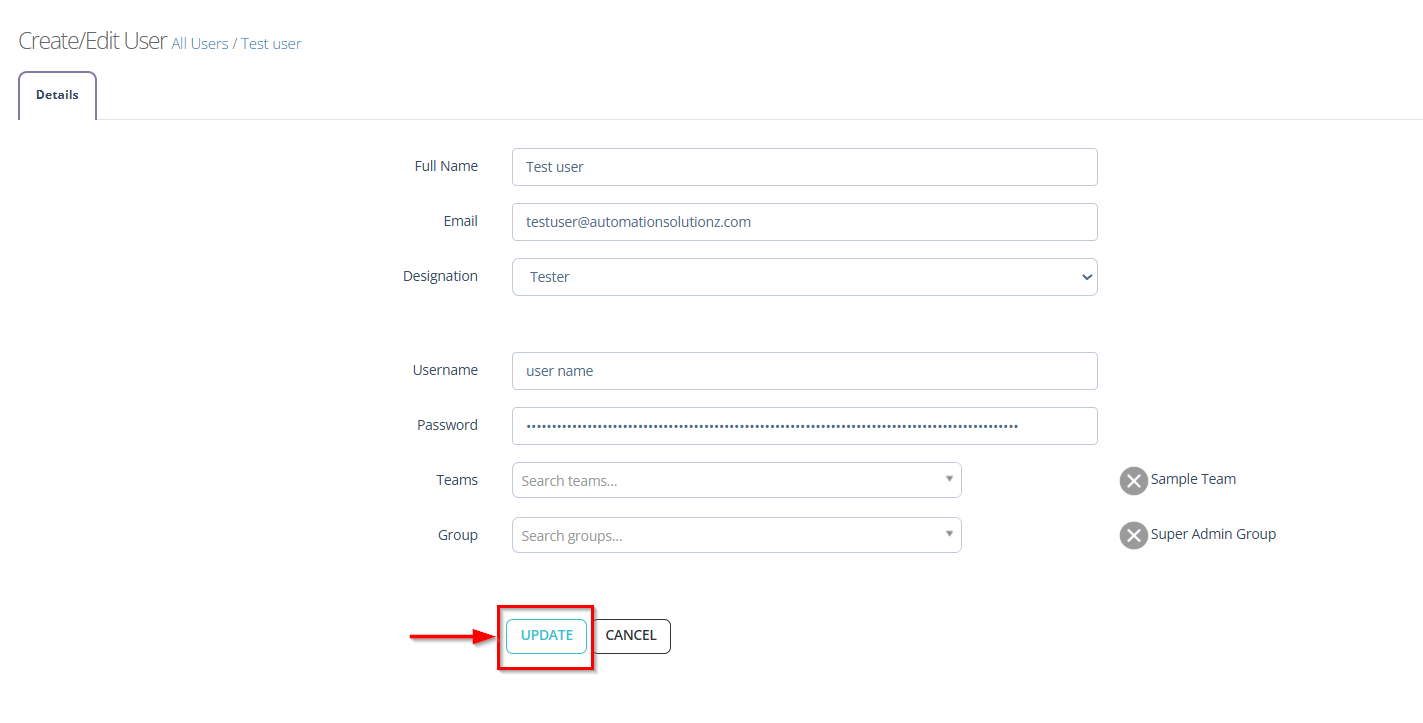
Update the user information
- It refers to the process of modifying or correcting any details associated with an existing user profile.
- To update any user information, click the Update button available at the bottom of the "Create/Edit User" page.
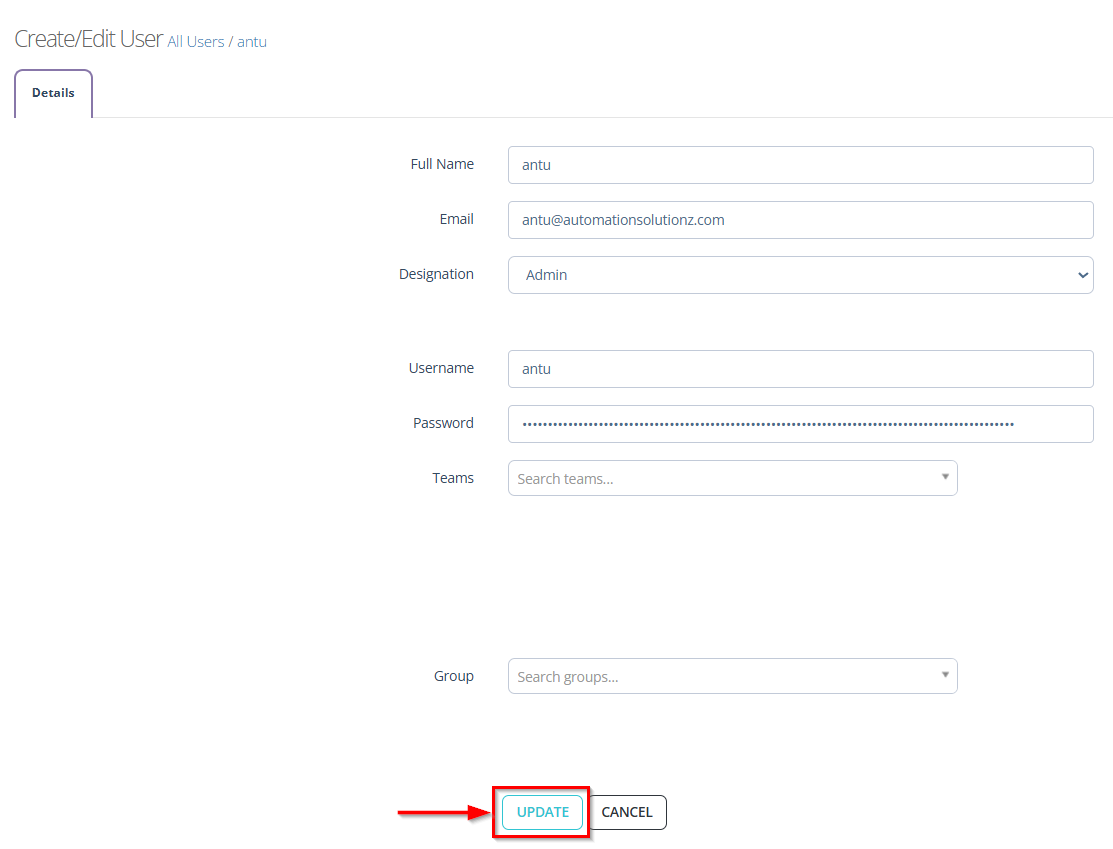
Modify the user
- It refers to the process of editing or updating the information associated with an existing user account.
- To modify any user details, click the Modify button and edit the information as required.
- After modifying the required details, click the Update button.

Generate new API key
- It refers to a function that creates a fresh, unique authentication token for a user or system. An API key acts as a secure identifier that allows external applications to communicate with a platform without exposing sensitive credentials.
- After clicking the Generate button, a new API key will be created for that specific user and displayed in the "API" section.

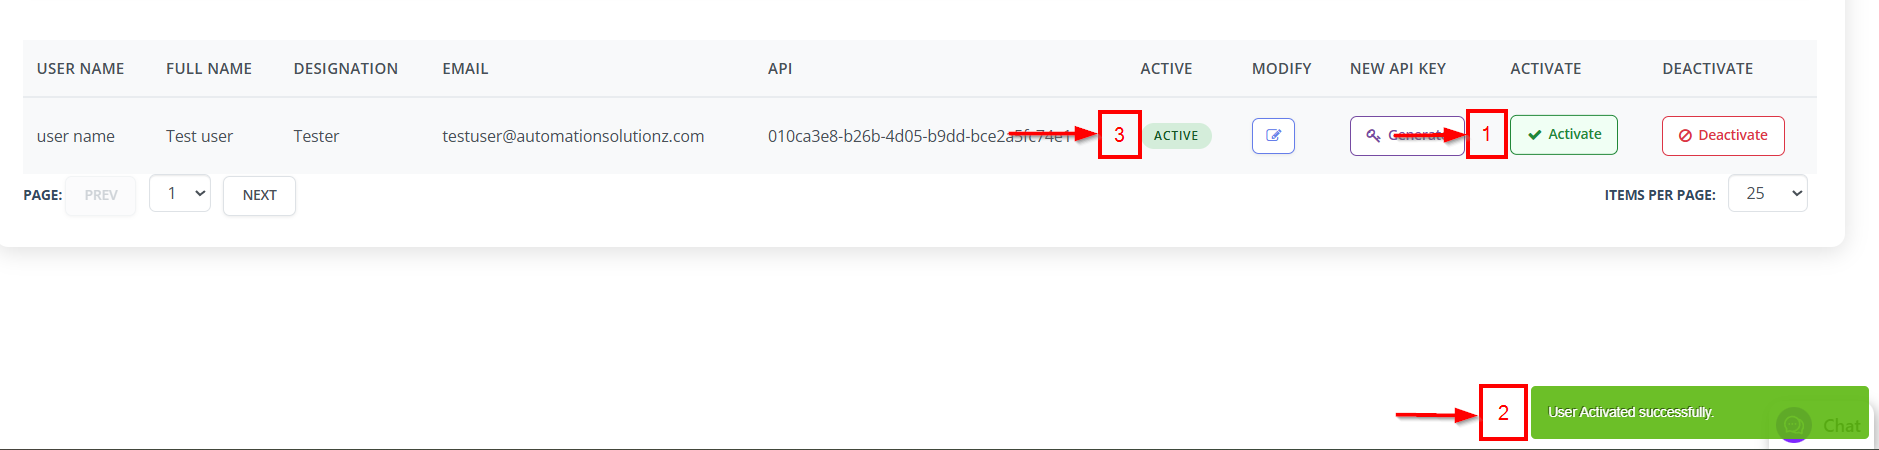
Activate the user
- It enables a user account within a system, allowing the individual to access the platform and perform permitted actions.
- After clicking the Activate button, a notification message will appear stating, "User Activated successfully."
- An ACTIVE label indicates that the user is currently enabled, and the active status will be displayed in the "ACTIVE" section.
- To view activated users, click the Active Users button.
Deactivate the user
- It is the process of disabling a user account, temporarily or permanently, so that the individual can no longer access the system or perform any actions.
- After clicking the Deactivate button, a notification message will appear stating, "User Deactivated successfully."
- An INACTIVE label indicates that the user is currently disabled, and the inactive status will be displayed in the "ACTIVE" section.
- To view deactivated users, click the Inactive Users button.


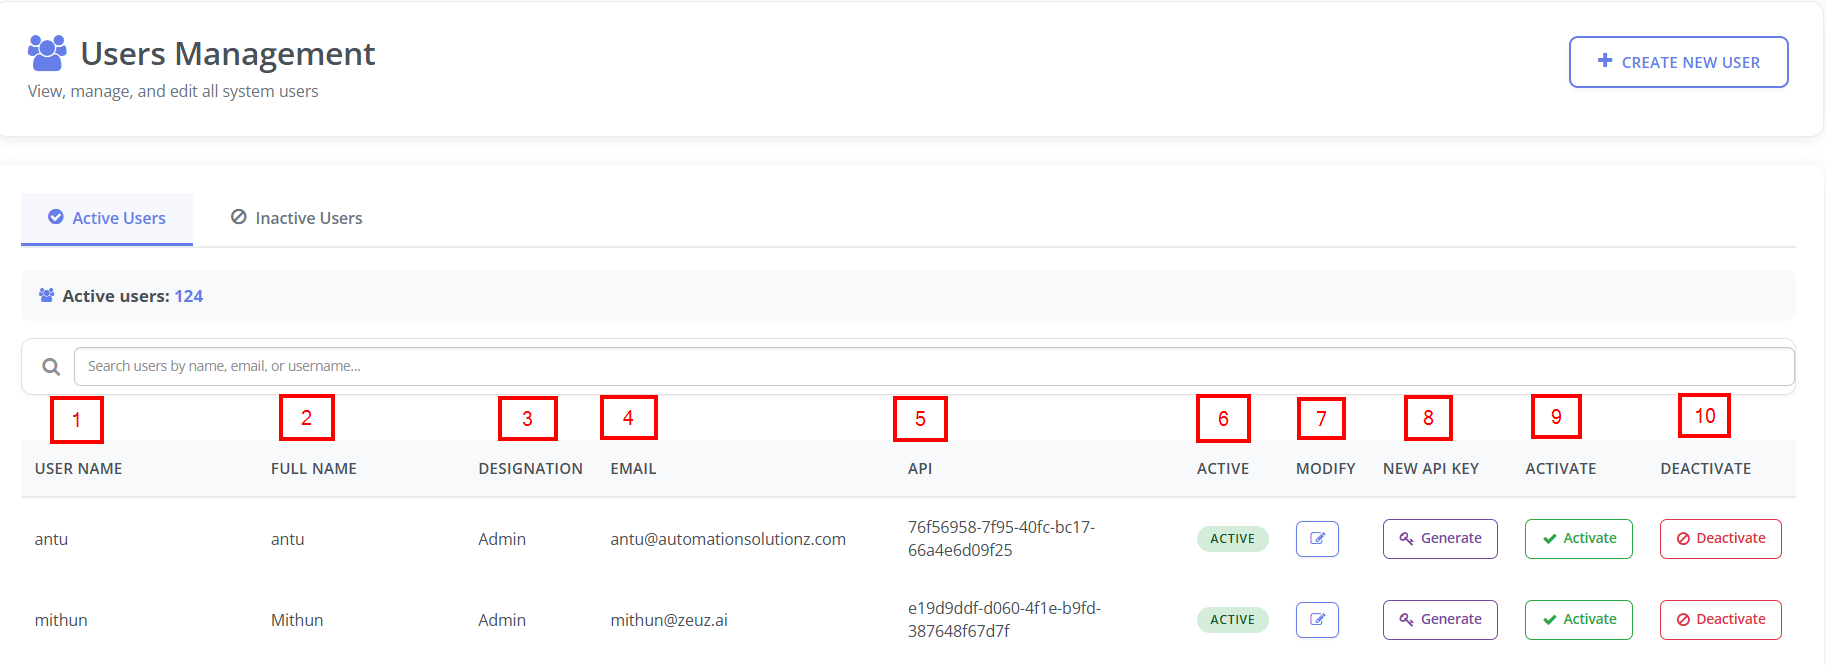
User management table
- It lists all existing users in the system, along with their key details and available actions.
- Each row represents a single user and includes the following columns:
- User Name: The unique username assigned to the user.
- Full Name: The user’s complete name.
- Designation: The role or job title, such as Admin, Tester etc.
- Email: The registered email address associated with the user.
- API: A unique API key generated for automation or integration purposes.
- Active: Shows the current status of the user.
- Modify: Provides an edit icon that allows administrators to update the user’s information.
- New API Key: Contains a Generate button that allows generating a new API key for the user.
- Activate: Allows the user to be activated.
- Deactivate: Allows deactivating the user if required.
FAQs / Troubleshooting
FAQs
How do I create a new user?
Click the Create New User button, fill in the required details, and save the changes.
How can I activate or deactivate a user?
Use the Activate or Deactivate buttons on the User Management page.
Can a user belong to multiple groups?
Yes, users can be assigned to multiple groups to manage permissions efficiently.
Where can I view active or inactive users?
Click the Active Users or Inactive Users button in the user management section.
How do I reset a user’s API key?
Click Generate New API Key under the user’s API section to create a new key.
Troubleshooting
- User cannot log in after activation: Ensure that the user account is activated and credentials are correct.
- Changes to user groups are not reflecting: Refresh the "User Management" page and verify that the correct groups are selected.
- API key not working for automation: Confirm that the key is active, has proper permissions, and regenerate it if needed.
- User appears inactive despite activation: Refresh the "User Management" page and ensure that the user has the required groups assigned.
Changelog
- New UI has been introduced [20250518]