Set
A Test Set is a collection of logically grouped test cases. Test sets can be executed and they provide easy and quick reporting capabilities. Think test sets for nightly runs with Scheduler, test sets for core features of your application, etc.
Why it matters / Use Cases:
- Reducing manual effort in running repeated tests by grouping and automating related test cases for bulk execution.
- Ensuring consistent and timely test runs (e.g., nightly, hourly, or on specific dates) by scheduling predefined sets of regression or smoke tests.
- Integrating test execution into CI/CD pipelines to automatically trigger relevant test sets (like sanity or feature-specific tests) with every code commit, ensuring immediate feedback without manual intervention.
- Achieving comprehensive test coverage by logically grouping tests by feature, priority, or risk to ensure all critical areas are validated together.
- Facilitating clear reporting and progress tracking by providing a structured unit for measuring test results, pass/fail rates, and overall testing status for a specific release or sprint.
Prerequisites
- Access to ZeuZ Server with permissions for Testing → Deployments → Sets.
- For creating a Test Set, one or more test cases must be available.
Quick-Start
- On the Test Set page, click on the button named "New Set".
- Enter the "Name" and "Description" of the test set and click "OK" to create.
- Navigate to the Add tab, select some test cases and click "Add selected" to add some test cases to the set.
Features
-
Navigate to the Test Set page, where you will find options such as "Filter by" and a "New Set" button. However, test sets can be filtered in two ways:
- Most TC
- Set Name.
At the top center of the test set, selecting a version or milestone shows the count of passed, failed/blocked, and skipped test cases, along with the difference between the two selections.

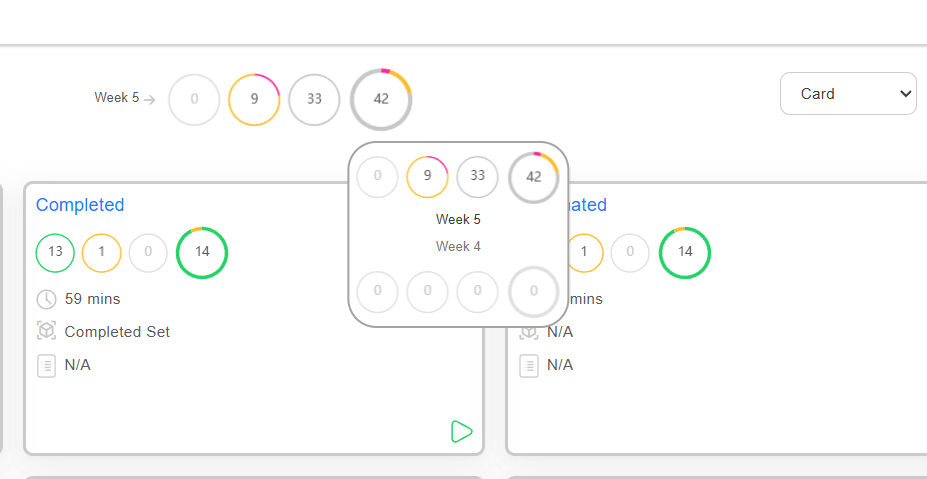
-
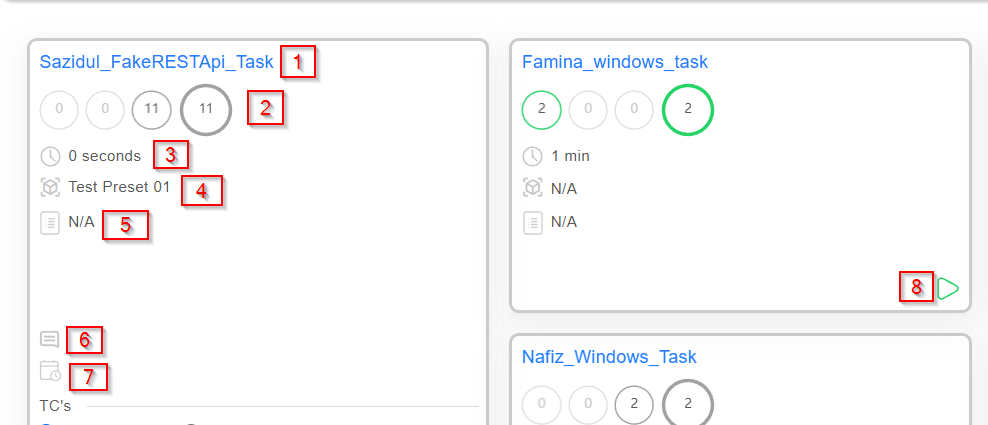
In the Test Set page, card view of the test set is represented. The card view includes the following information:
- The name of the test set.
- Shows the total number of test cases in the set, as well as the number of test cases that have been passed, failed, blocked, and submitted.
- The execution time of the test set.
- The preset of the test set is defined. However, if we click on the preset that has been connected to the test set then it will show the following run configuration information, such as:
- Description of the Test Set.
- Schedule of the Test Set.
The benefit here is that if the preset of a set is selected, it will display the test cases associated with that set.
- It also displays the plan, if there is one.
- The description is available; if there is a description, it will be displayed, otherwise, the field will remain blank.
- The scheduler will be displayed if it has been created for that test set.
- Below the card, there is a "Deploy" button used to deploy the test set.
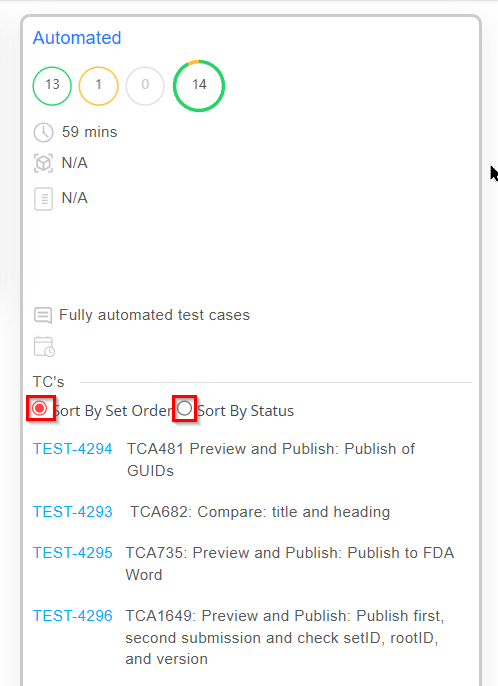
When the test set card is expanded, it displays the test cases belonging to that set. The test cases can be sorted in two ways:
- Sort by Set order
- Sort by Status.
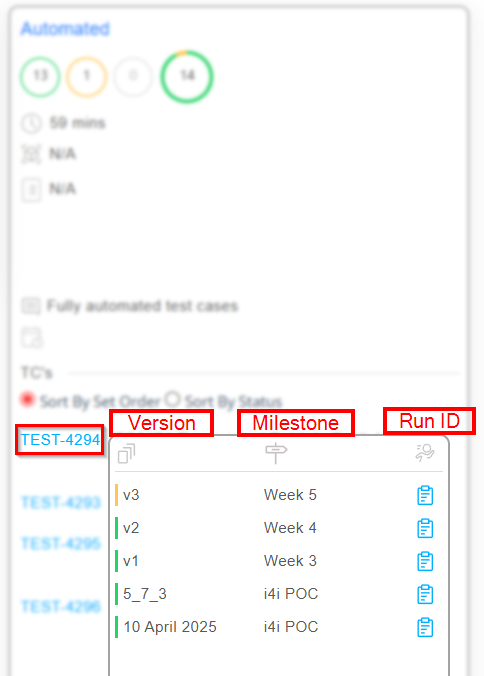
When sorted by "Status", failed test cases appear first, followed by blocked, passed, and not-run cases. Hovering over any test case shows its version, milestone, and run ID.
View Tab of the Test Set Page
- At first, the specific test set must be selected by clicking on it, which will open the Test Set page.
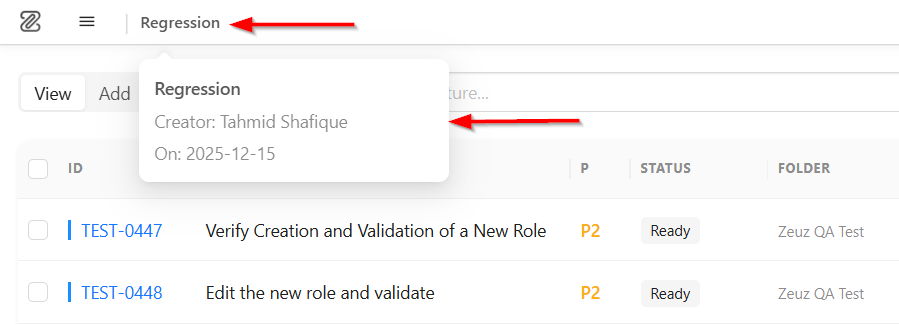
- At the top of the page, there is a title bar that displays the test set name, the creator, and the creation date of the test set. However, the name of the set can be updated by clicking on it.
-
Again, at the top of the page, the following options are available:
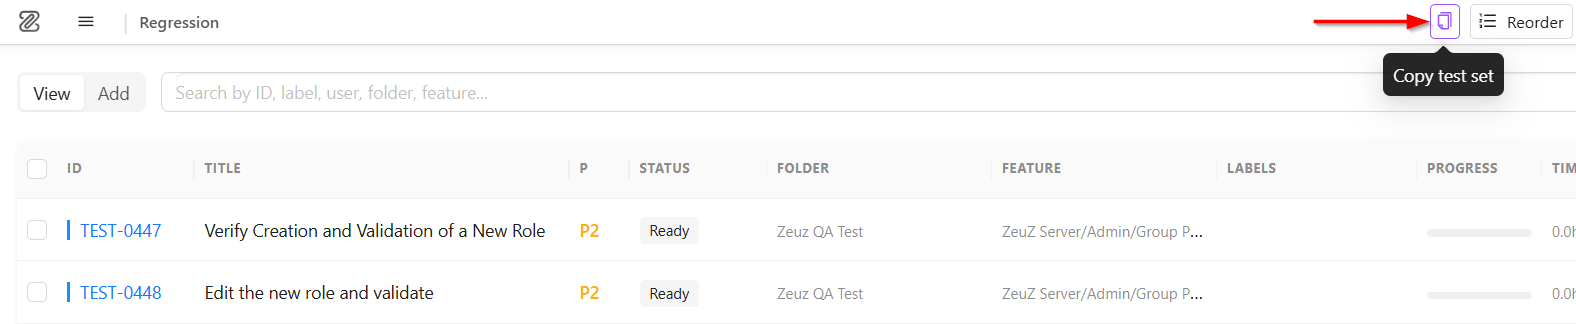
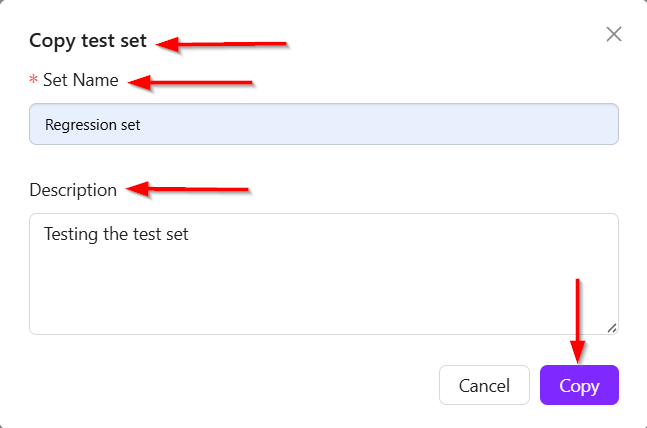
- Copy test set: By clicking the Copy test set option, the Copy Test Set window will appear. It requires the test set name and description. After clicking the Copy button, a notification will appear, such as: “Test set with the name ‘Regression Set’ was created successfully.”

- Reorder options: It is used to change the execution order of the test cases within the test set.This allows users to arrange test cases in a specific sequence based on their testing needs. Also, by clicking the Reorder option, a Drag & Drop feature becomes available, allowing users to arrange the test cases by dragging them.

- Export test set: An Export test set is the process of extracting a collection of grouped test cases from a test management system and saving them in an external file format such as Excel or CSV for sharing, reporting, backup, or offline analysis.

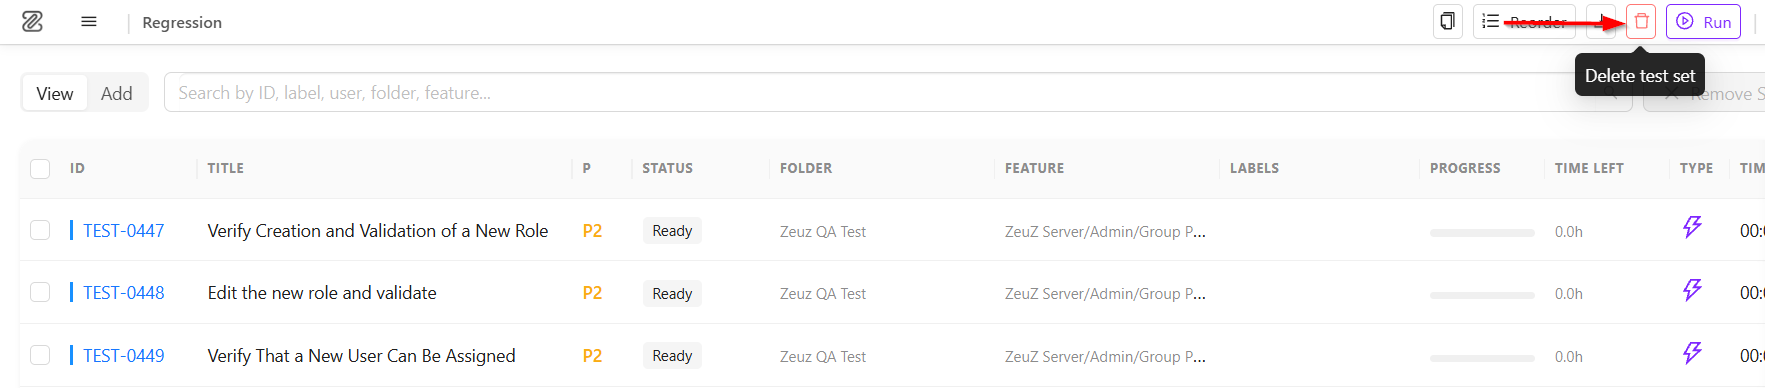
- Delete test set: A Delete test set refers to the action of permanently removing a test set and all its associated test cases from a test management system.
- Run test set: A Run test set is the process of executing all test cases grouped inside a test set in a test management system to validate the functionality of an application.During a test run, each test case is executed, and its result is recorded as passed, failed, or submitted.

-
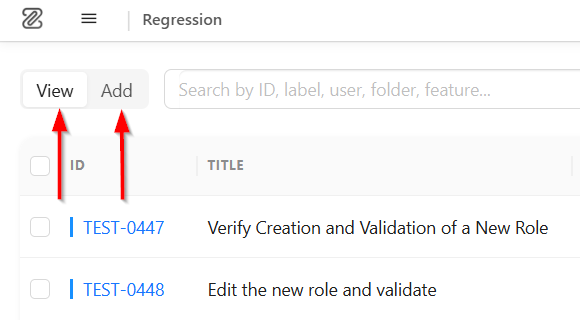
Below the title, there are two tabs:
- View: Displays all existing test cases.
- Add: Used to add new test cases.
-
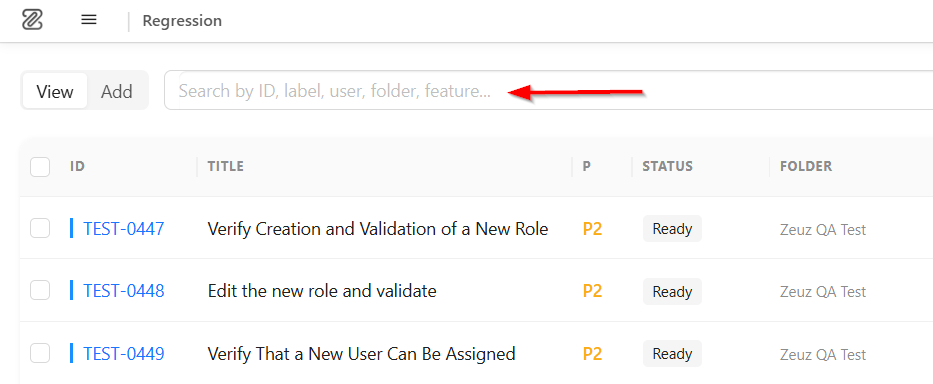
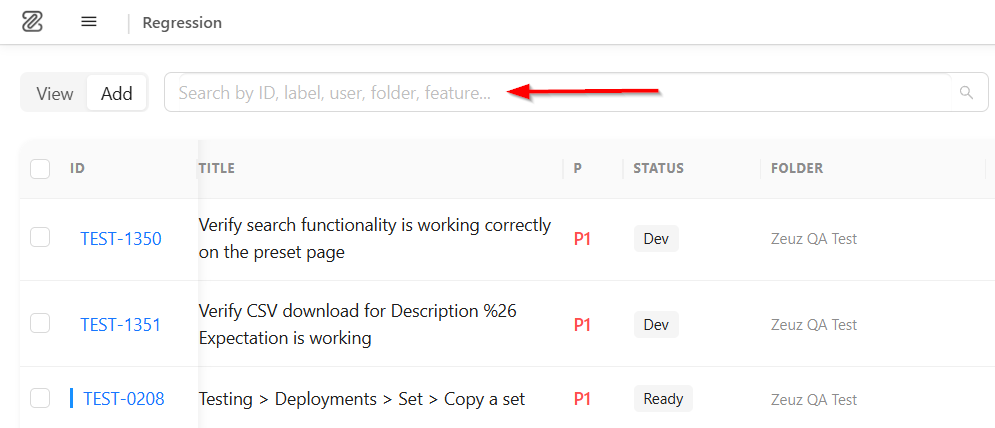
A Search bar is available to quickly find test cases by ID, label, user, folder, or feature.
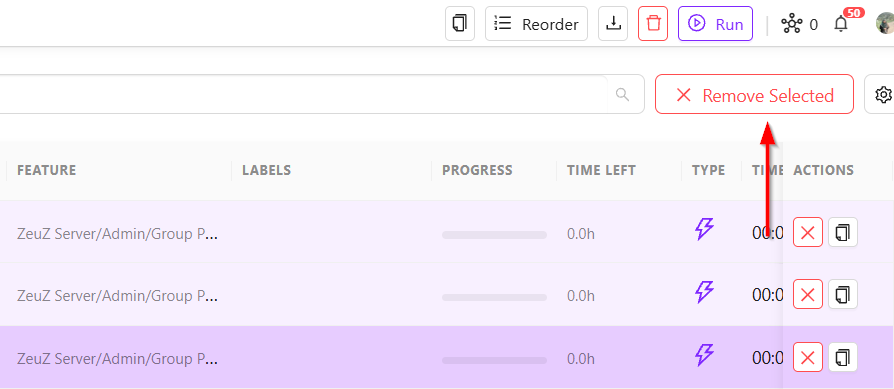
- The Remove Selected button allows users to delete multiple selected test cases at once.
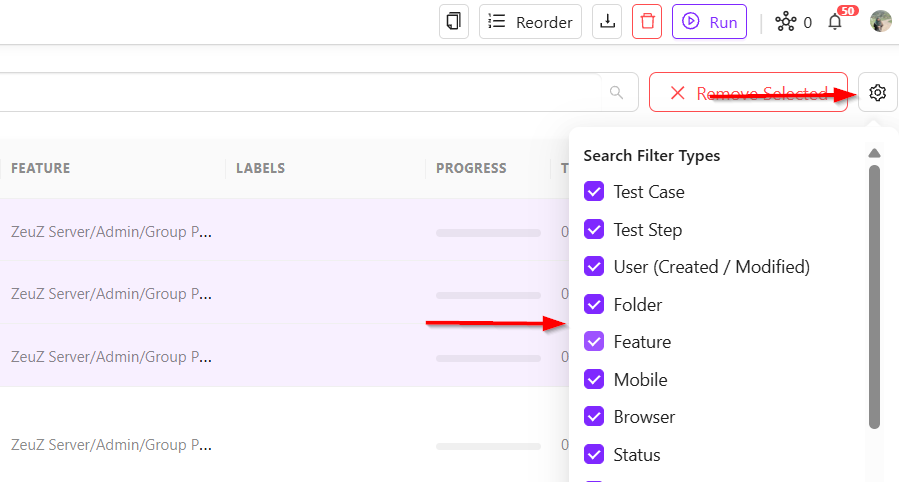
- After clicking the Settings button on the right side, a dropdown-style filter menu appears containing multiple selectable checkboxes. These options are used to refine Search filters, Columns, and Row actions. From the settings option, the user can choose which columns to display. By selecting or deselecting checkboxes, columns can be added or removed as needed. The table view can be toggled according to preference. Additionally, the user can configure which action buttons should appear within each row.
- The View tab contains a table that displays all the test cases with the columns selected through the Settings option, such as:
- Selection Checkbox: Available at the left side of each row, allowing users to select one or multiple test cases for bulk actions.
- ID: Displays the unique test case ID, such as TEST-0447, TEST-0448, and others.
- Title: Shows the name or description of each test case, helping users identify the purpose of the test.
- P (Priority): Indicates the priority level of the test case, such as P1, P2 etc.
- Status: Displays the current execution status of the test case. Here, some test cases are marked as Ready, meaning they are prepared for execution.
- Folder: Shows the folder where the test cases are stored.
- Feature: Indicates the feature or module associated with the test case.
- Labels: Reserved for tags or labels used to categorize test cases.
- Progress: Displays the execution progress using a progress bar.
- Time Left: Shows the estimated remaining execution time.
- Type: Displays the execution type using an icon, such as, Automation or Manual.
- Time: Shows the execution duration or recorded time.
Additional information can be displayed in the table by selecting the desired options from the Settings menu, if needed.
- Actions: Provides action buttons for each test case, such as:
- Remove test case: Removes the test case from the test set.
- Copy test case: Creates a copy of the selected test case of the required test set.

Add Tab of the Test Set Page
- At the top of the page, a Search bar is available to quickly find test cases by ID, label, user, folder, feature, and other criteria.
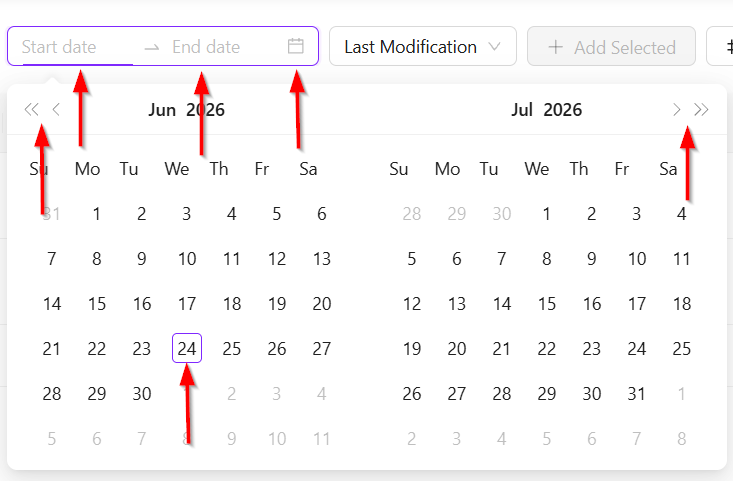
- A date range picker used to filter test cases based on a selected date range. It contains the following components:
- Start Date-End Date: Located at the top left, this field allows users to select a start date and an end date for filtering test cases.
- Calendar Icon: Opens the calendar popup for date selection.
- Dual Calendar View: The popup displays two months side by side, making it easier to select dates across different months.
- Navigation Arrows: The arrows at the top allow users to move to previous or next months.
- Date Selection: Users can click on specific dates to define the desired date range.
-
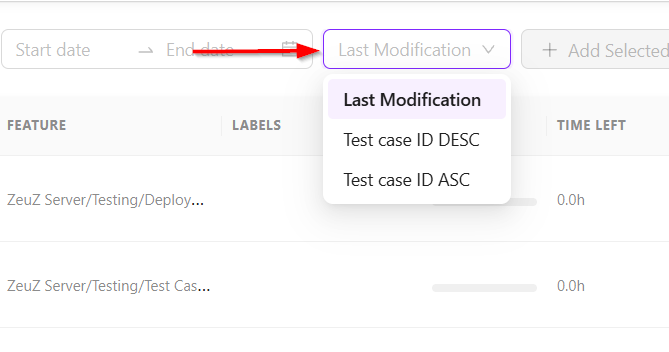
Sorting dropdown menu: It is used to arrange test cases based on modification time or test case ID. It contains the following options:
- Last Modification: This is the currently selected sorting option. It sorts the test cases based on their most recent modification date, allowing users to view recently updated test cases first.
- Test case ID DESC: Sorts the test cases in descending order by test case ID, meaning higher IDs appear first.
- Test case ID ASC: Sorts the test cases in ascending order by test case ID, meaning lower IDs appear first.
-
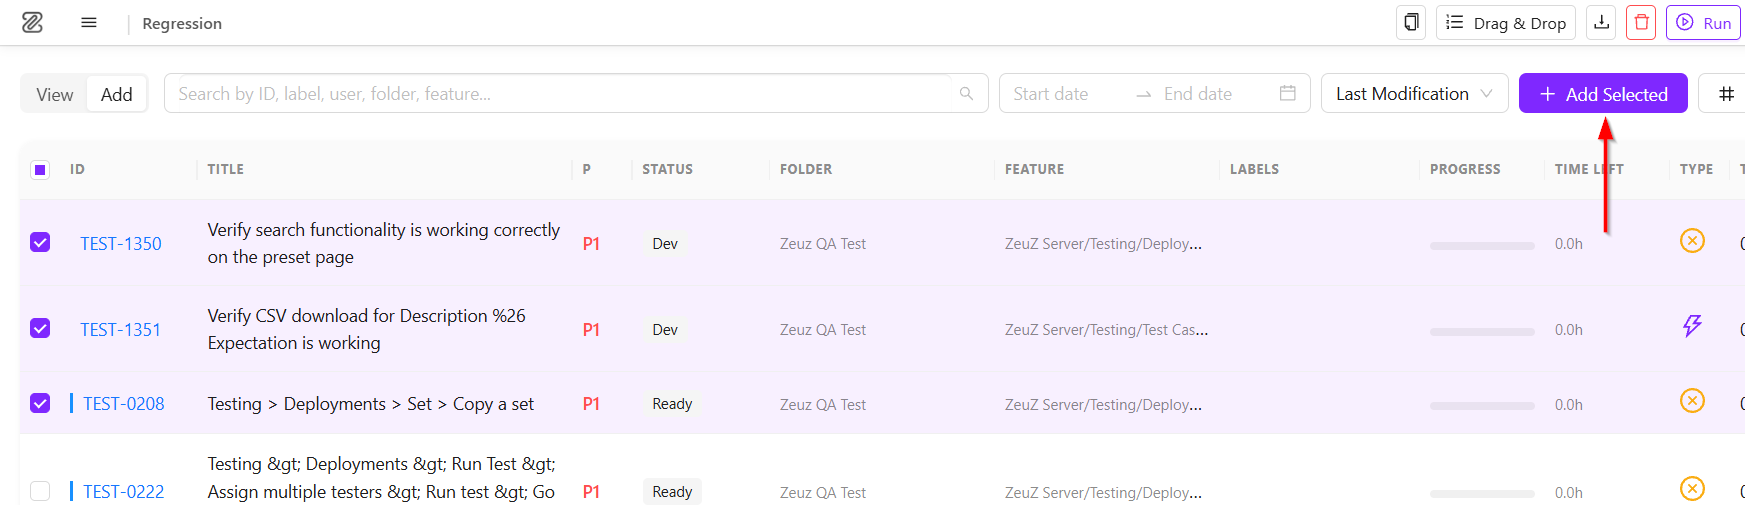
Add Selected Button: Allows users to add the selected test cases after applying the filter.
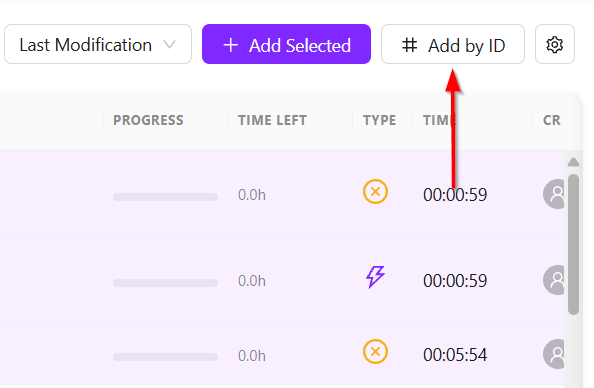
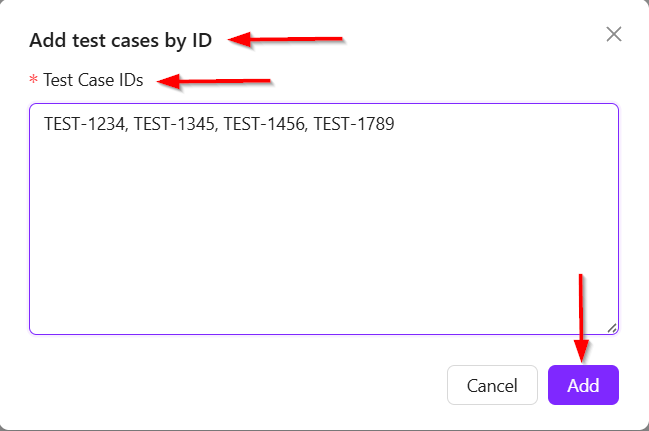
- Add by ID: It means adding test cases to a test set by entering their unique test case IDs instead of selecting them manually from the list. By using the Add by ID option, users can directly input one or multiple test case IDs, and the system automatically adds those specific test cases to the selected test set.
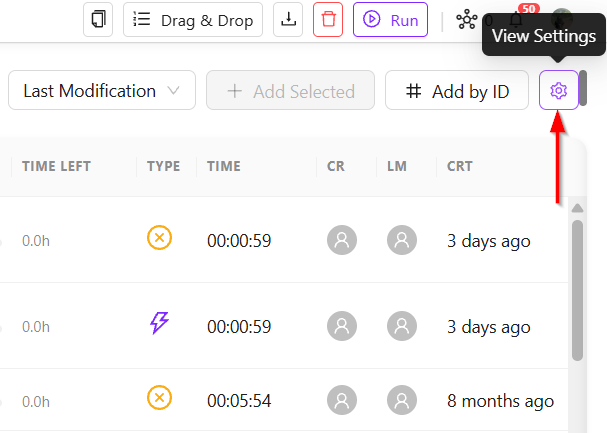
- View Settings: The function of the Settings button has already been described in the View tab section. It works the same way in the Add tab as it does in the View tab.
- The Add tab contains a table that displays all test cases with the columns selected through the Settings option. The Add tab includes the same columns as the View tab, with one exception: under the Actions column, only the Copy test case icon is available, which allows users to create a copy of the selected test case.
- Additional information can be displayed in the table by selecting the desired options from the Settings menu, if needed.

Add test cases to the Test Set
- First, click on the Test Set Name of the specific test set card available on the Set page.

- Users can add test cases to the test set by navigating to the Add
- Click the Checkbox to select test cases for adding to the test set.
- Next, click on the + Add Selected button.
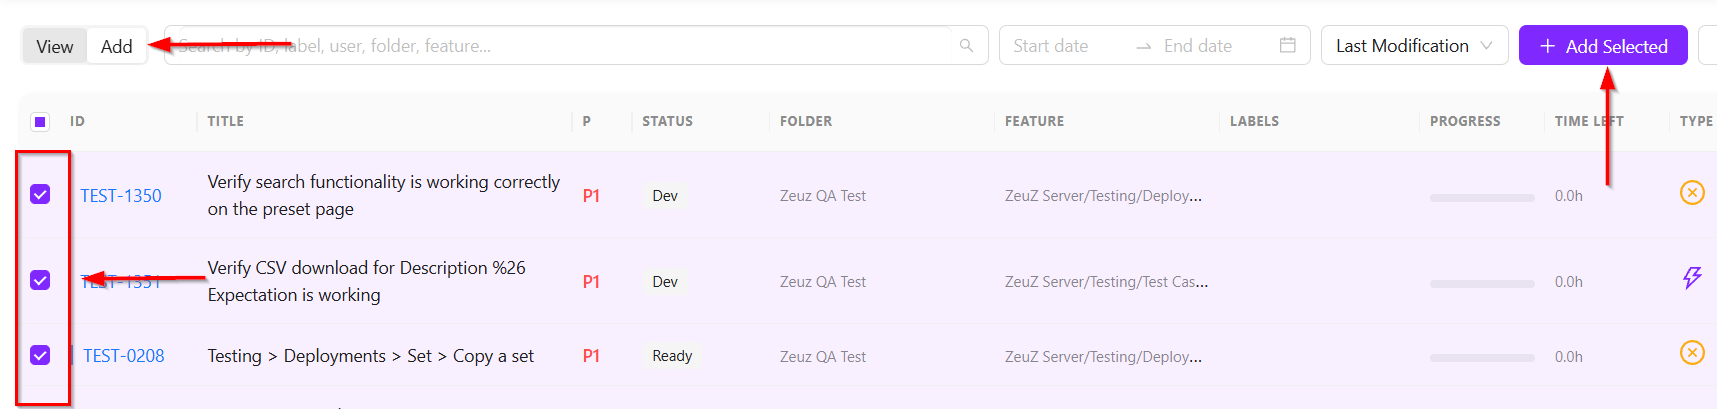
- Click on the View tab to see whether the required Test cases are added or not.
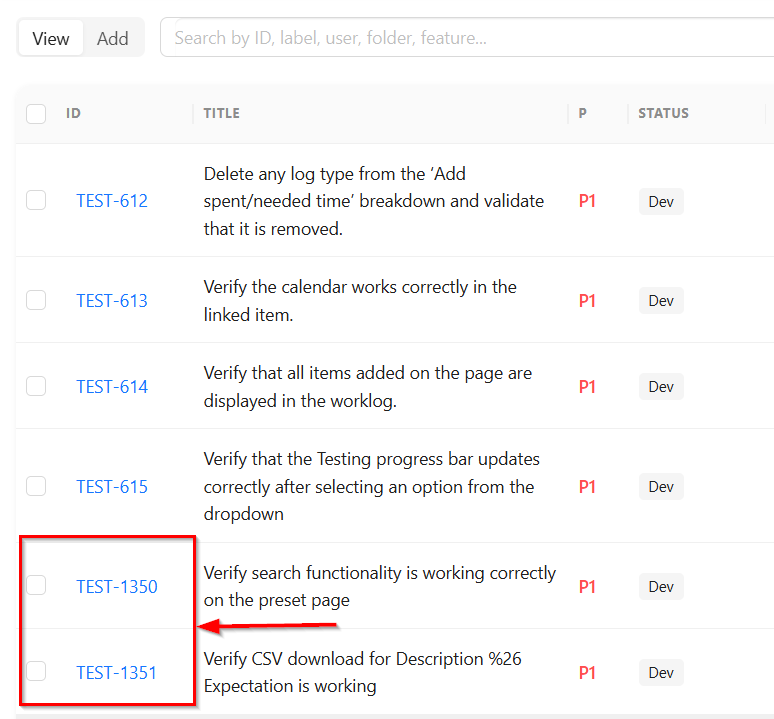
- The test cases can also be reordered by using the Drag & Drop button.

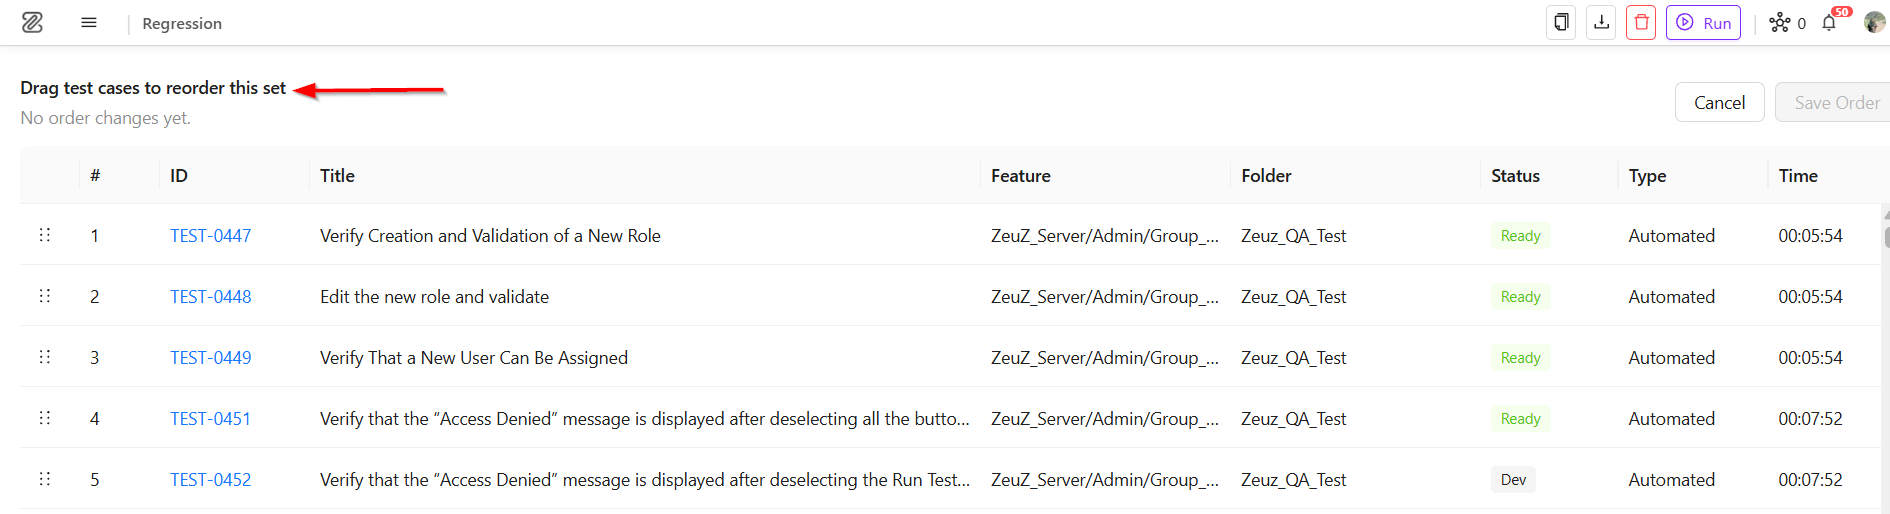
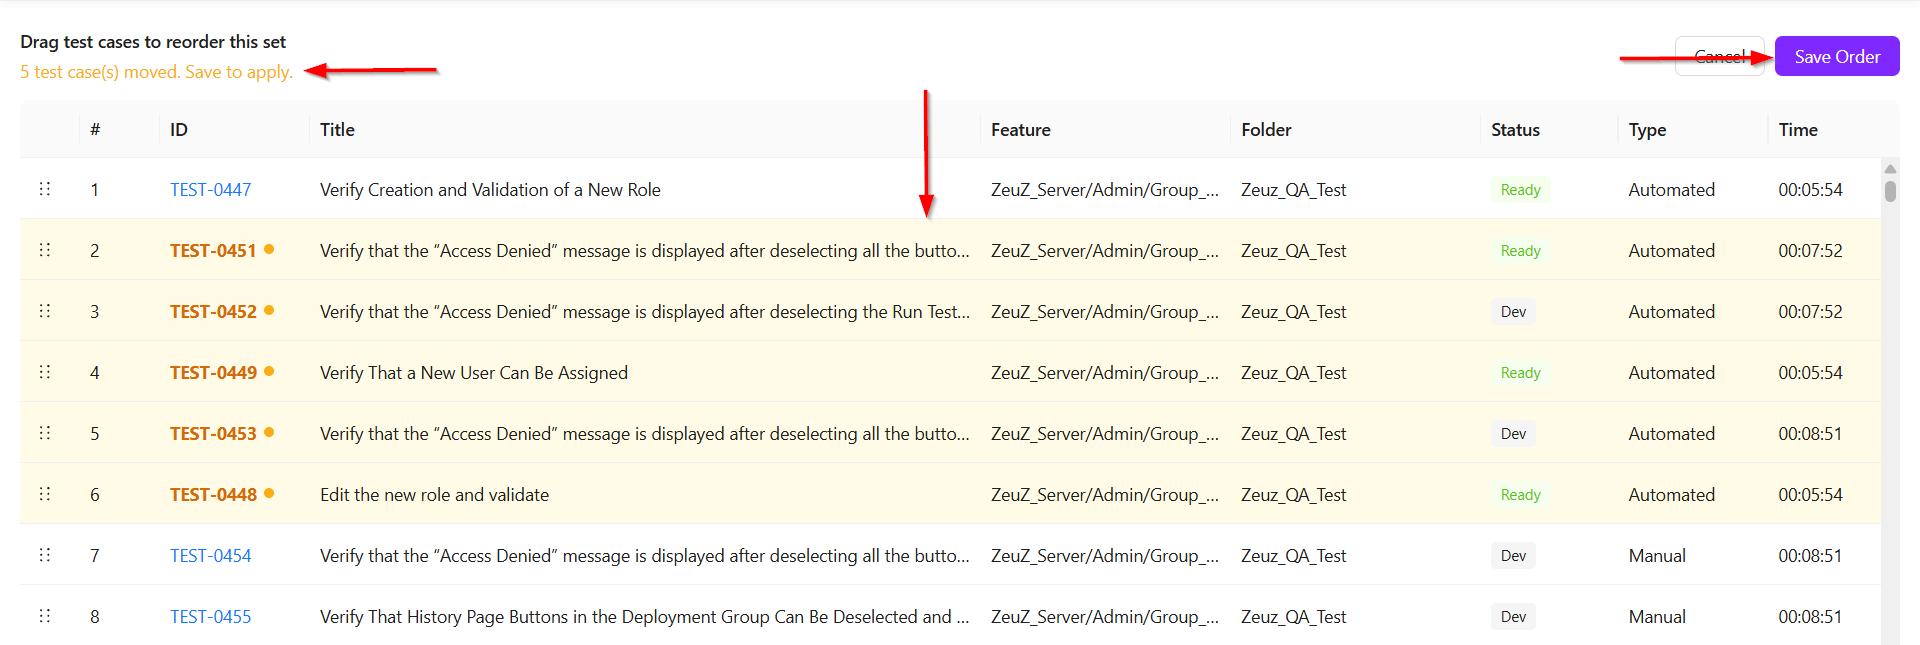
- During reordering, the system highlights the test cases whose positions have been changed, making it easier to identify the affected test cases. This is useful because users may sometimes forget which test cases were reordered, especially when test case IDs are difficult to remember or multiple test cases have similar titles. The highlighted rows help users clearly see which test cases were affected due to the changed order.
- After completing the reordering, clicking the Save Order button saves the new sequence successfully.
FAQs / Troubleshooting
How to run test sets on schedule at specific intervals?
- Create a "Run preset" from Testing → Deployment → Run Test with this set as the search filter.
- Go to Testing → Configure → Schedule to create a schedule with the new preset.
How to run test sets from CI/CD pipelines?
- Create a "Run preset" from Testing → Deployment → Run Test with this set as the search filter.
- Go to Testing → Configure → CI/Run preset and copy the cURL command or webhook url.
- Put the cURL command in your CI/CD pipeline.
Changelog
- Adopted a new card view [20250518]