API
Onboarding refers to the process where new users sign up and log in, ensuring that all systems are properly prepared so they can execute test cases smoothly for the first time.
Why it matters / Use Cases:
- It ensures that new users can automate test cases effectively using a properly prepared system.
Prerequisites
- Access to ZeuZ Server with permissions for Testing → Test Case → Guided.
Quick-Start
- Click on the Start Now button available in the "Automate Testing in 5 Guided Steps" page.
Features
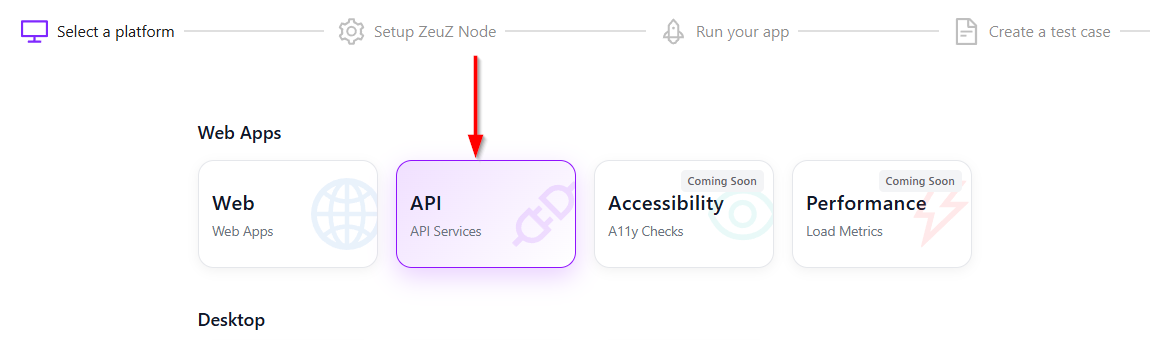
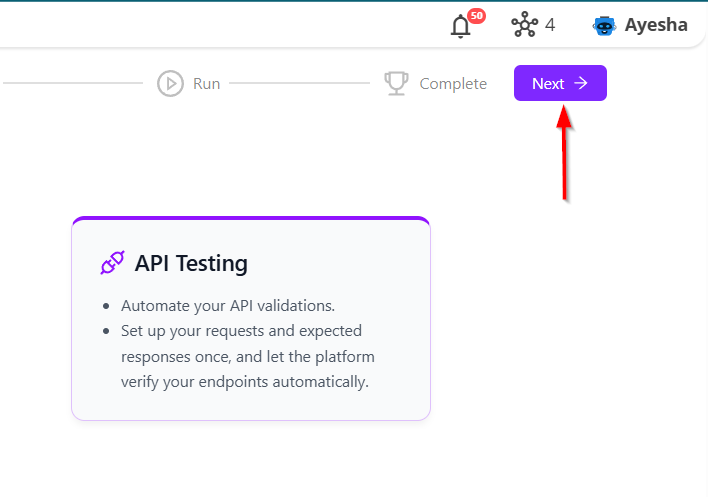
Select a platform
- Click on the API button in the "Web Apps" section.
- After selecting the API services, click on the Next button located at the top-right corner.
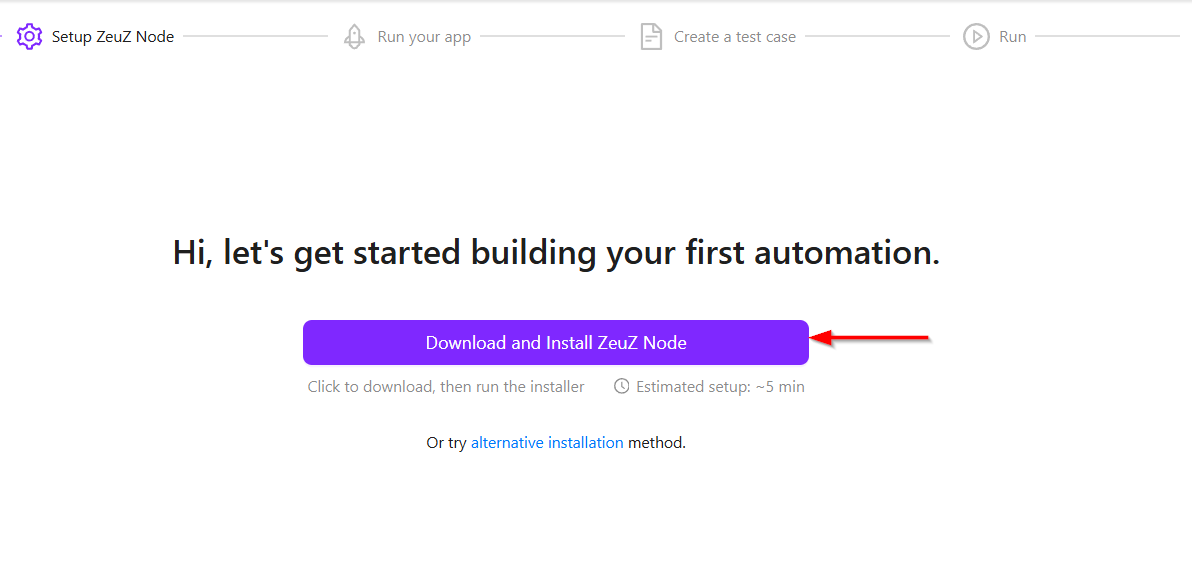
Setup ZeuZ node
- To set up the ZeuZ node, click on the Download and Install ZeuZ Node button.
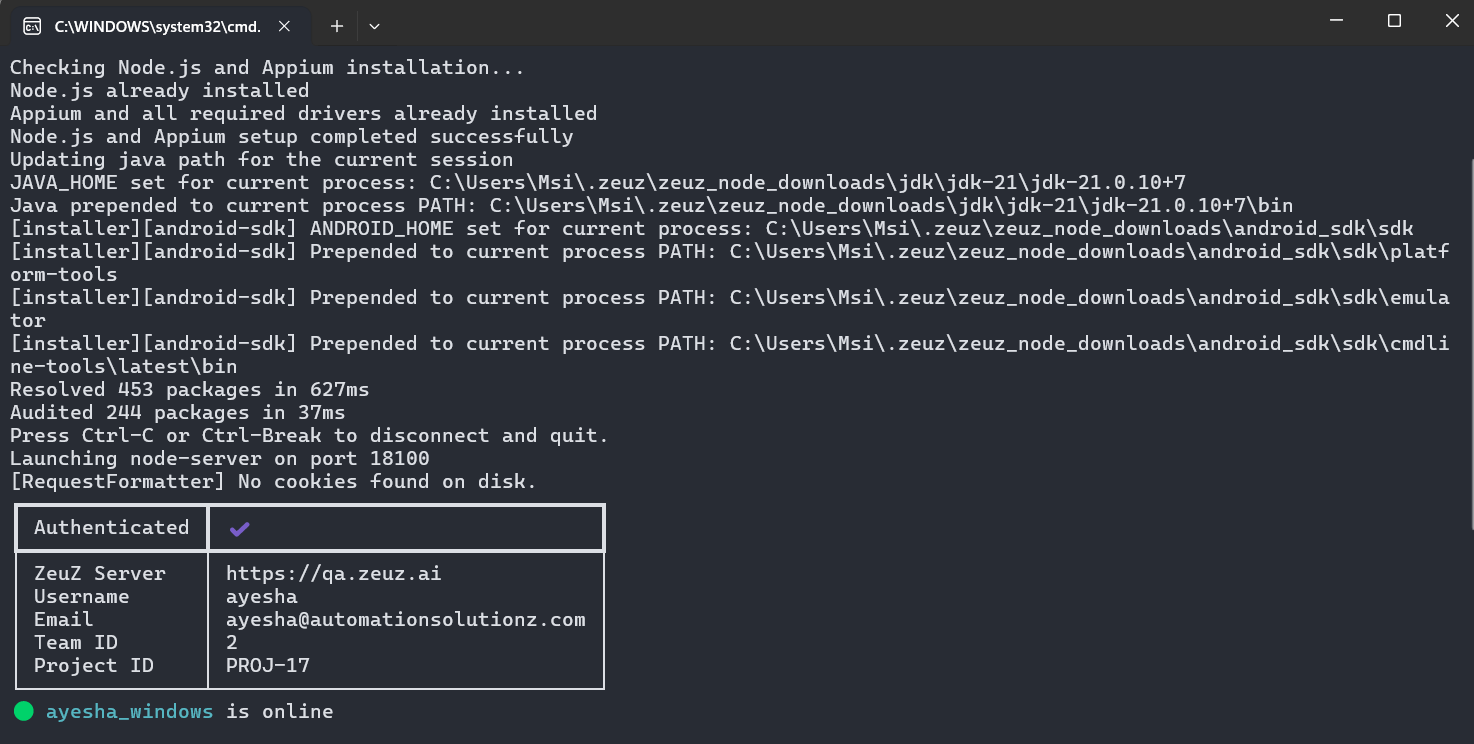
- Launch the application, which will also download the necessary dependencies required for API automation.
- Once the setup is complete, a Node Disconnected message will appear initially. After a few seconds, the status will update to show that the node is Online, displaying the username, platform, and authentication details. At the same time, the background page will also change.
Run your app
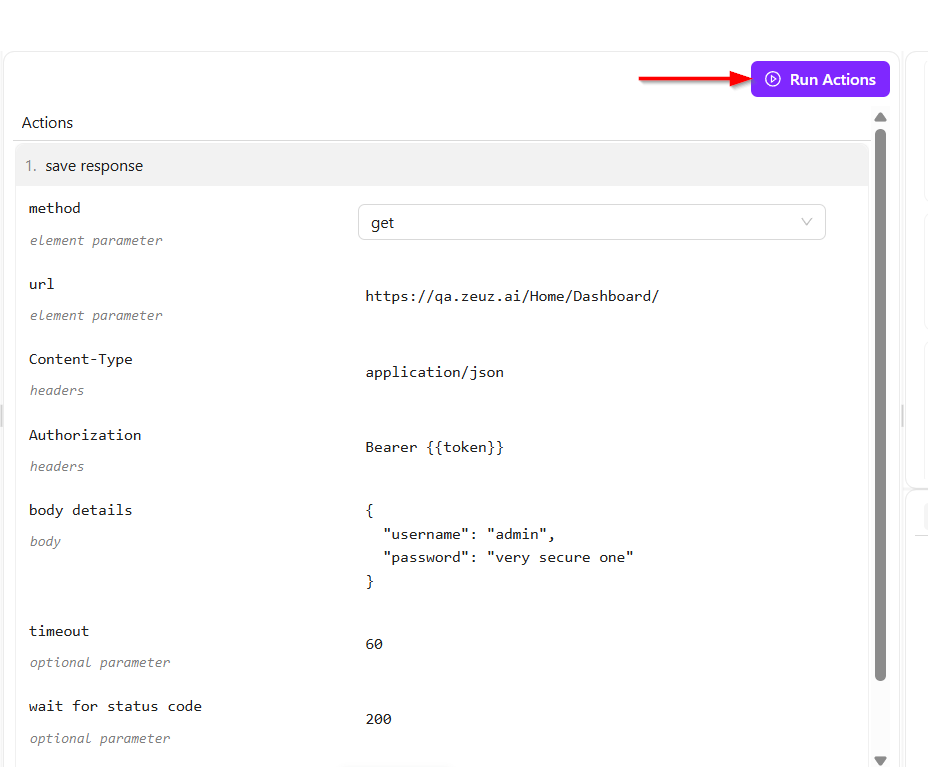
- At the top of the "Build API Request" page, the request method is set to GET by default. However, HTTP also supports other methods such as POST, PUT, PATCH, and DELETE, which can be selected, and an endpoint URL must be provided.
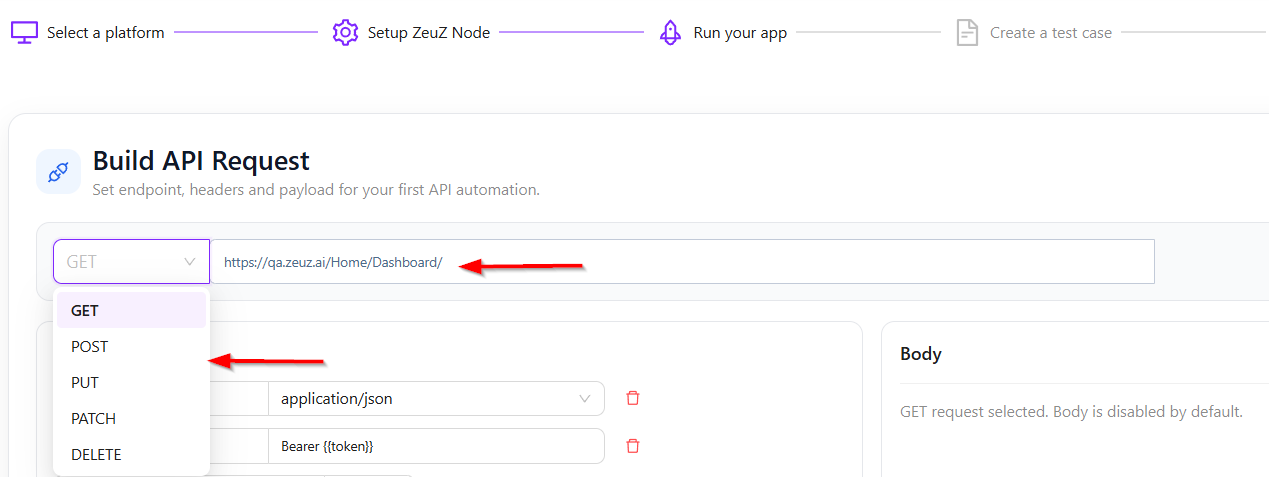
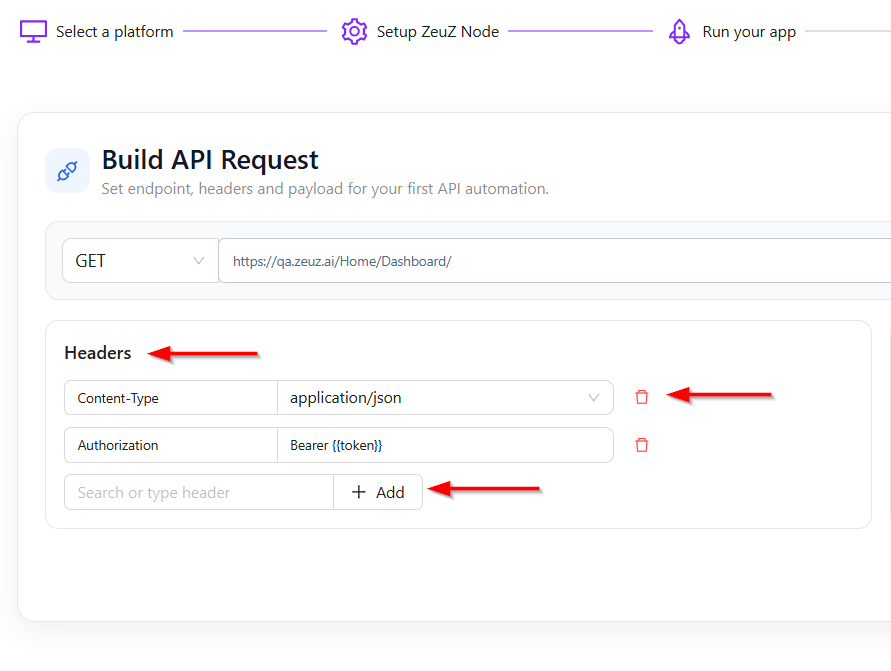
- On the left side, the Headers section is displayed:
- Content-Type is set to
application/json, meaning the request body will be in JSON format. - If a Bearer token is required by the server, it can be added in the Authorization header. This header is optional and should be included only when authentication is needed.
- There is also an option to add more headers if required.
- If a header needs to be deleted, click the delete button next to the respective header.
- Content-Type is set to
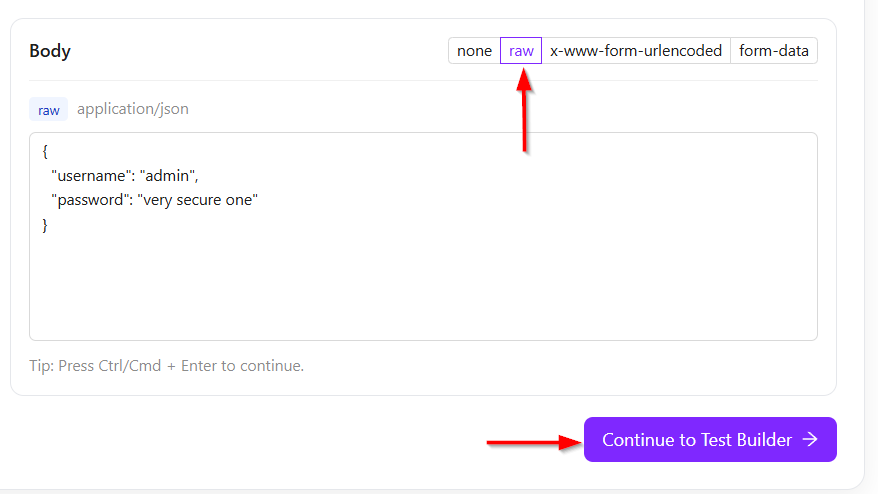
- On the right side, the Body section is selected as "raw" with
application/jsonby default. If any BODY need to be sent with the request, this can be used. - At the bottom right, there is a Continue to Test Builder button, which allows proceeding to the next step after configuring the API request.
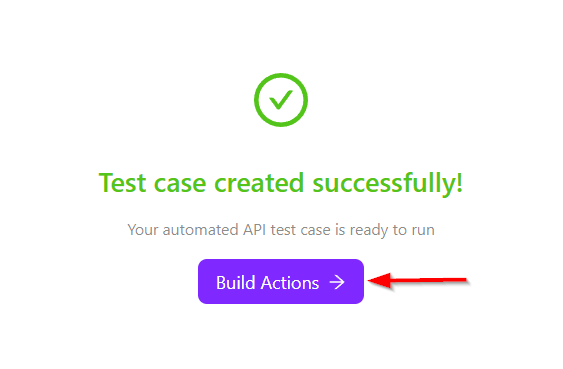
- At the top, a green checkmark icon is displayed, which represents successful completion of the process. Below it, the message “Test case created successfully!” confirms that the automated API test case has been generated without any errors.
- At the bottom, there is a “Build Actions” button. This option allows proceeding to the next step, where additional actions or steps can be configured for the test case.
Create a test case
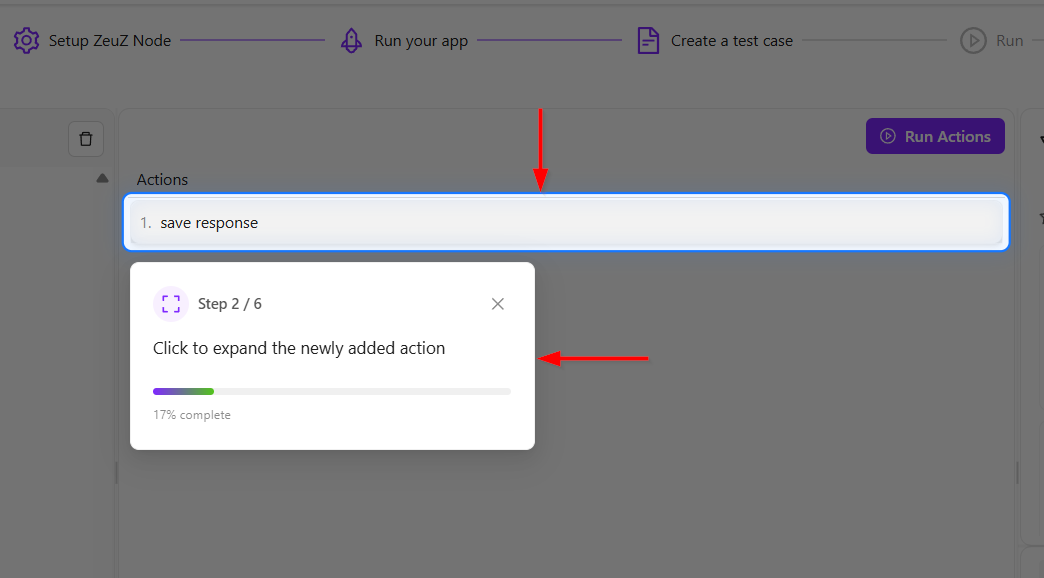
- The first action is entered as "Save Response", indicating that the workflow will capture and store the response from a previous step or API call.
- After that, a step indicator will appear, guiding us to the subsequent expanded actions.
Run actions
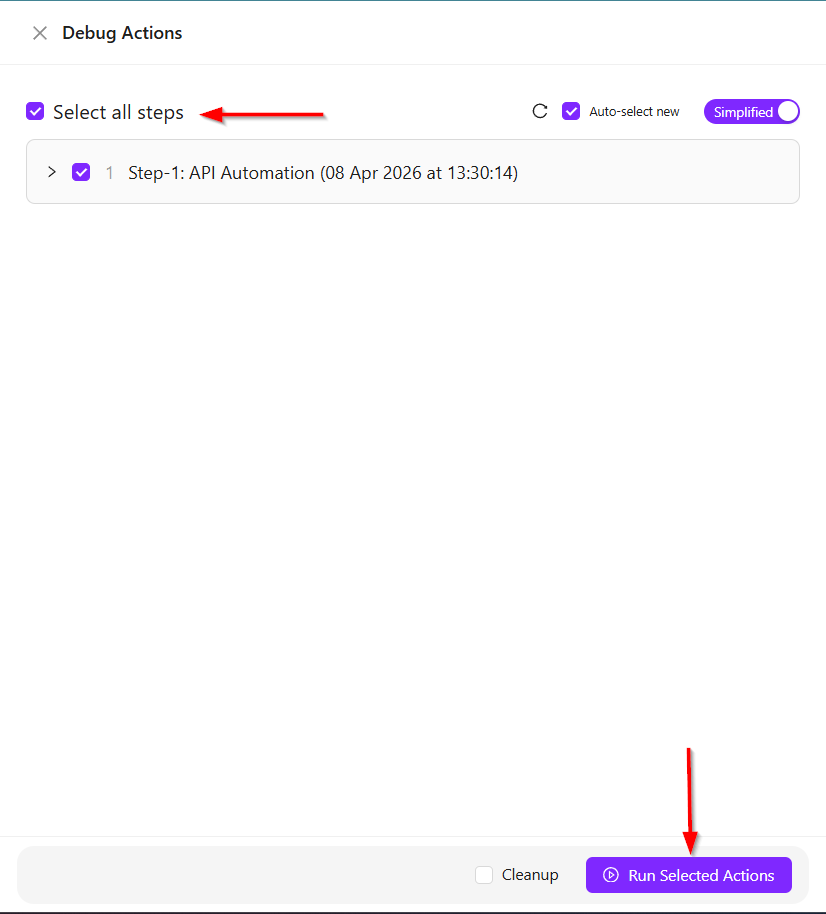
- On the top-right corner, there is a Run Actions button, which will execute all configured actions sequentially.
- Click to select all steps, then click Run Selected Actions. A notification will appear stating, "Started running selected actions".
Adding a new action
- To add a new action, click the Add Action below button.
- There is also a More button in the required section, where additional options can be selected if needed.
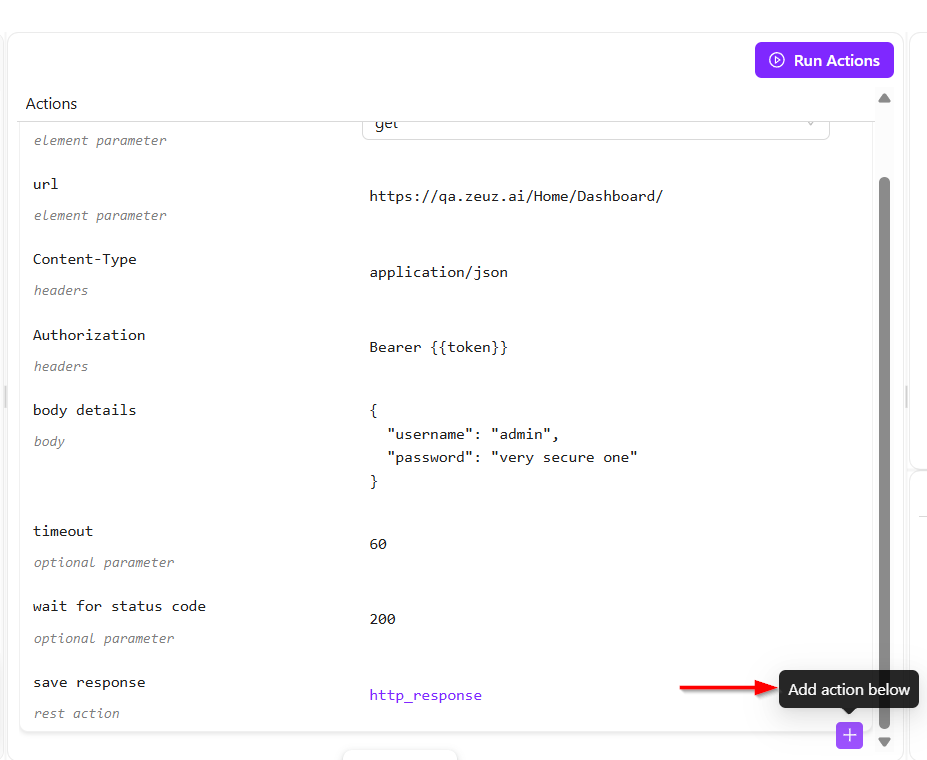
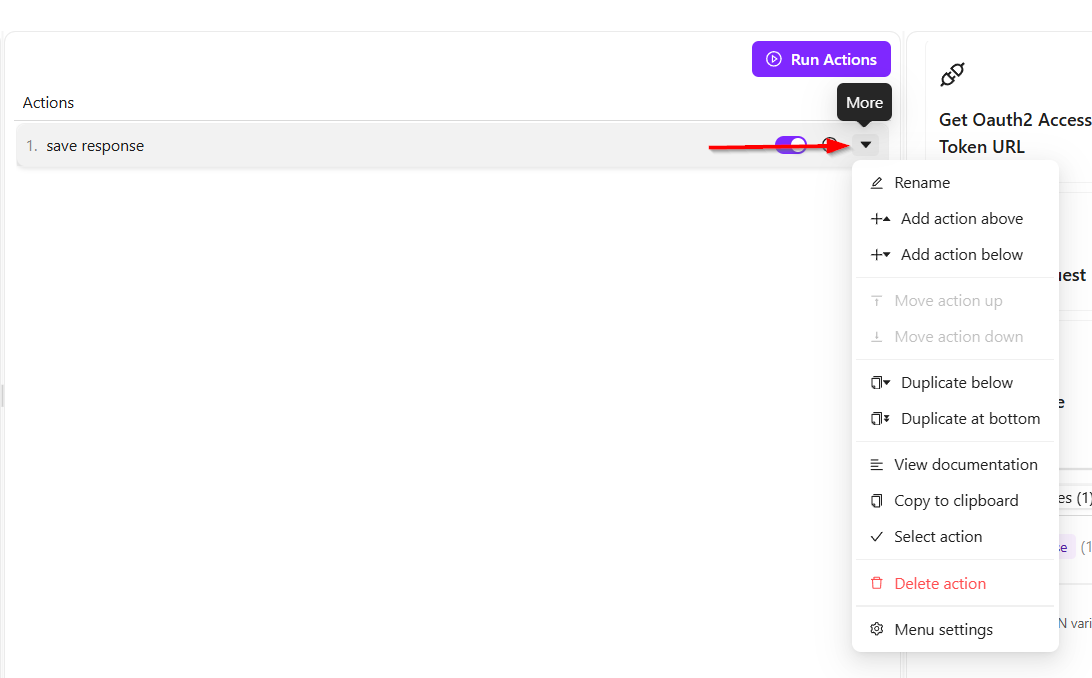
- The desired action can also be selected from the right side.

- While running the actions, first unselect the initial action, then select the newly added action, and click the Run Selected Actions button again.
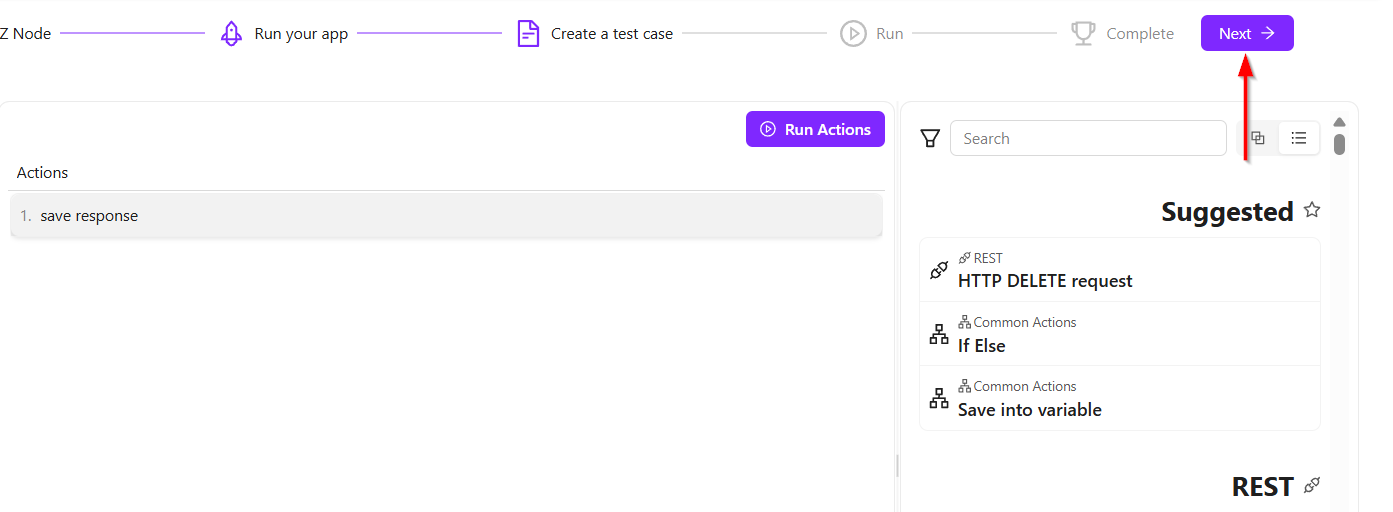
Run actions within the platform
- After adding the actions, click the Next button available at the top right of the page.
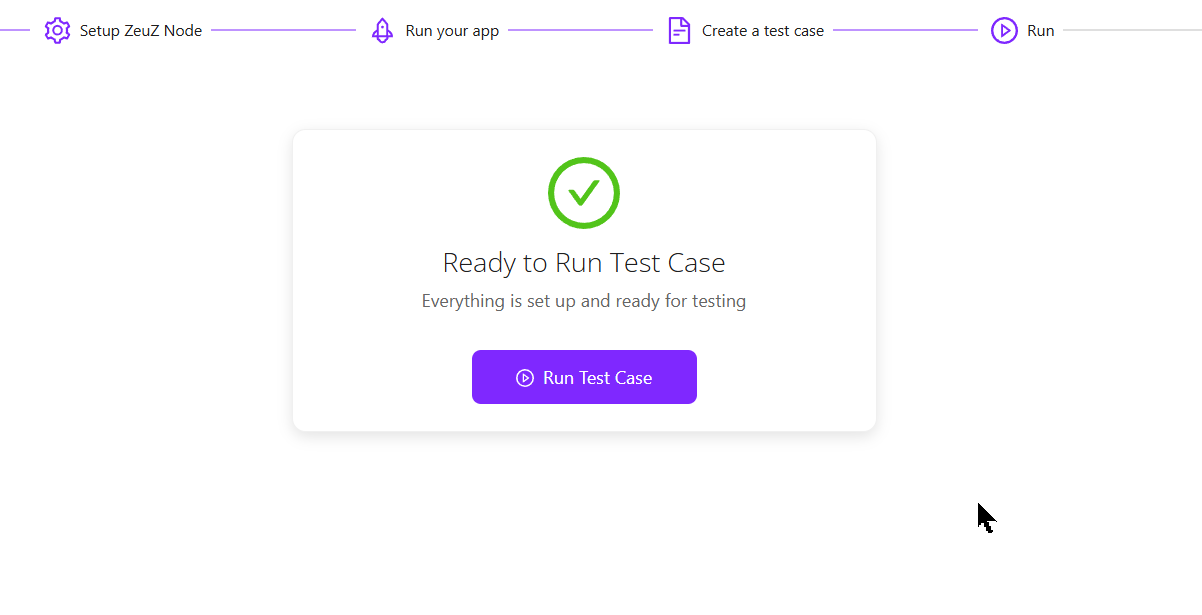
- Click the Run Test Case button.
- It will then redirect to the Run ID Details page of the test case.
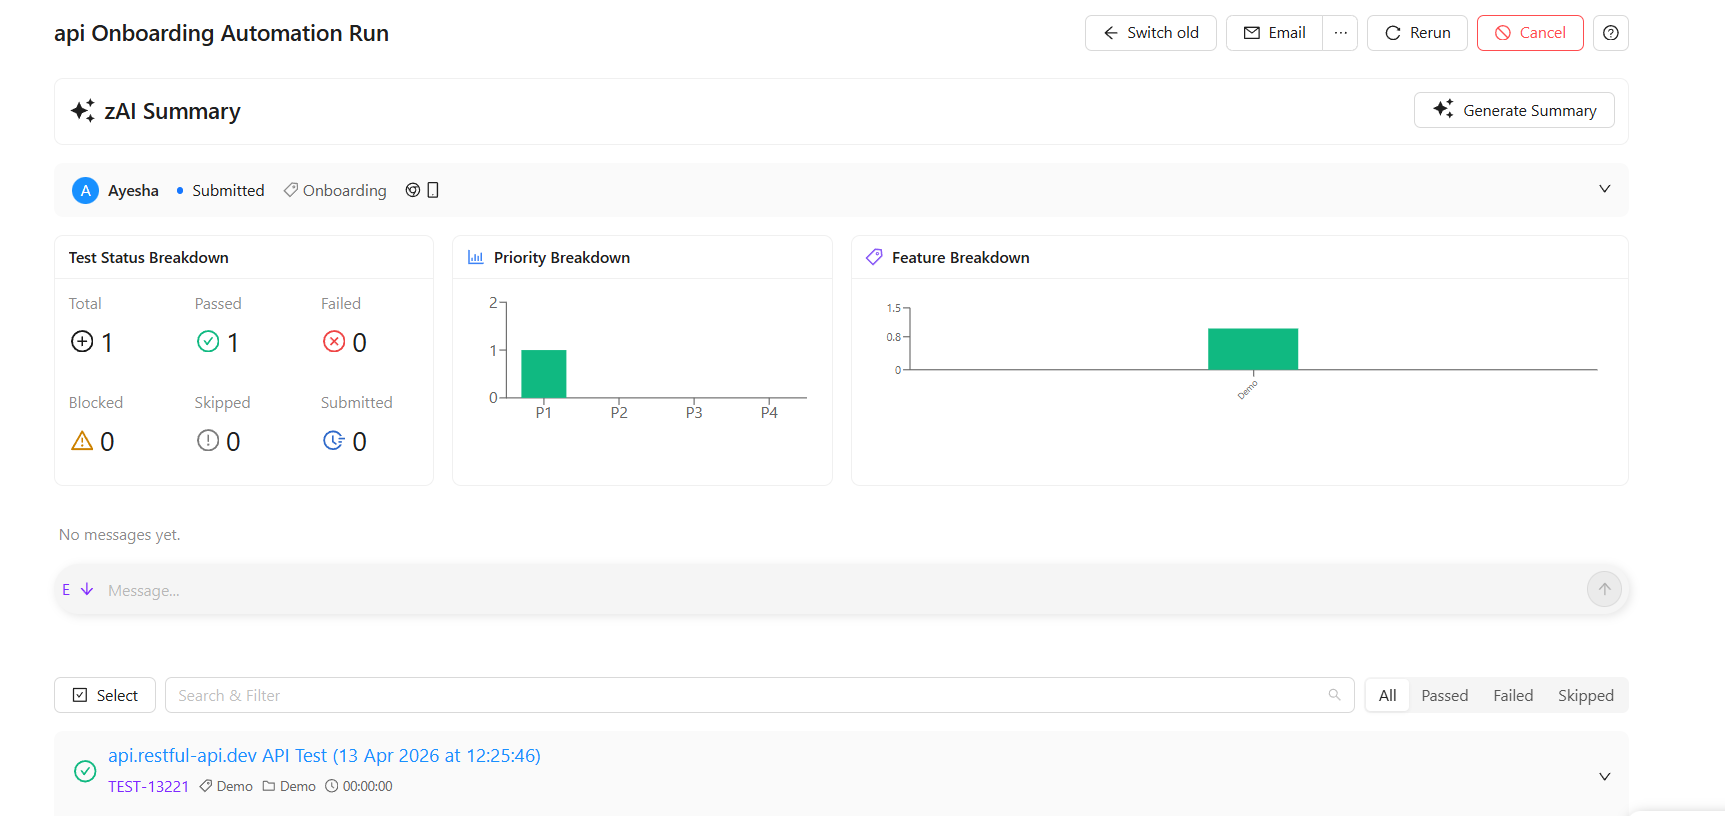
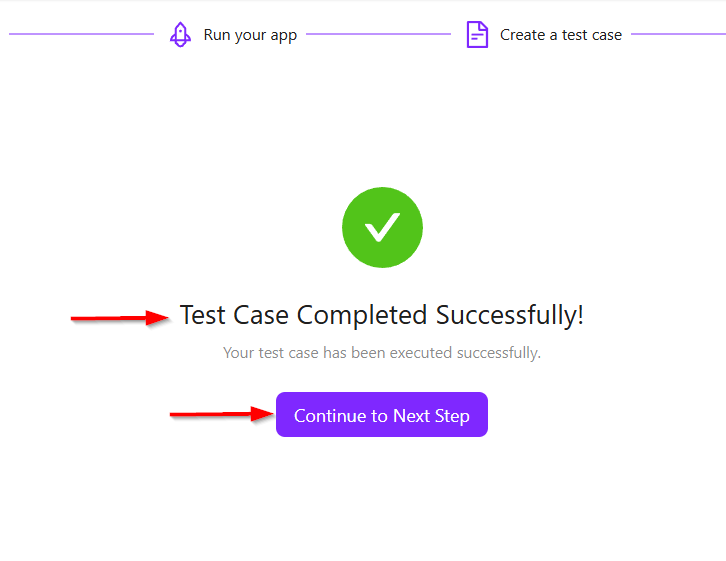
- After closing the Run ID details page, the platform will display a message stating that the Test Case Completed Successfully!. Then, click to Continue to Next Step.
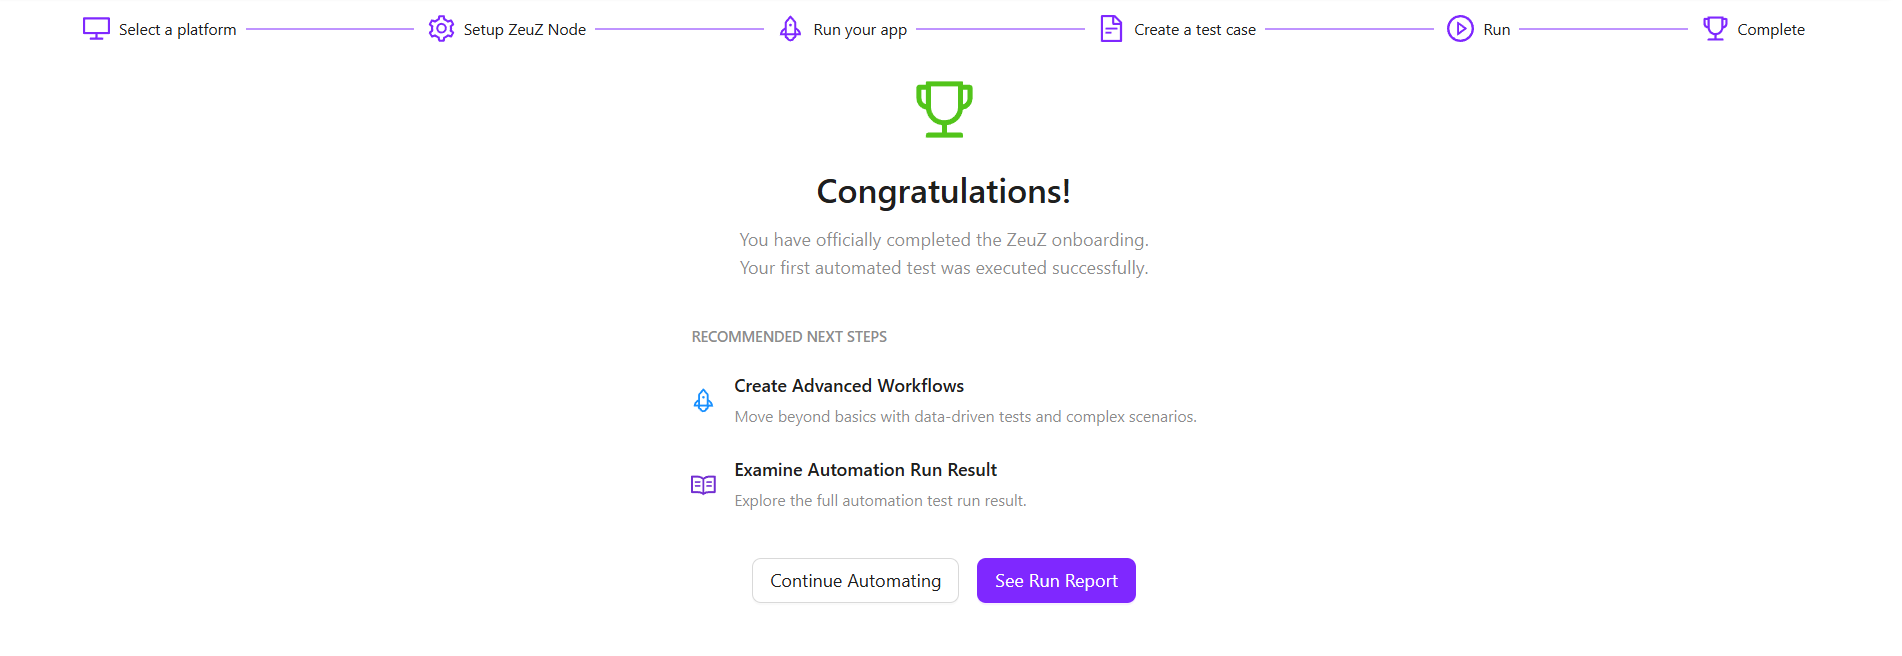
- Lastly, at the top, a confirmation message “Congratulations!” indicates that the user has officially completed the onboarding. It also confirms that the first automated test case has been executed successfully, which means the basic setup and execution process is working correctly.
- Under the Recommended Next Steps section, the platform suggests further actions, such as, Create Advanced Workflows and Examine Automation Run Result.
- At the bottom, two action buttons are available, such as, Continue Automating and See Run Report.
note
ZeuZ follows a process similar to Postman for API services.
FAQs / Troubleshooting
Why is the API request failing?
The API request may fail due to an incorrect URL, invalid request method, missing parameters, or authentication issues. Verify all request details carefully.
Why is the request body not working?
Ensure that the body format is correct, such as JSON, and verify that the content type is properly selected.
Why are headers required in API requests?
Headers are used to send important information such as authentication tokens, content type, and custom request details.
Why is the API returning empty data?
The requested resource may have no records, filters may be incorrect, or required parameters may be missing.
Changelog
- Guided, platform-aware setup with auto node setup, auto test case creation, and first-run execution. [202603]