CICD Run preset / Webhook
CICD Run preset / Webhook is a mechanism in ZeuZ that enables automated test execution to be triggered from external systems, such as Jenkins, GitHub Actions, or other continuous integration servers.
- CICD Run preset:
CICD Run preset is a saved configuration in ZeuZ that defines which tests to execute, the target environment, and any specific parameters. By using a preset, users can quickly run tests without manually setting execution details each time. - Webhook:
Webhook allows ZeuZ to be triggered automatically by an external system. For instance, when new code is pushed to a repository, the CICD tool sends a request to ZeuZ through the webhook, which initiates test execution based on the selected preset.
CICD Run presets and webhooks enable seamless integration between development and testing, accelerating the feedback cycle, reducing manual effort, and ensuring consistent test execution.
Why it matters / Use Cases:
- Consistency and Reliability: Ensure tests run with the same configuration every time.
- Efficiency and Time-Saving: Users can execute tests instantly without manually configuring each run.
- Automation and Integration: Connects ZeuZ with CICD pipelines for automated workflows.
- Scalability Across Environments: Run tests across multiple environments easily.
- Traceability and Reporting: Each execution keeps a record of the preset used, helping in audits and reports.
- Flexible Parameter Testing: Run tests with different inputs or configurations.
Prerequisites
- Access to ZeuZ Server with permissions for Testing → Configure → Run/CI Presets is required, ensuring the user has the necessary rights to create and execute test runs.
- The user must already have tests created in order to associate them with the preset.
- The target environment or execution machine must be added and available for use.
- The user must be working within the correct project and workspace where the preset will be stored.
- If the preset will be triggered through a webhook, the external CICD tool must be configured properly.
Quick-Start
- Preset Cards: Each card shows the preset name, creator, created and modified dates, and the associated test set.
- Webhook and Automation: Users can copy the webhook URL or curl command to trigger the preset from external CICD tools.
- Preset Actions: Users can create a copy of the preset or delete it.
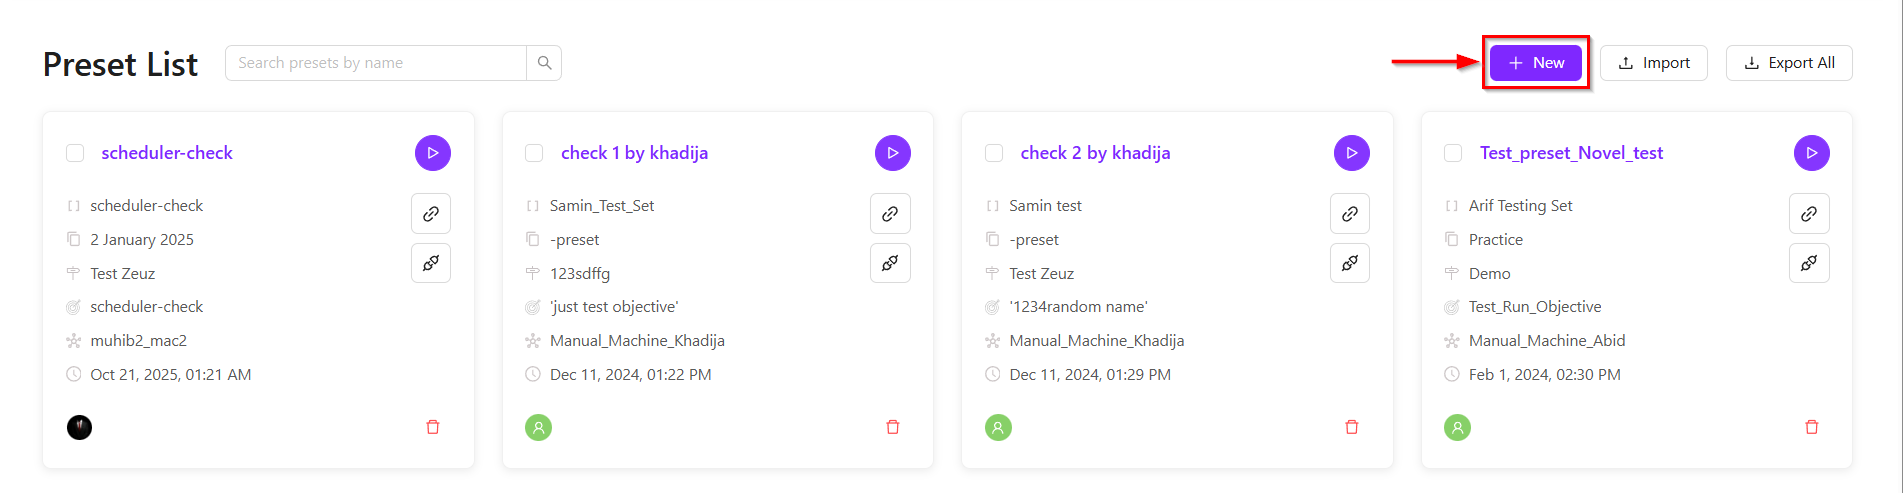
- Global Actions (Top Right): Options are available to create a new preset, import or export presets, and select all presets for bulk actions.
Features
Create new preset
- Click the + New button.
- It will redirect to the Deploy page.
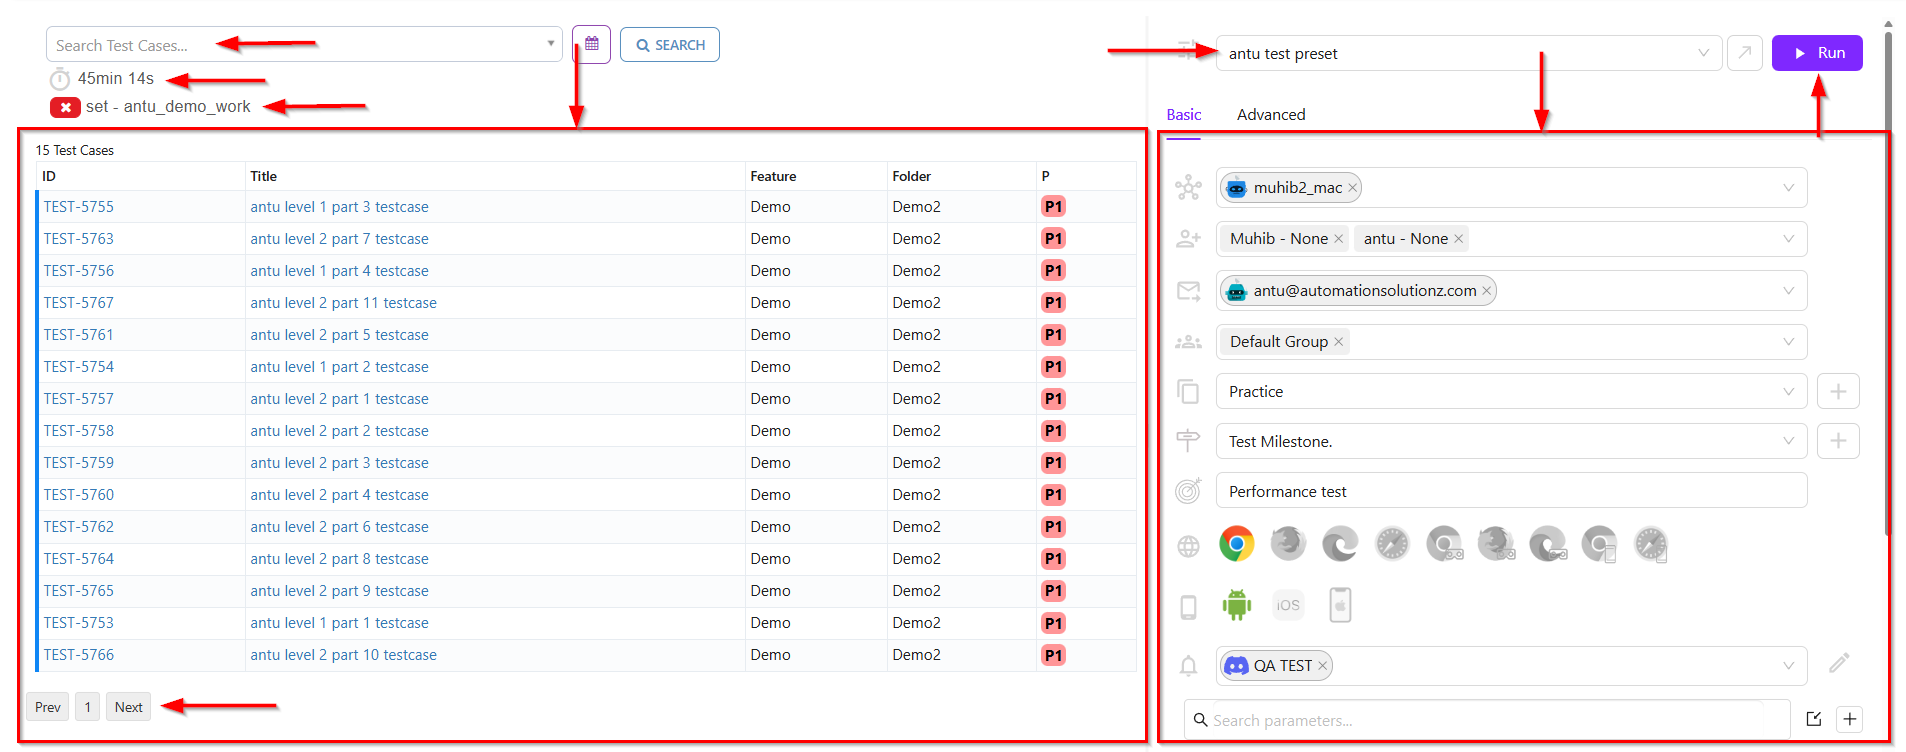
- The Deploy page displays the following information:
- Test Case Search and Overview (Left Panel):
- Search bar: Allows searching for specific test cases by task, set, test case, linked_step, createdby, folder, onlyfeature, related_req, label, automatability, step, test case version, test step, requirement, customtag, bug, title, priority, modifiedby, status, feature, runid, related_test, onlyfolder, related_ticket.
- Execution timer: Shows total runtime (e.g., 45min 14s).
- Test Case Table:
- ID: Unique identifier for each test case (e.g., TEST-5755).
- Title: Name of the test case (e.g., antu level 1 part 3 testcase).
- Feature: The feature under test (e.g., Demo for all cases in this set).
- Folder: The folder where the test case is stored (e.g., Demo2).
- P: Priority of test case (e.g., P1 indicates highest priority).
- Pagination: Navigate with Prev, Next buttons.
- Preset Execution Panel (Right Panel):
- Preset selection: Dropdown menu showing the selected preset (e.g., antu test preset).
- Tabs: Basic as the default option and Advanced for additional configurations.
- Execution parameters (each row represents a different execution setting):
- Node: The execution node selected for this run is muhib2_mac.
- Testers: Here, antu - None and Muhib - None are selected as the testers.
- Emails: Execution updates will be sent to antu@automationsolutionz.com.
- Groups: The Default Group is selected, which is used to categorize and organize executions.
- Version: The field shows Practice, meaning the execution will run against the Practice version.
- Milestone: The milestone selection dropdown is available, indicating that the execution will run against the selected Test Milestone.
- Objective: The Performance test describes the purpose of the execution.
- Browser: Multiple browser icons are available, and Chrome is selected.
- Mobile: Android is selected, and iOS and iOS Simulator are disabled.
- External Service: QA TEST is selected as the external service for notifications and communication.
- Parameter Search: Field to search additional parameters for execution.
- Run button: The purple button in the top-right corner is used to start executing the selected preset.
- Test Case Search and Overview (Left Panel):
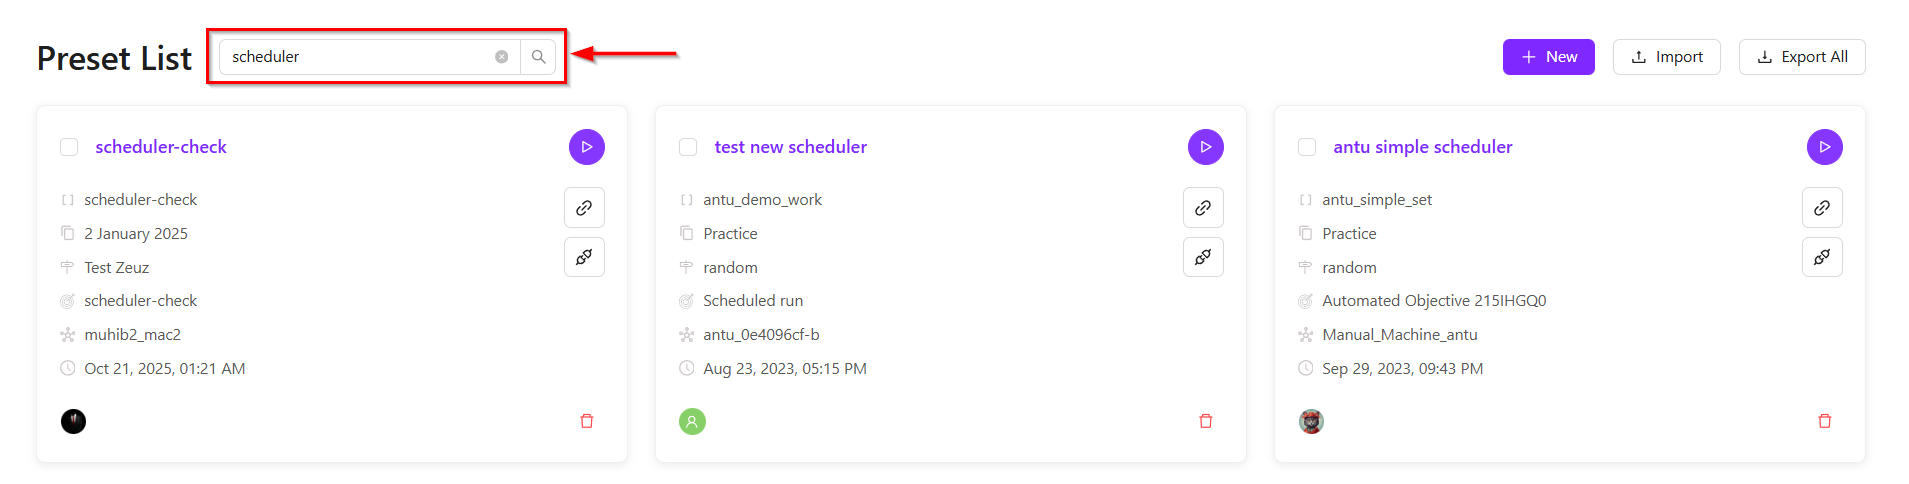
Search presets
- The Search Bar is located at the top of the "Preset List" page.
- Here, presets can be searched by their name or title.
Import preset
- Click the Import button on the "Preset List" page.
- After clicking the Import button, the file will be uploaded directly.
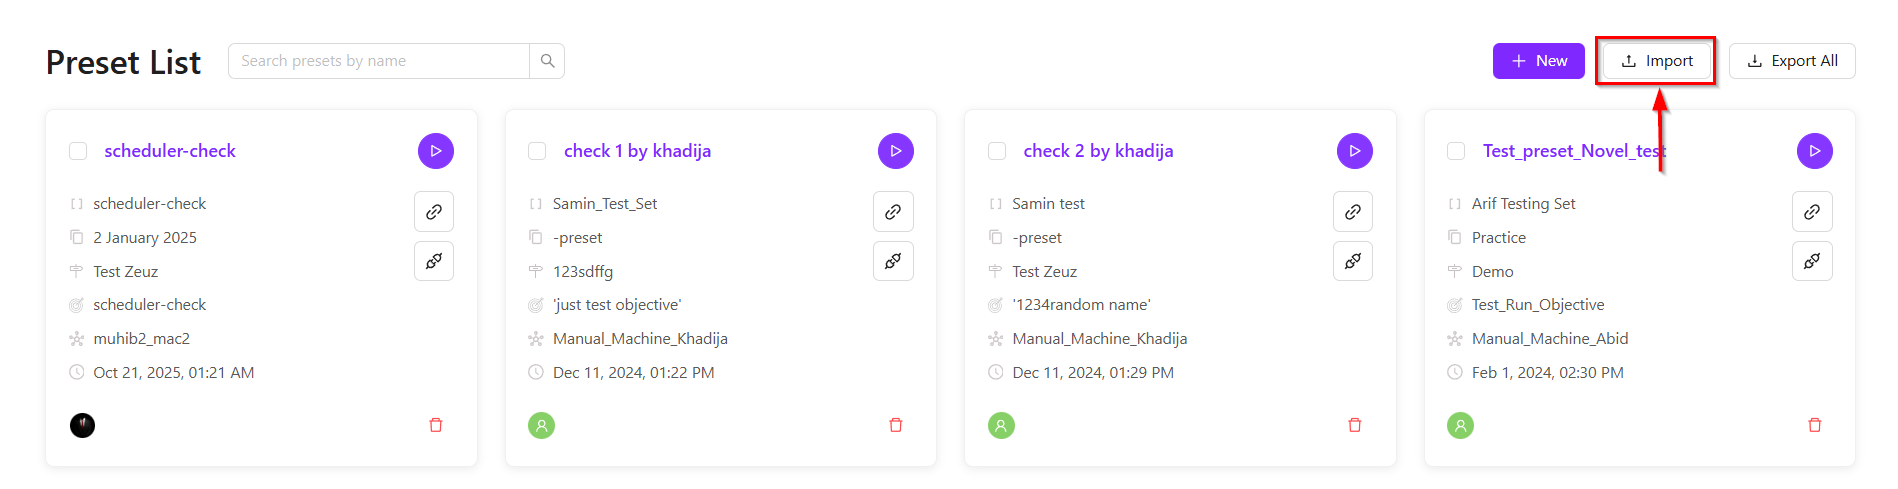
If the preset fails to import, an error message will appear.
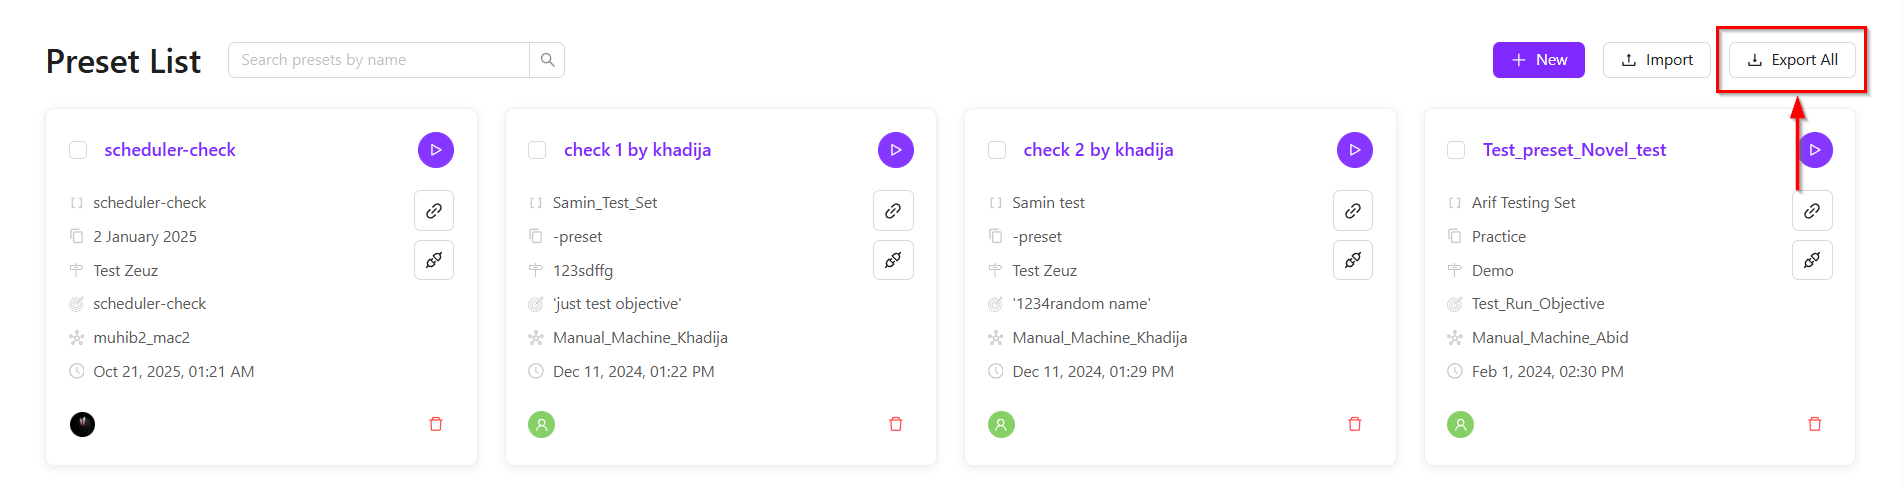
Export all presets
- By clicking the Export All button available on the "Preset List" page, all presets will be exported.
- Selected presets can also be exported by selecting the checkboxes for the required presets.
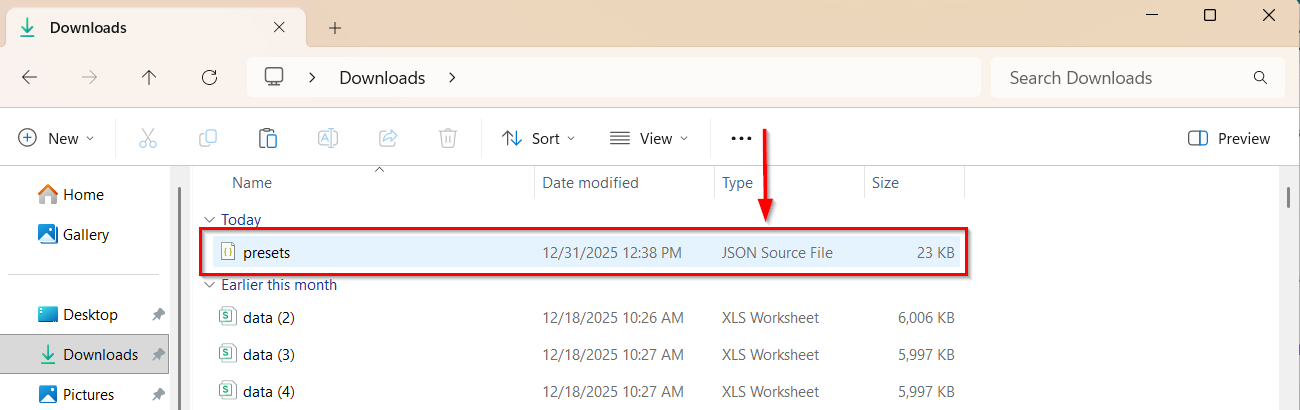
- The preset will be downloaded in JSON format and will appear in the Downloads folder.

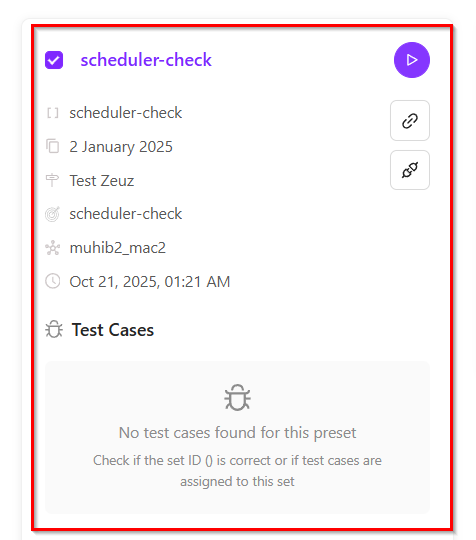
Preset card details
- The preset card on the "Preset" page presents essential information and available actions related to that specific preset.
- The explanation of the elements available in the preset card is given below:
- Preset Title: The top of the card shows the name of the preset, for example: scheduler-check.
- Preset Info: It displays the audit details of a preset card. This section provides basic information about the preset. The information is provided below:
- Test Set: It indicates that this preset corresponds to the test set named scheduler-check.
- Version: The date, such as 2 January 2025, represents the version of the selected item.
- Milestone: It indicates that the given preset is stored under the milestone named Test ZeuZ.
- Objective: It refers to the specific purpose or intended outcome that the preset is designed to achieve such as, scheduler-check.
- Nodes: It shows a saved test configuration where muhib2_mac2 is assigned as the target node or environment for automated or scheduled testing.
- Created: It refers to the date and time when the preset was originally created or saved in the system such as, Oct 21, 2025, 01:21 AM.
- Deploy: It means activating a saved preset so its predefined configurations or settings are applied automatically.
- Copy webhook URL: Copies the webhook link associated with the preset.
- Copy curl command: Copies a ready-to-use curl command for triggering the preset externally.
- Delete: Removes the preset.
- Test Cases: It refers to a predefined set of testing instructions or scenarios linked to a particular preset.
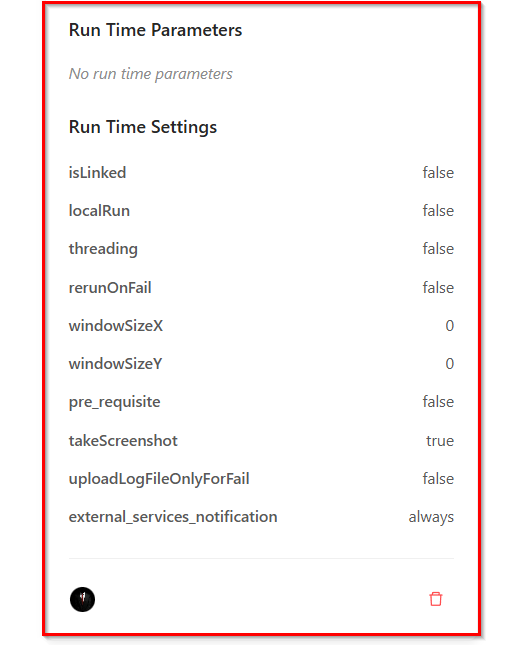
- Run Time Parameters: It refers to configurable values that can be set or adjusted during the execution of a preset without modifying the preset itself.
- Run Time Settings: It determines how a preset is executed without changing its original setup.
FAQs / Troubleshooting
FAQs
How do I apply a preset?
Presets can be applied by selecting them during a test execution, deployment, or task configuration.
Can multiple presets be applied at once?
Yes, presets can often be applied in multiple if the platform supports multi-selection.
Can I delete a preset once it is created?
Yes, a preset can be deleted after creation, provided it is not currently in use and is not restricted by permissions.
Can I copy the webhook URL and curl command?
Yes, you can copy the webhook URL and curl command for a preset. These options allows you to quickly use the preset in external systems or automate tasks by sending requests without manually configuring them each time.
Troubleshooting
- Preset not appearing in the list: Ensure it was saved in the correct workspace or project, and check filters or search criteria.
- Changes to a preset not reflecting: Verify that the preset was saved after editing and that the execution environment has the latest version.
- Unable to delete a preset: Check if the preset is currently in use by an ongoing execution or shared with restricted permissions.
- Error when applying a preset: Confirm all required fields in the preset are valid and compatible with the current environment or version.