Intelligent Project Management & Capacity Planning Framework
ZeuZ represents a fundamental shift from traditional project management tools to an AI-native delivery operating system. Unlike conventional platforms that simply track work, ZeuZ actively participates in the delivery process by breaking down complex initiatives, forecasting outcomes with precision, and intelligently orchestrating work across PODs.
This document defines ZeuZ’s complete terminology framework, AI capabilities, and delivery methodology for external stakeholders, clients, and partners.
Why it matters / Use Cases:
- Intelligent Work Allocation: Assigns tasks efficiently across PODs based on skills, priority, and available capacity.
- Accurate Capacity Planning: Helps organizations understand team availability and plan workloads realistically.
- Improved Delivery Forecasting: Predicts timelines, milestones, and likely outcomes with greater precision.
- Better Project Visibility: Provides clear insight into progress, blockers, dependencies, and team performance.
- Faster Decision-Making: Uses data-driven insights to support quick and informed management decisions.
- Risk and Bottleneck Detection: Identifies delays, overloaded resources, and workflow issues early.
- Cross-Team Coordination: Reduces idle time and ensures effective use of available talent.
- Optimized Resource Utilization: Reduces idle time and ensures effective use of available talent.
- Scalable Project Execution: Supports growing teams and multiple parallel projects efficiently.
- Higher Delivery Success Rate: Increases the likelihood of completing initiatives on time and within scope.
Prerequisites
- Access to ZeuZ Server with permissions for Project → View → POD → Milestone Planning → Kanban.
Features
ZeuZ POD Structure
- A POD is ZeuZ’s fundamental team unit—an autonomous, cross-functional delivery cell typically consisting of multiple developer / QA with complementary skills. PODs are designed to own complete features or services end-to-end.
- A POD has the following characteristics:
- Self-organizing with AI-assisted guidance
- Shared delivery accountability
- Complementary skill matrices
- Collective ownership of outcomes.
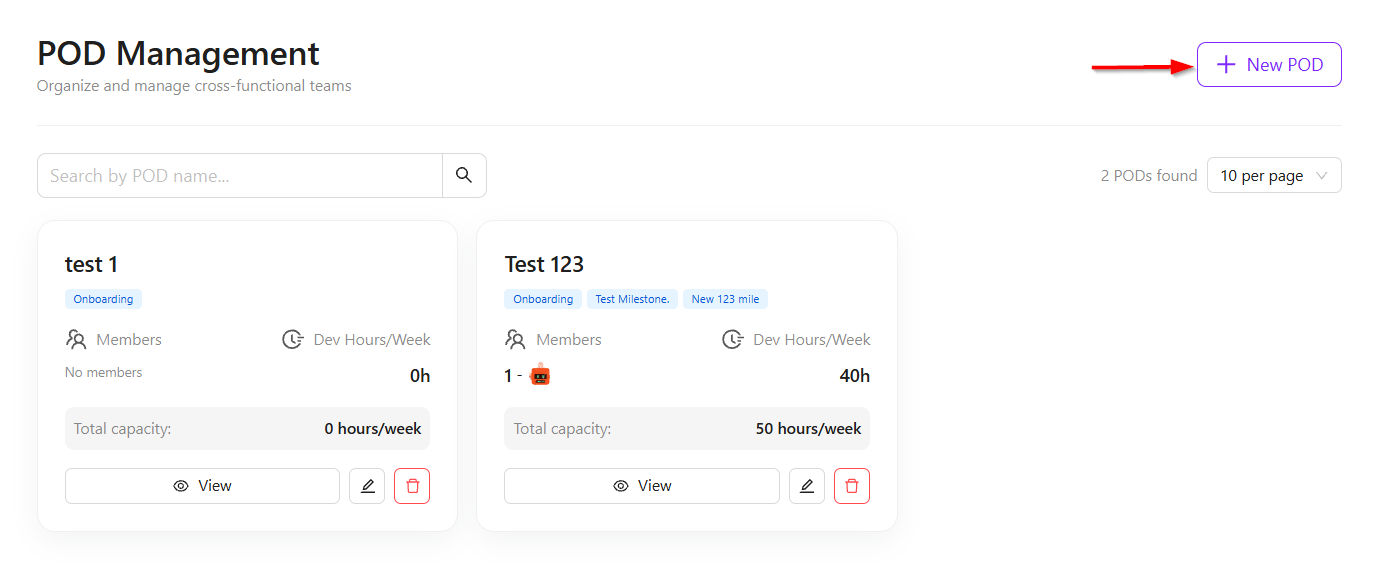
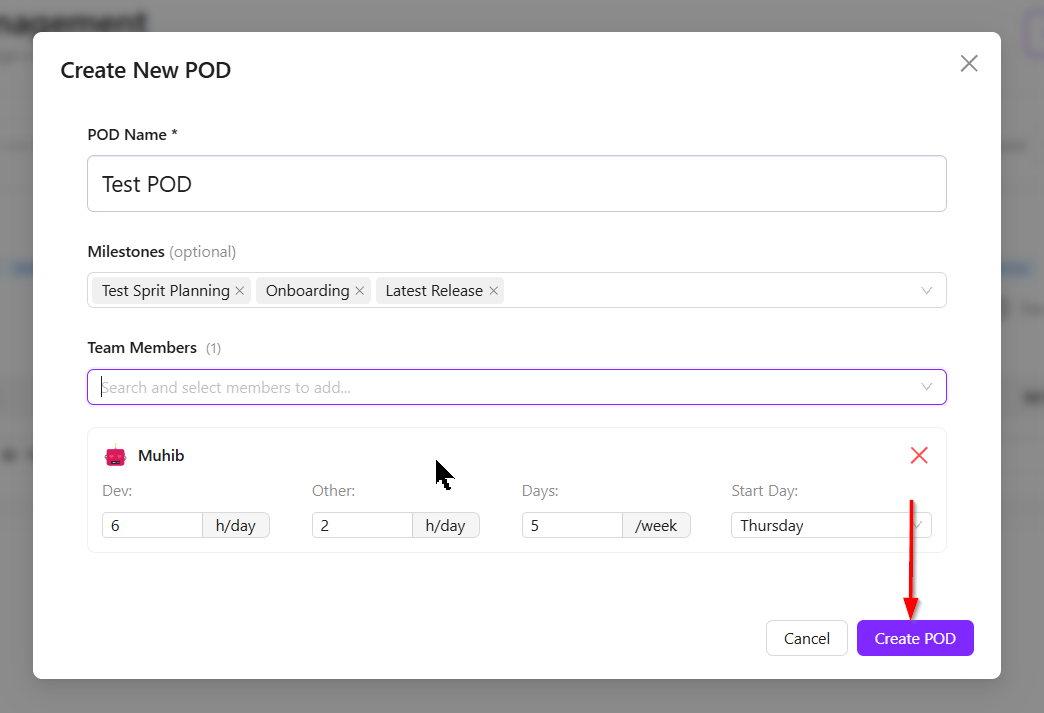
- Click the + New POD button to create a new POD.
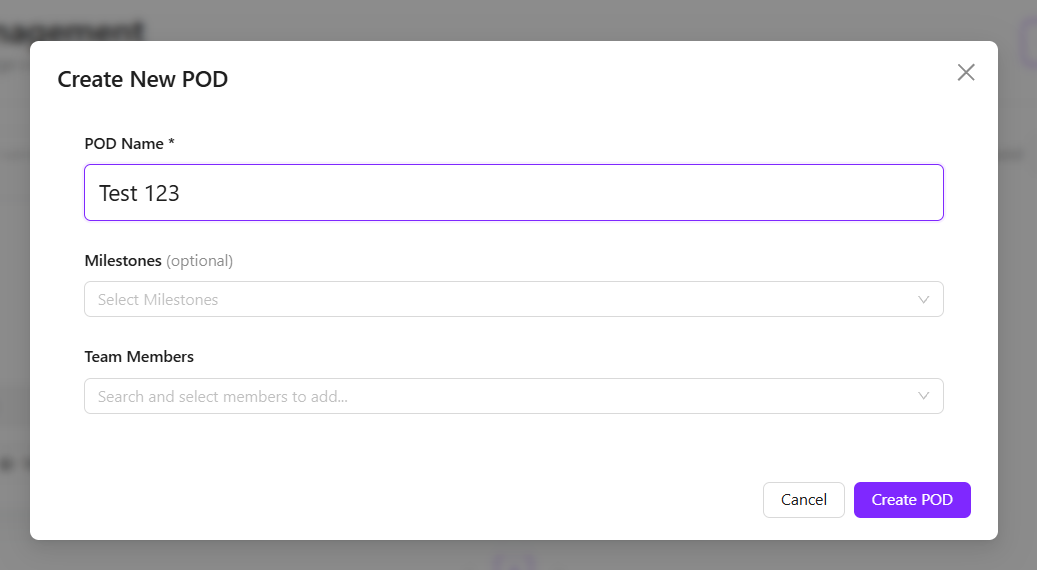
- When creating a new POD, a name can be assigned to it, for example, Test 123. An optional parameter allows the addition of milestones to define which milestone the POD will work on. Any available milestone can be selected if required.
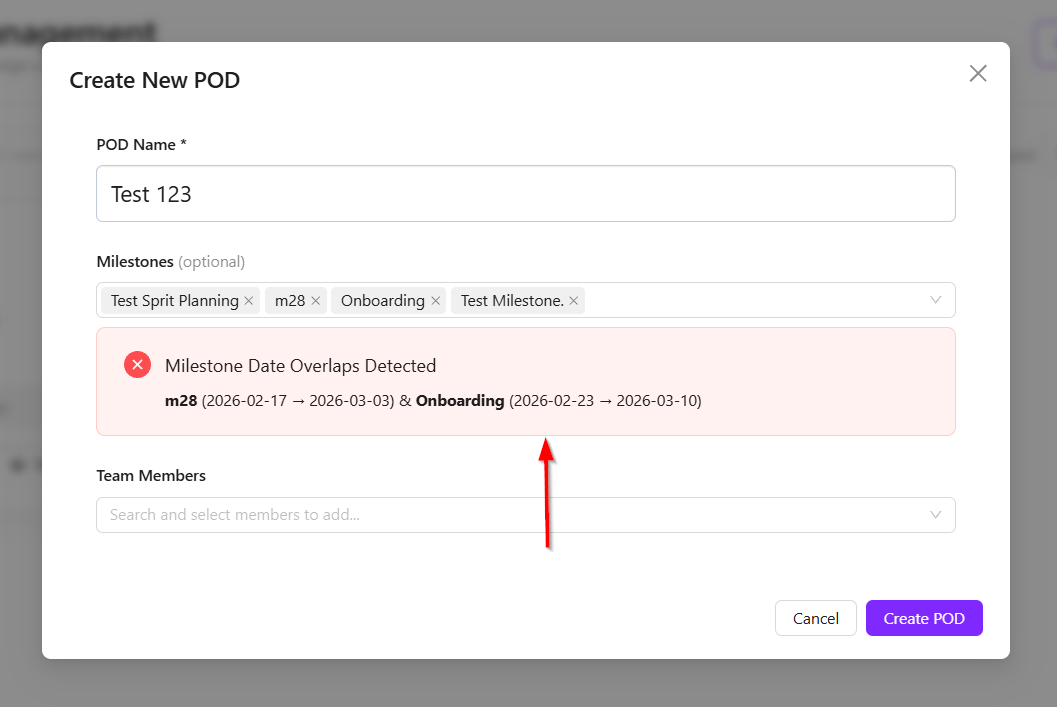
- There are certain validations in place for milestones. For example, overlapping milestones cannot be added together. If m28 overlaps with Test Sprit Planning, only one of them can be selected. In that case, either m28 or Test Sprit Planning must be chosen.
- After selecting milestones, members can be added to the POD based on who will be part of the team. For example, Muhib can be added as a member. His development time may be set to 6 hours, and this value can be adjusted as needed. The remaining 2 hours may be allocated for meetings or other tasks.
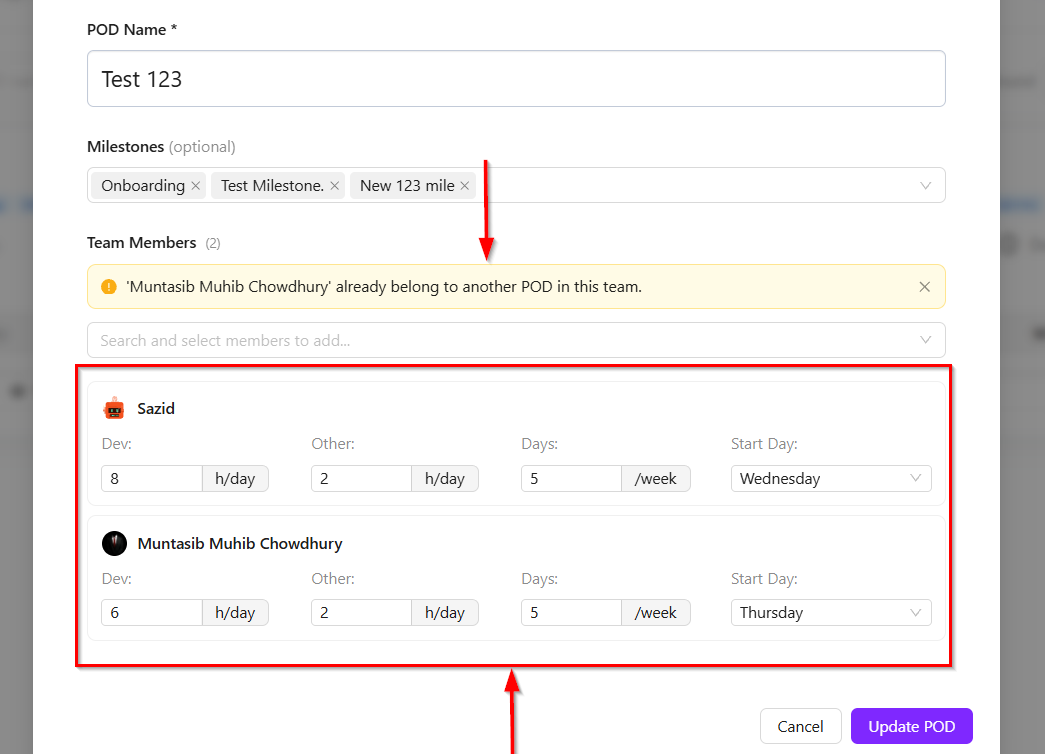
- The POD configuration mainly defines how many hours each user will work, how many working days are available, and when the work will start. For example, it can show that a member will work 8 hours per day including development and other tasks, work 5 days a week, or work fewer days due to leave or sickness. It also allows defining whether the member will start work from Monday, Tuesday, or another selected day.
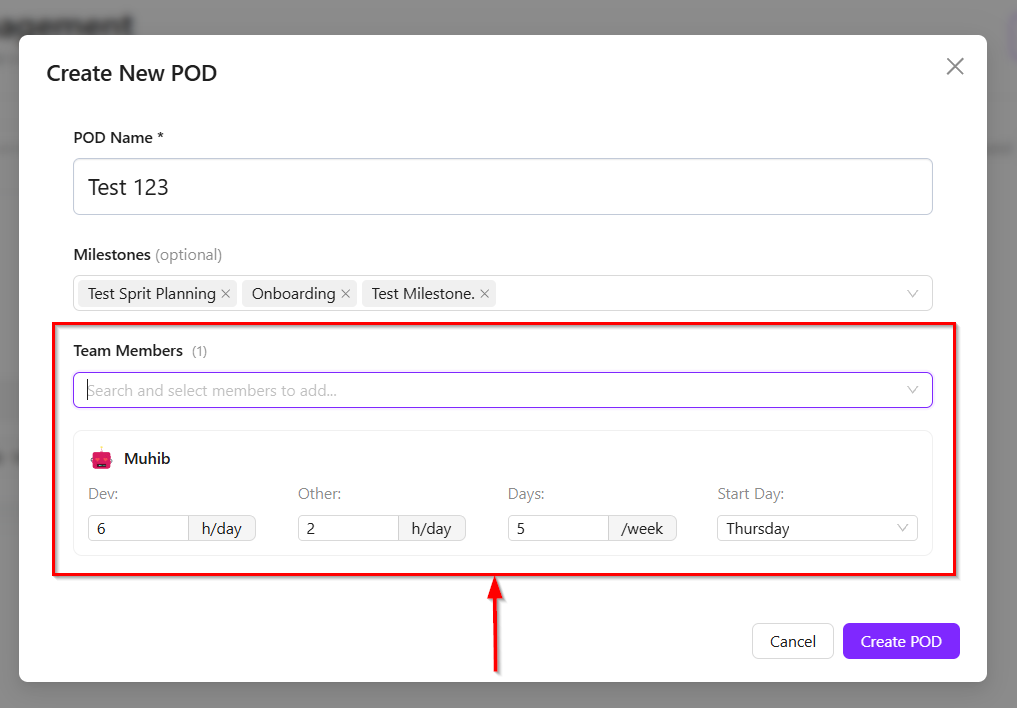
- In this system, multiple users can be added, and for each user, individual fields can be defined or configured as required. After providing all the necessary information, the pod can be created.
- A validation rule is also applied where a user already belonging to a pod team cannot be added to another pod. In other words, for a given project and team ID, a user can be a member of only one pod. For example, if five pods are created, a user (e.g., Muntasib Muhib Chowdhury) can belong to only one of those pods within the same project and team context.
- Milestones can be selected and assigned to any pod. However, the validation rule for milestones ensures that overlapping milestones are not allowed.
- Once all the required information is properly filled and validated, the POD creation process is completed successfully by clicking the Create Pod button.
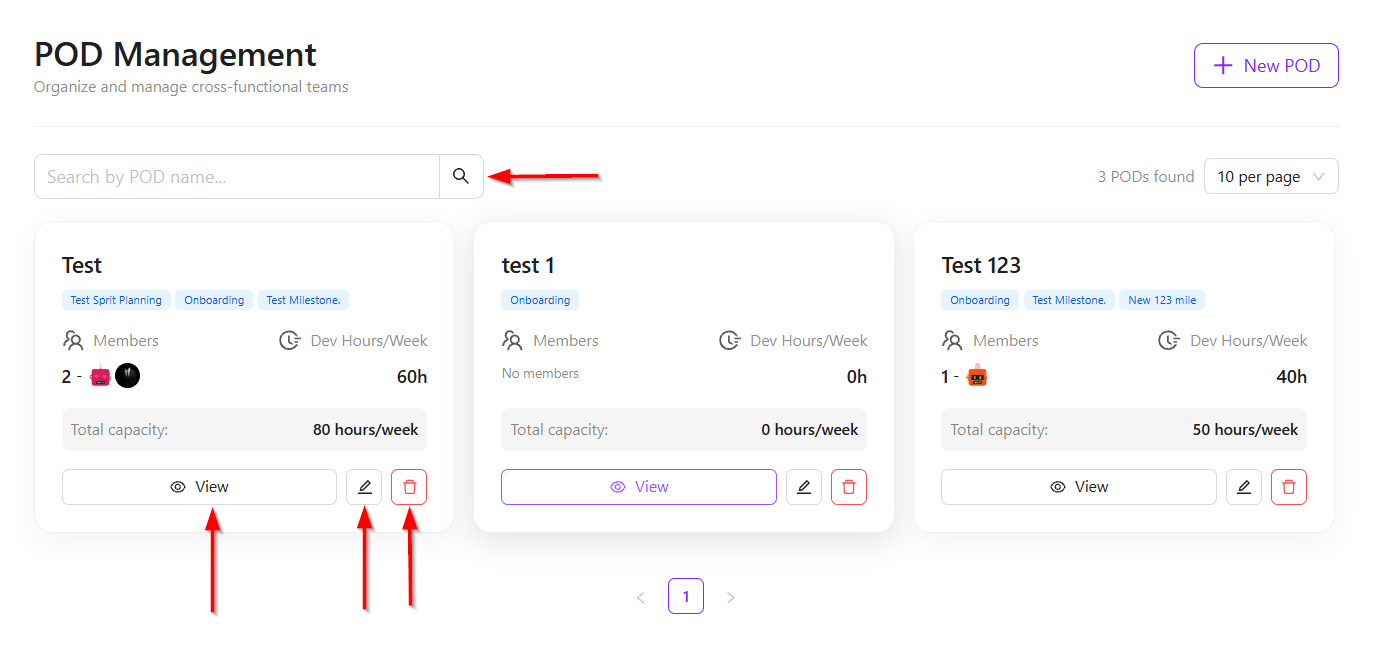
- If you need to edit an existing POD, click the Edit button. To view the complete information of a POD, click the View button to display its details. If a POD needs to be deleted, click the Delete button.
- To search for a POD, click the Search bar at the top and enter the POD name.
Milestone Planning
- In milestone planning, multiple activities can be performed to organize and distribute work effectively across different milestones.
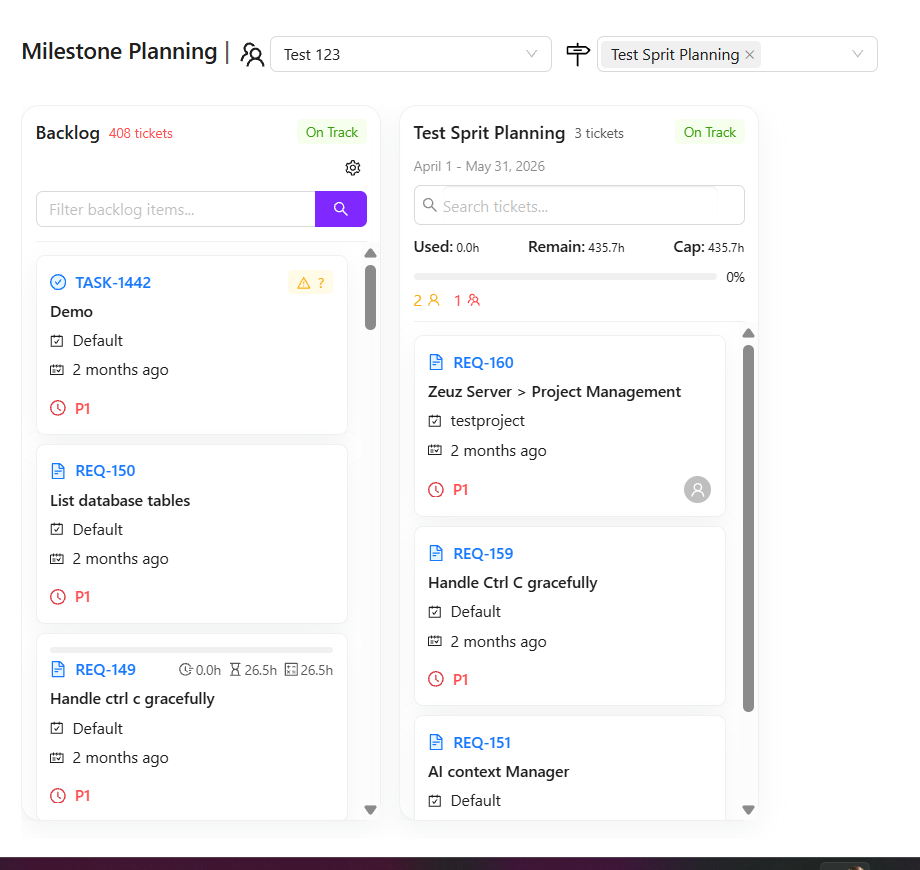
- During milestone planning, two main fields are available. First, the existing pods can be selected. Second, the milestones on which work will be performed can also be selected. For example, a new milestone named Test Sprit Planning can be created to manage specific tasks.

- In this section, the backlog can be either hidden or displayed depending on the requirement. The backlog contains all available tasks, including both completed and pending items. Additionally, upcoming milestones, such as one starting tomorrow, can also be viewed. For instance, if an existing milestone like m28 is currently in progress, work can still be planned for the upcoming milestone.
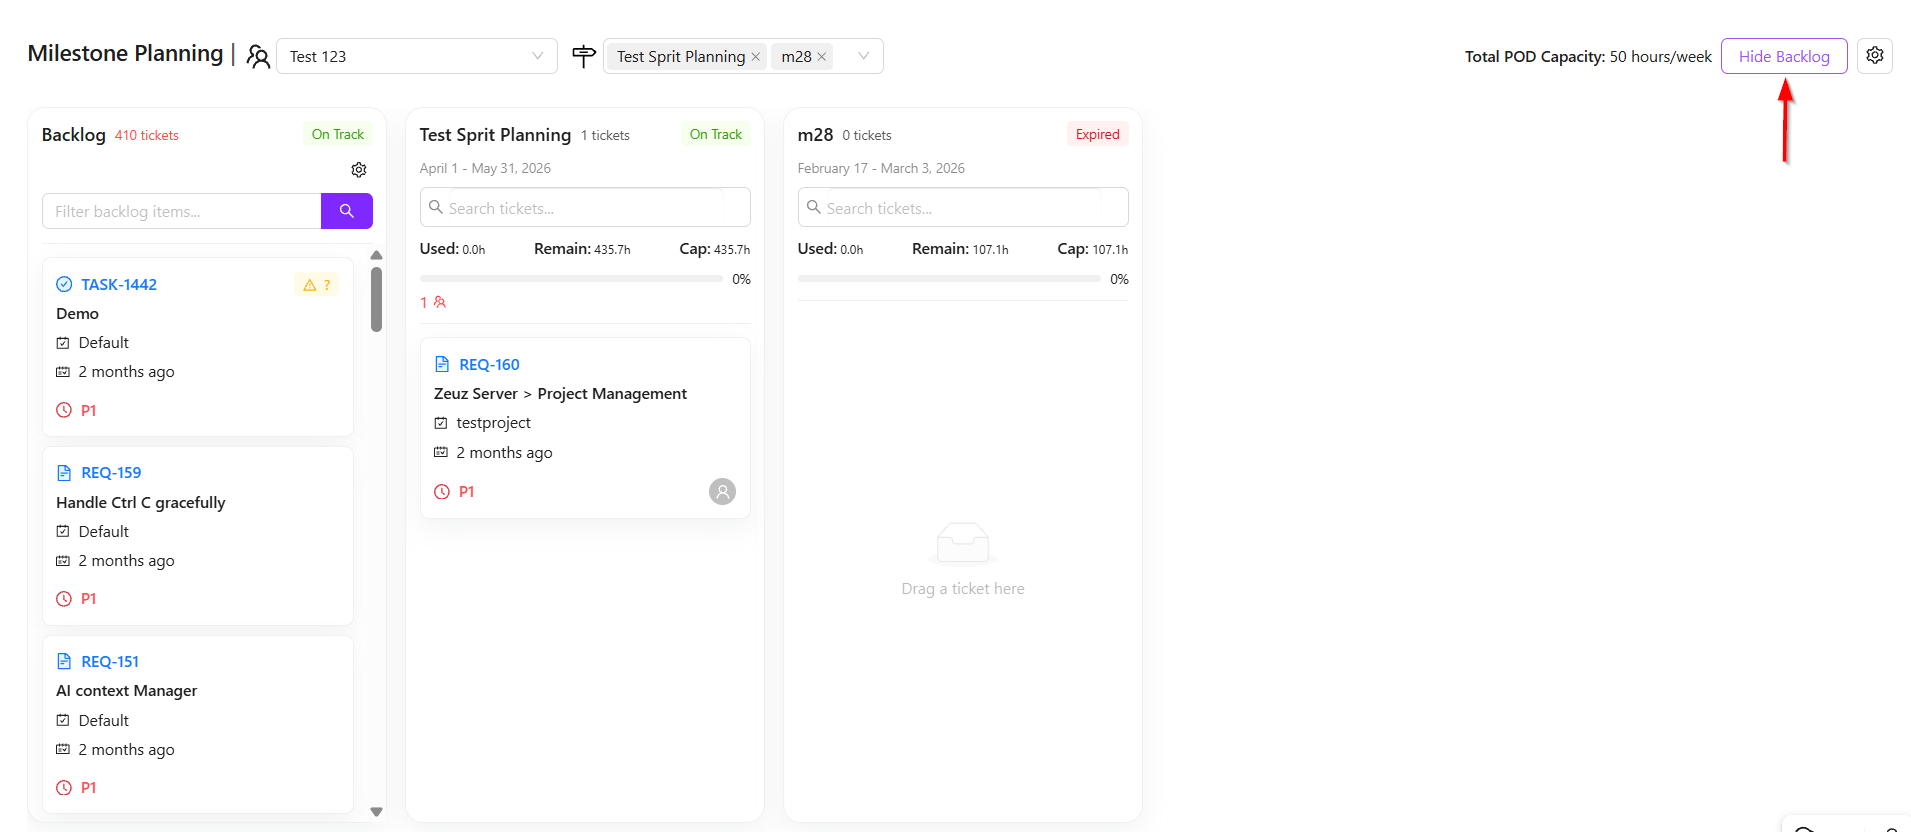
- Tasks can be added to the current or upcoming milestone based on priority. Important tasks from the backlog can be selected and moved into a new milestone using a simple drag-and-drop functionality. Similarly, if a task was previously assigned to an earlier milestone but remains incomplete, it can also be moved to the new milestone.
- This process allows tasks to be distributed effectively across milestones. Once all tasks are moved into the Test Sprit Planning milestone, an overall view of the milestone can be reviewed. For this, navigation to the Kanban page is required, where the complete status and flow of tasks can be analyzed.
Sprint view
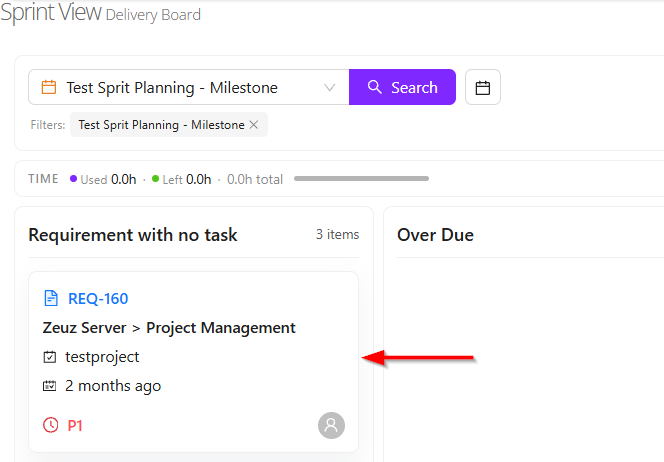
- On the Kanban page, the milestone that was planned along with the tasks added to it can be opened and managed easily. For example, if a milestone named Test Sprit Planning was created, it can be searched directly from the Kanban page.
- Once selected, all tasks under that milestone will be displayed across different columns. There are two main viewing concepts available in the column view.
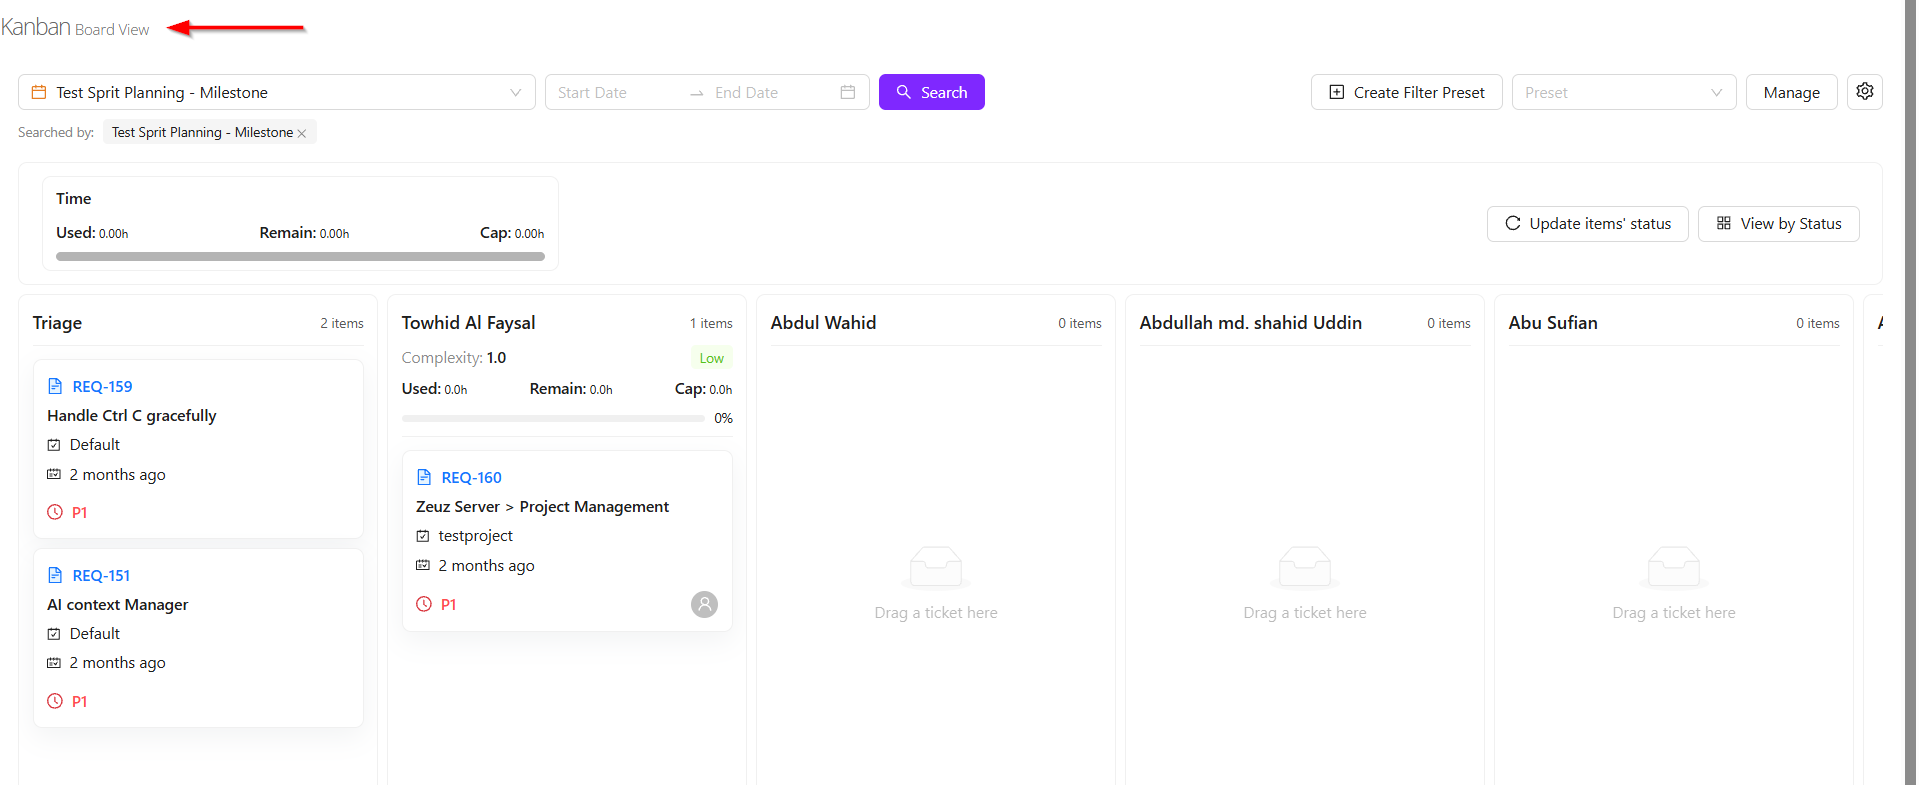
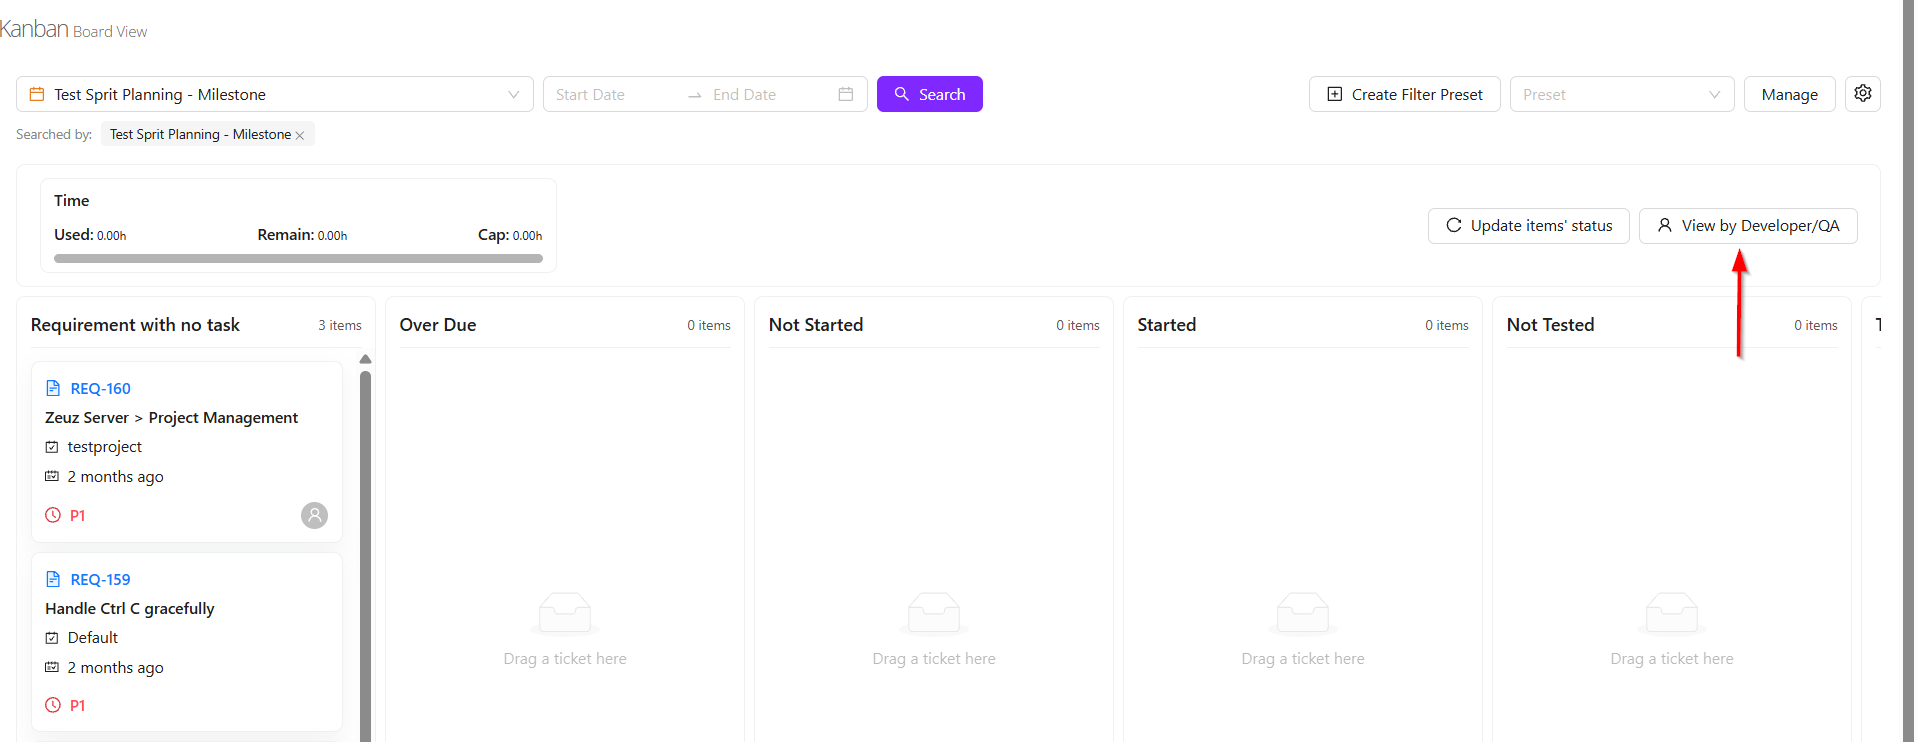
- The first view is the Status View, where tasks are distributed based on their current progress. This allows users to see whether tasks are overdue, not started, started, or not tested.
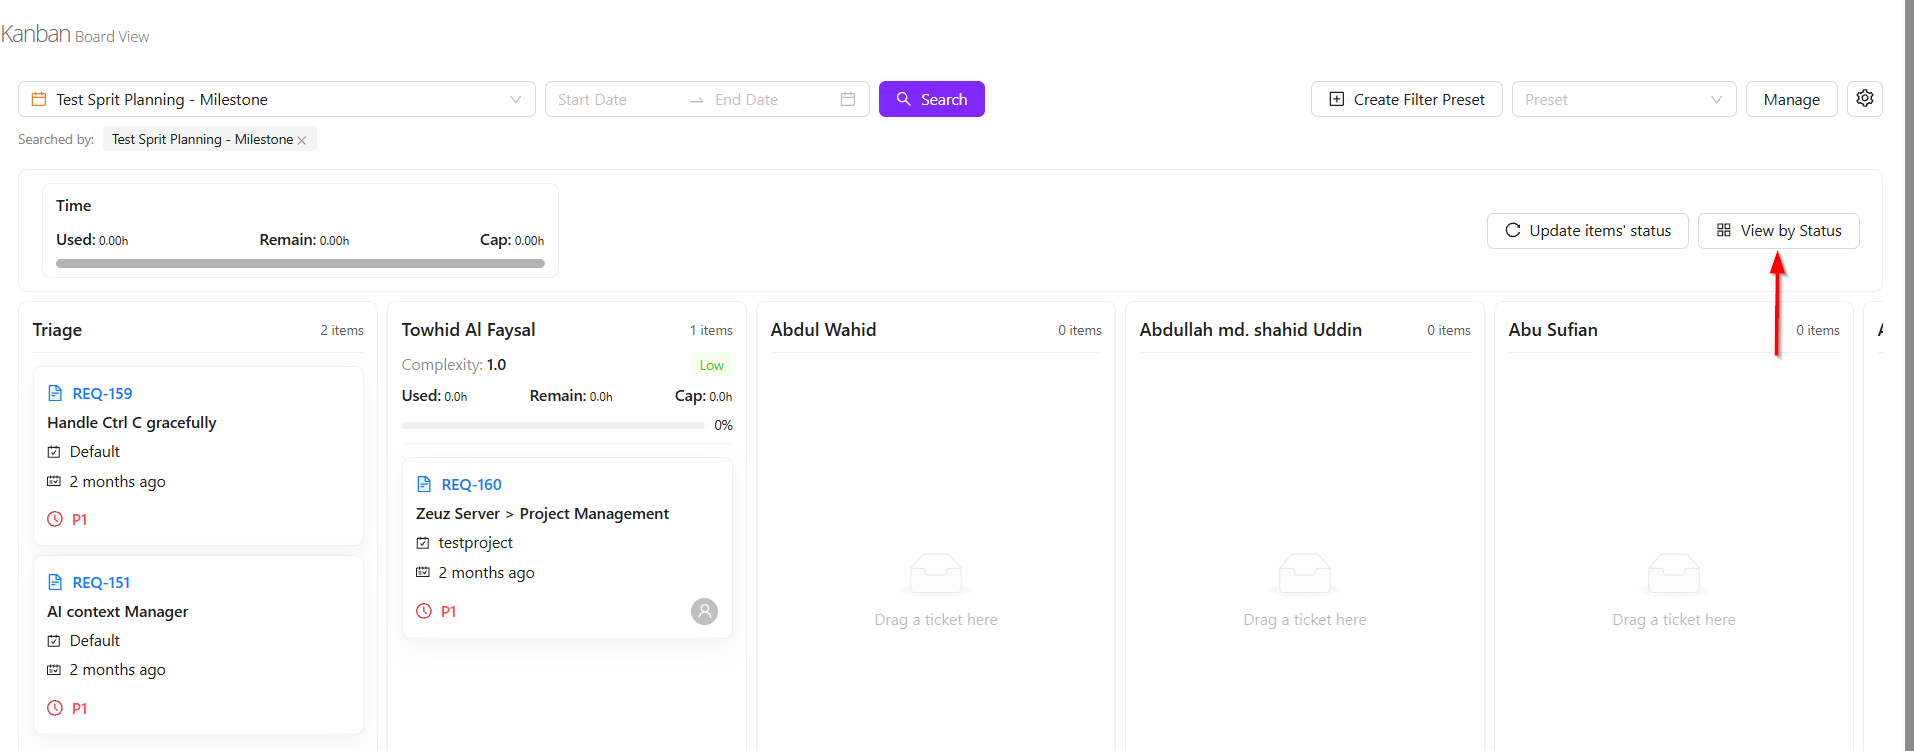
- The second view is the Developer/QA View, where tasks are grouped based on the assigned developer or QA member. For example, several tasks may be assigned to Towhid Al Foysal, while other team members may have none. This provides a clear workload distribution view.
- Additional customization features are also available. Users can resize the task cards into large, medium, or small views according to preference.

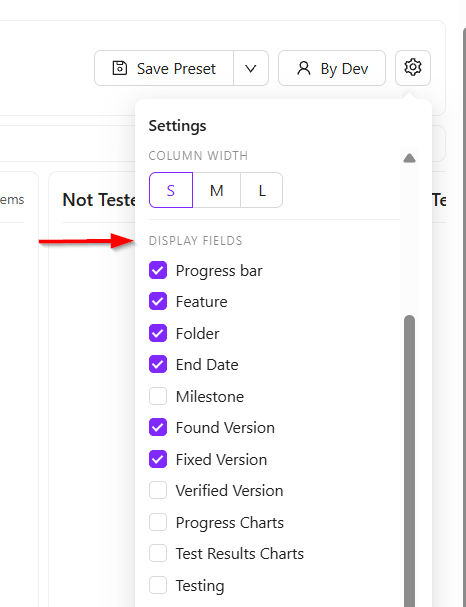
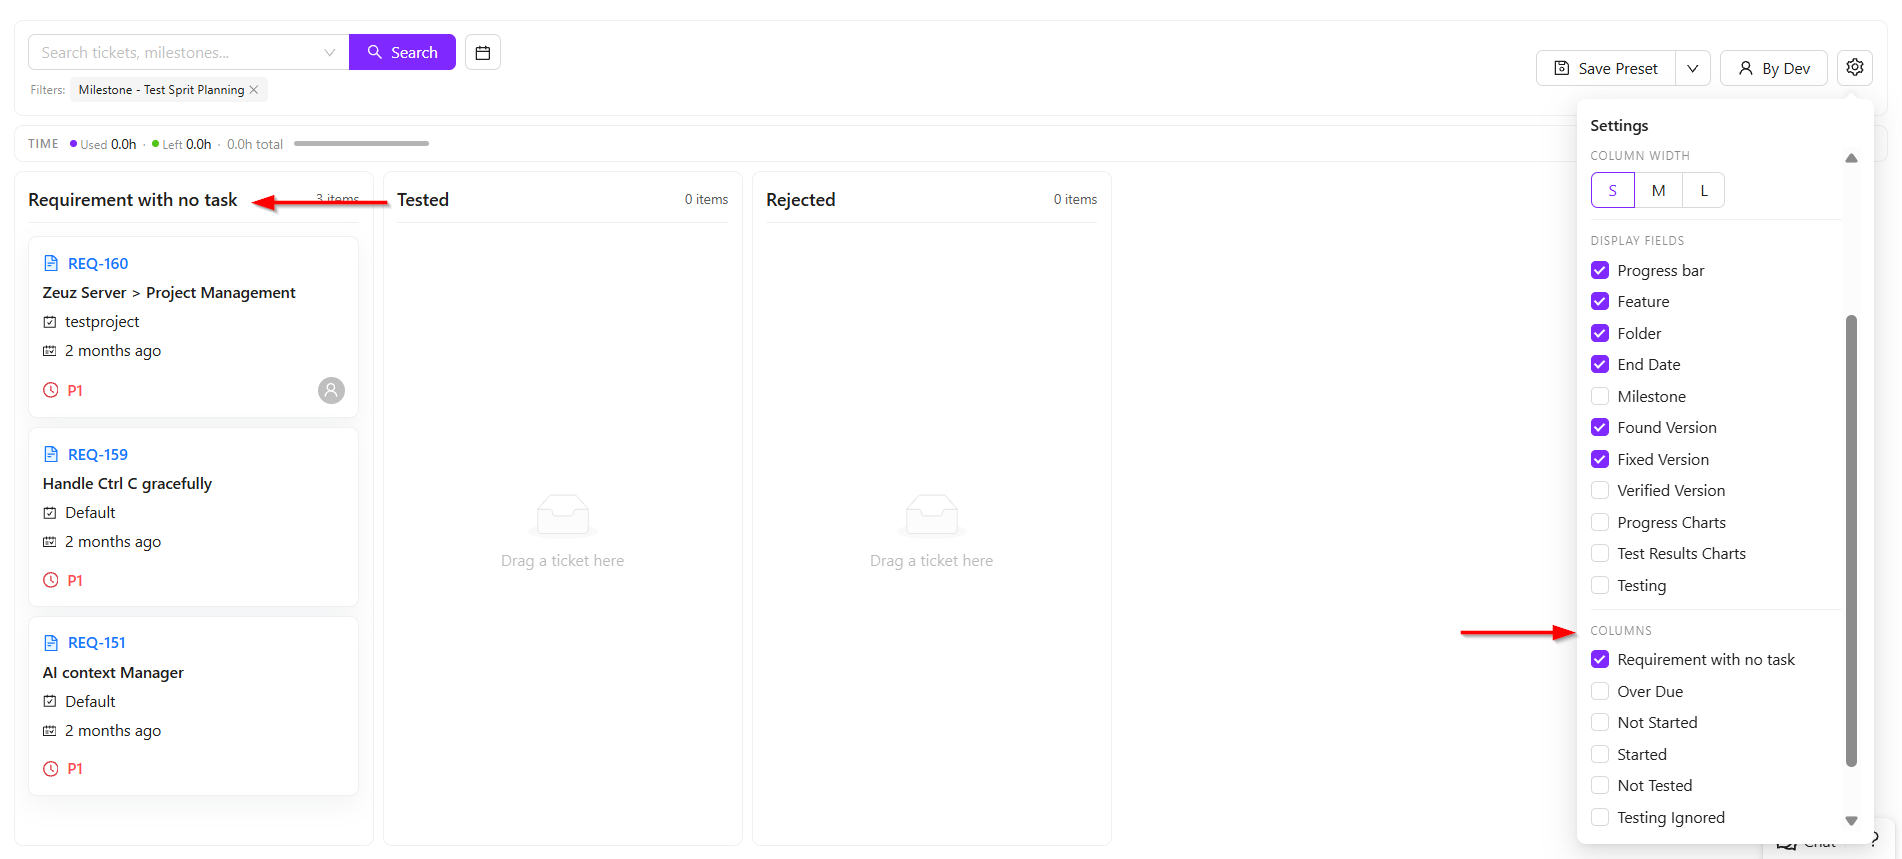
- The Display Fields option allows users to control which information is shown on each task card. For example, the title, feature name, and due date may currently be visible. If milestone information is also needed, it can be added simply by selecting the milestone checkbox. Other fields such as found version or fixed version can also be enabled as required.
- Users can also control which status columns are visible. For example, if only the Requirement with no task tasks need to be viewed, all other columns can be unchecked, and only the selected column will remain visible.
Card view
- When a card is clicked, it expands to display additional details. After expansion, it also shows whether any linked items are associated with that card.
- These linked items help users understand the task dependencies and overall progress. The progress bar available on the card provides a visual indication of the current completion status.
- For each requirement, most of the important information is presented on the card. While not every detail may be shown directly, approximately 90% of the relevant information is displayed through available filters and view options.
New concept of Sprint view
- Two new concepts have been introduced in the Sprint view system: Complexity and Risk.
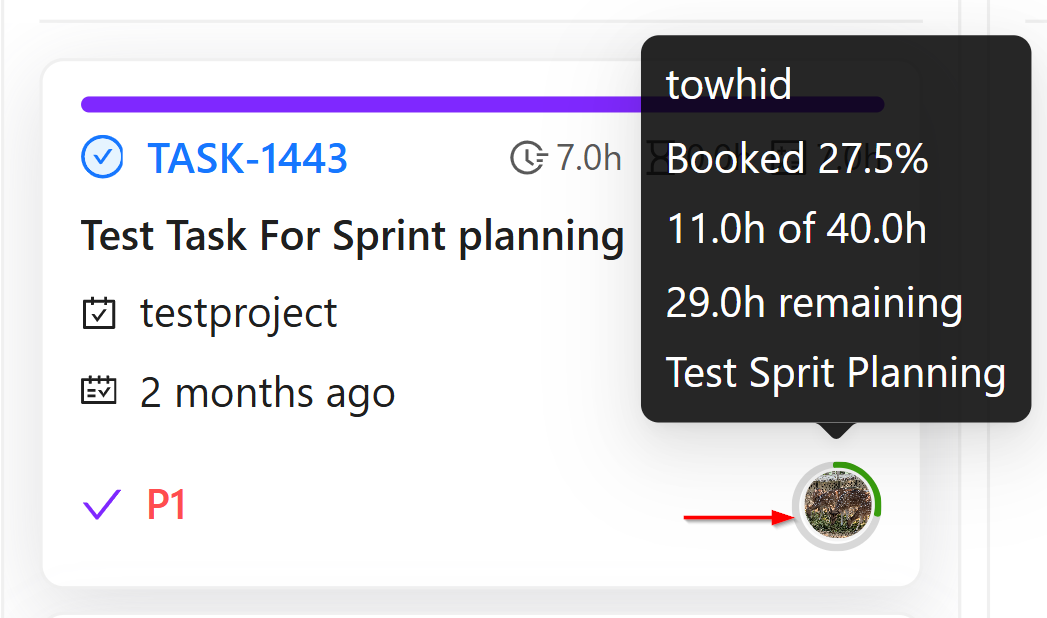
- The Risk concept is based on the working time allocated to each user. For every pod member, estimated working hours are assigned for development, testing, or other activities. Based on this allocated time, the system calculates the individual risk level for each user, which is displayed through the user’s profile picture.
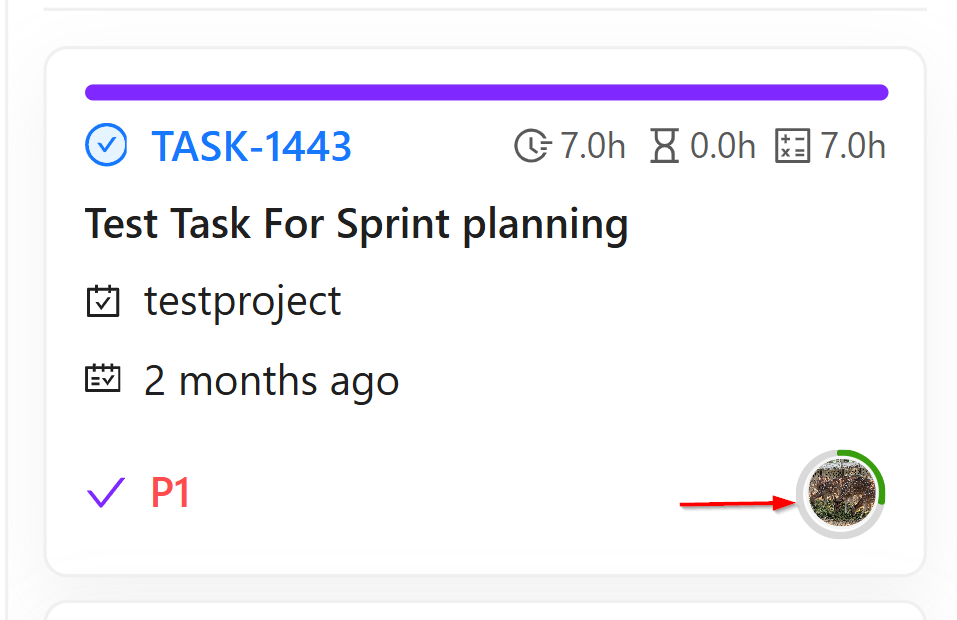
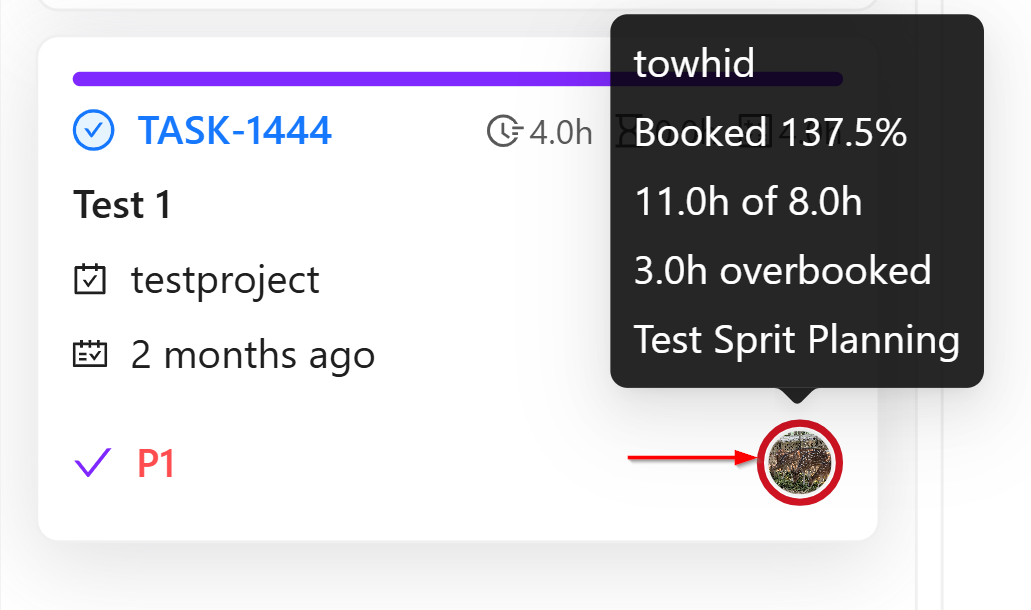
- When the profile picture is hovered over, detailed information appears. For example, if it shows Towhid Al Foysal booked 106.9%, it means the user is overbooked. If the display shows 13.9hrs of 13.0hrs, it indicates that 13 hours were allocated, but assigned tasks already require 13.9 hours. This means the user is overbooked by 0.9 hours, which is why the indicator appears in red.
- The risk levels are calculated as follows:
- Green (Below 70%): The user has enough available capacity and can take more tasks. Example: 10 hours allocated, only 7 hours assigned.
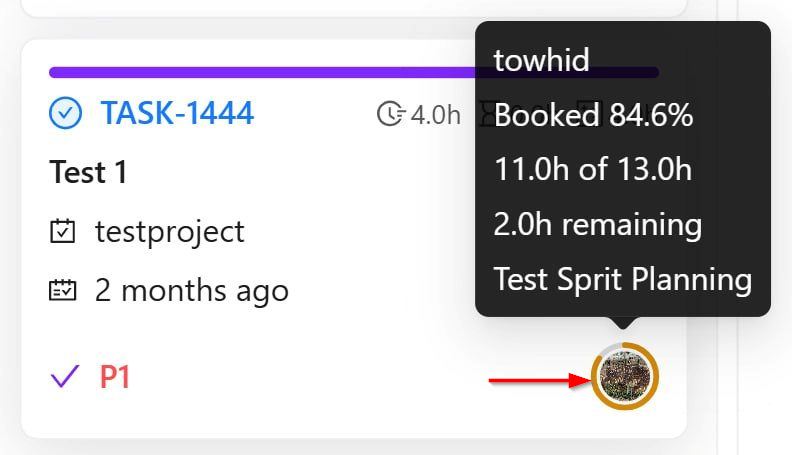
- Orange (Between 70% and 90%): The user is at medium risk. Additional tasks can still be assigned, but heavy or large tasks should be avoided.
- Red (Above 90%): The user is highly utilized or overloaded. Taking new tasks may not be practical.
- These colored indicators are shown on the bottom-right side of the task card to help quickly understand each developer’s workload. The calculation is based on the time allocated in the pod compared with the estimated hours of assigned tasks.
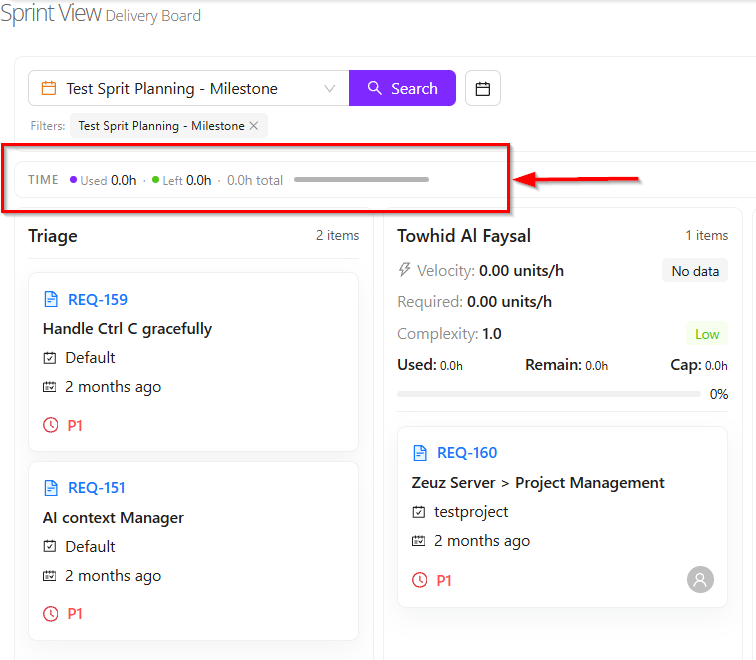
- Another concept is Global Risk. This represents the overall average risk level of all users within a milestone. For example, in the Test Sprit Planning milestone, the system combines the allocated hours of all developers and QA members, calculates each individual risk, and then shows an average percentage.
- This global risk helps determine whether the milestone workload is balanced, overloaded, or still has available capacity. In simple terms, it provides an overview of how much work remains and whether the team’s total workload is manageable, based on the combined individual risk values.
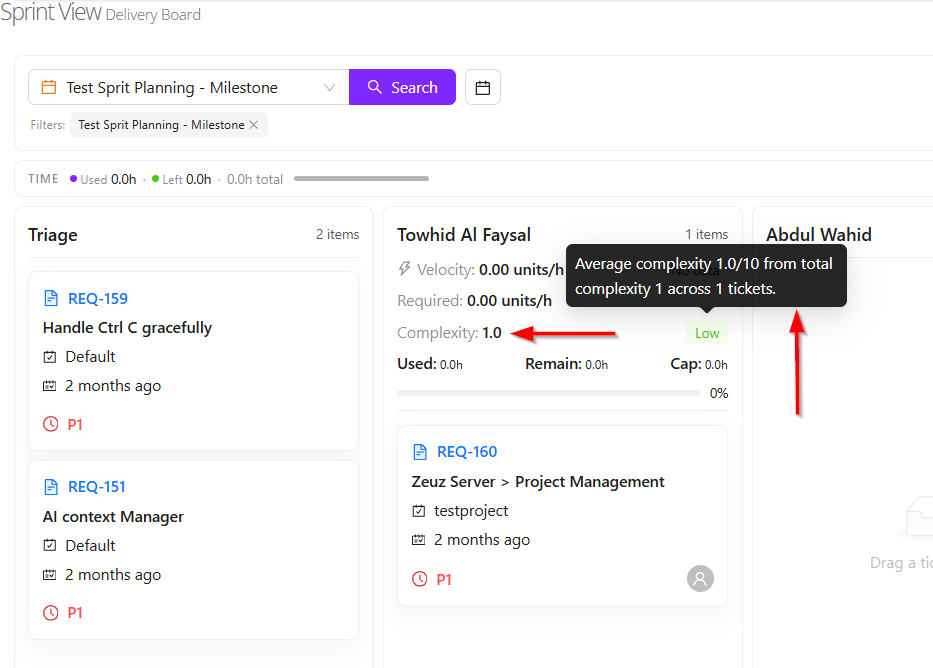
- Lastly, another important feature is Complexity.
- When a requirement is created, its complexity level can be updated. This helps measure how difficult the requirement is to complete. The complexity is rated on a scale of 1 to 10.
- For example:
- If the requirement is very easy, it may be marked as 2.
- If the requirement is very difficult and requires significant time and effort, it may be marked as 8, 9, or 10.
- In the Sprint view, when the display is changed to Status by Developer, the system shows the average complexity of the tasks assigned to each developer.
- The average complexity is categorized as follows:
- Below 6: Low complexity, meaning the developer is working on easier tasks.
- 6 to below 8: Medium complexity, meaning the developer is handling moderately difficult tasks.
- 8 and above: High complexity, meaning the developer is working on more challenging and time-consuming tasks.
Changelog
- Now fully launched! Previously in beta, this update streamlines ticket creation with auto-populated details for a faster, one-click experience. Includes Version/Milestone creation and a versatile new link component [202603]