Test Plan
A Plan is a structured execution framework linked to a specific Milestone and Version, designed to group and execute multiple presets together. Since each preset contains only a single set, a Plan enables you to organize and run several sets in a coordinated way ensuring efficient test execution, streamlined progress tracking, and strong alignment with the project's delivery goals.
Why it matters / Use Cases:
- Organized Execution: Groups multiple test sets under a single unit, making execution systematic and reducing the risk of missing tests.
- Time Management: Shows estimated execution duration, helping teams plan resources and timelines effectively.
- Alignment with Milestones and Versions: Ensures testing is directly tied to specific project milestones and software versions, supporting accurate release planning.
- Improved Reporting: Consolidates results from multiple test sets, simplifying reporting and analysis for stakeholders.
Prerequisites
- Access to ZeuZ Server with permissions for Testing → Deployments → Plan.
- Relevant test sets must already exist so that they can be added to the plan.
- Presets must be created in advance when there is a need to reuse the same group of tests across multiple plans.
- A milestone and version must be defined when the plan needs to be associated with a release.
- The execution environment must be configured and ready.
Quick-Start
- Click the search bar to find a Plan by its name.
- A plus (+) icon is available to quickly create a new plan.
- Users can view existing plans displayed as individual cards.
Features
Create a new plan
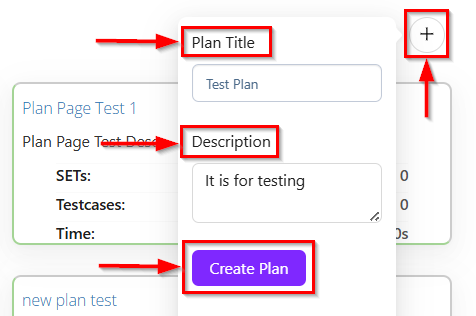
- Click the plus (+) icon to create a new plan which is located at the top-right corner.
- After clicking the plus (+) icon, a modal or pop-up window appears for creating a new plan.
- The following details need to be filled in, such as:
- Plan Title: A text field where the user enters the name of the plan (e.g., Test Plan).
- Description: A text area to provide additional details about the plan (e.g., It is for testing).
- Create Plan button: A purple button at the bottom that finalizes the creation of the plan.
- After clicking the Create Plan button, a new plan is created.
Detailed information
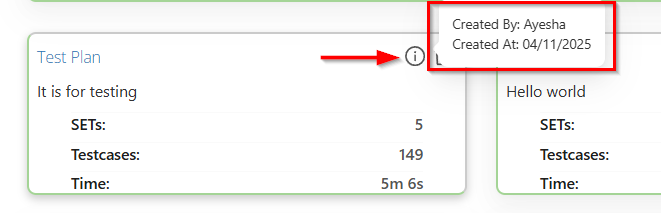
- The information (i) icon is located at the top-right corner of the plan card and is used to view detailed information about that specific plan.
- After clicking the icon, it will display relevant details, including the following information, such as:
- Created By: It indicates the user who originally created or set up the specific plan.
- Created At: It indicates the exact date when the plan was originally created.
Delete a plan
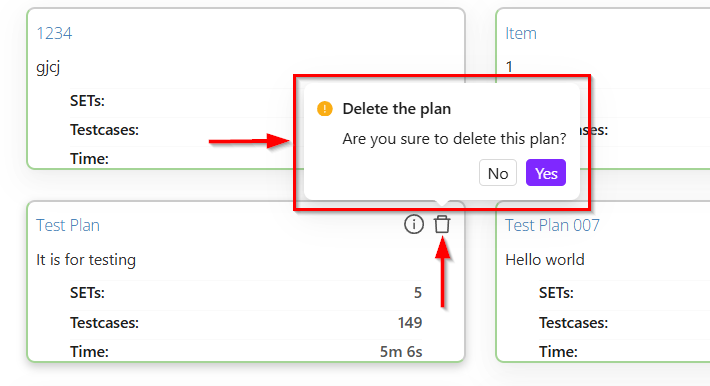
- The trash (delete) icon is located at the top-right corner and can be used to delete a specific plan if needed.
- Clicking it will typically prompt for confirmation before permanently deleting the selected item.

Selection and addition of presets
- First, click on a specific plan to add presets to it.
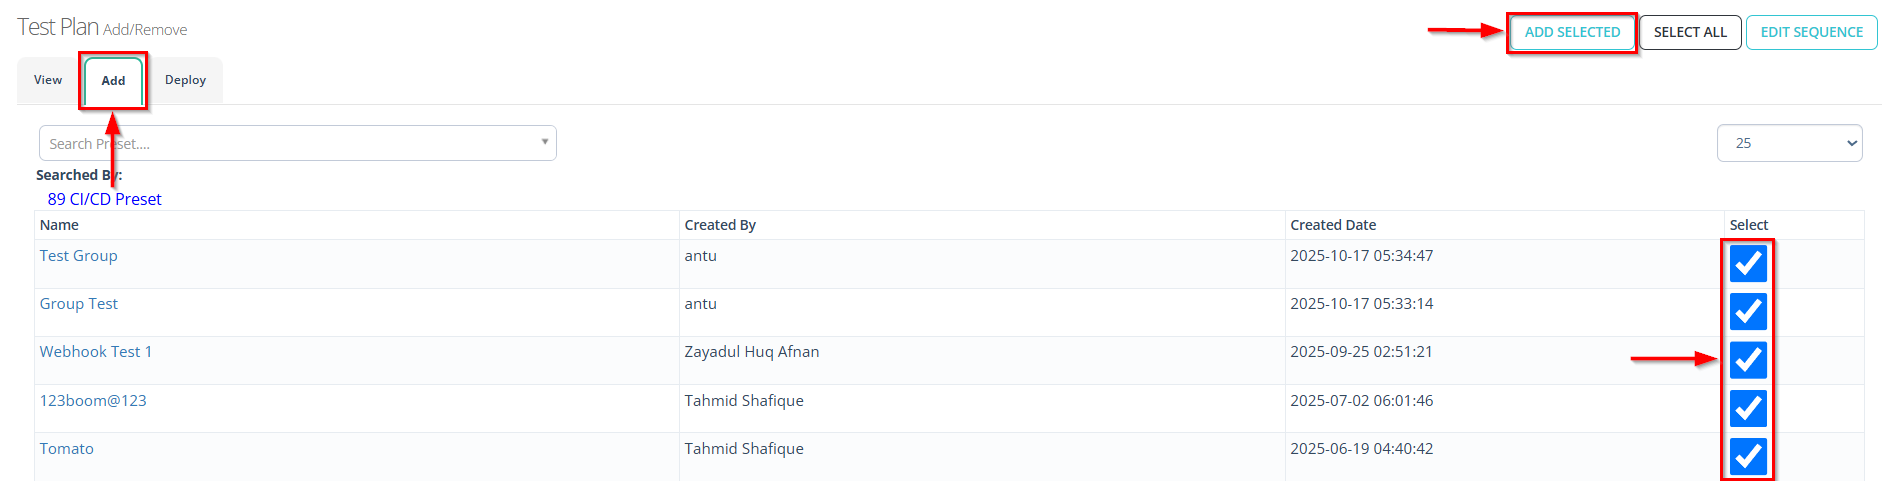
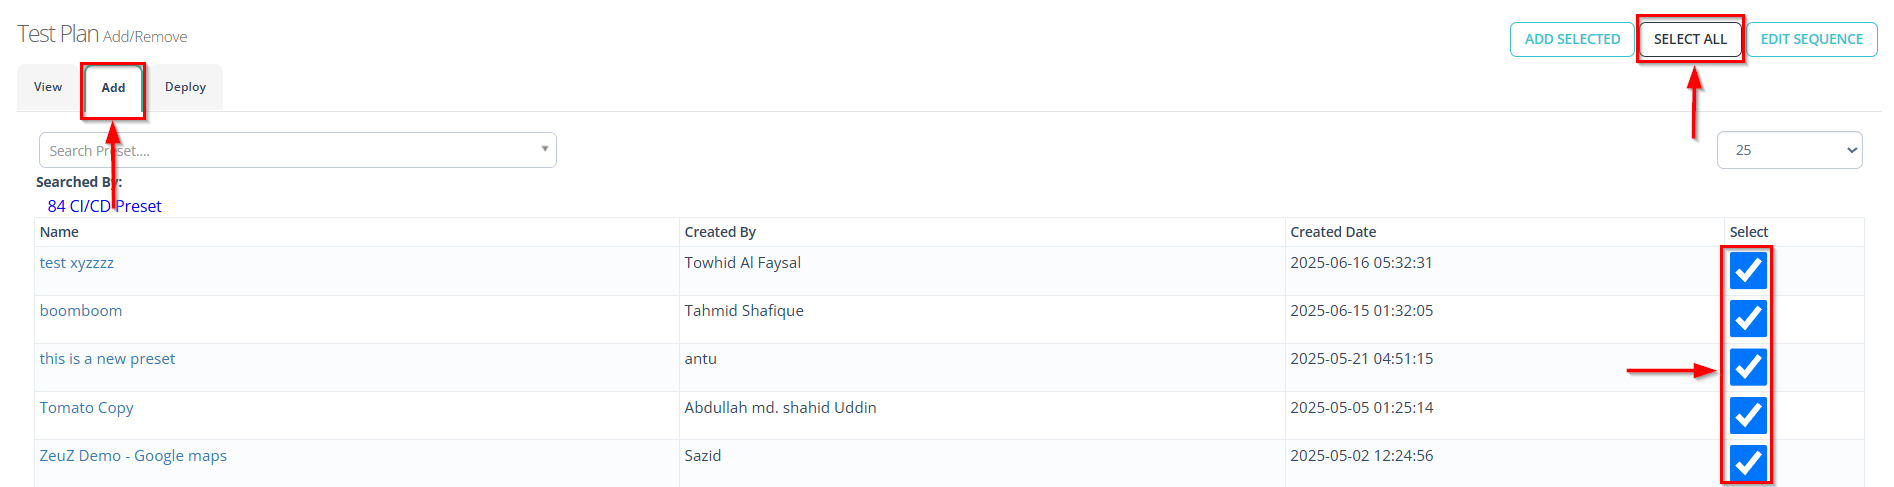
- Click on the "Add" tab on the Test Plan page of the selected plan.
- Select the required presets.
- To add the required presets, click the ADD SELECTED button.
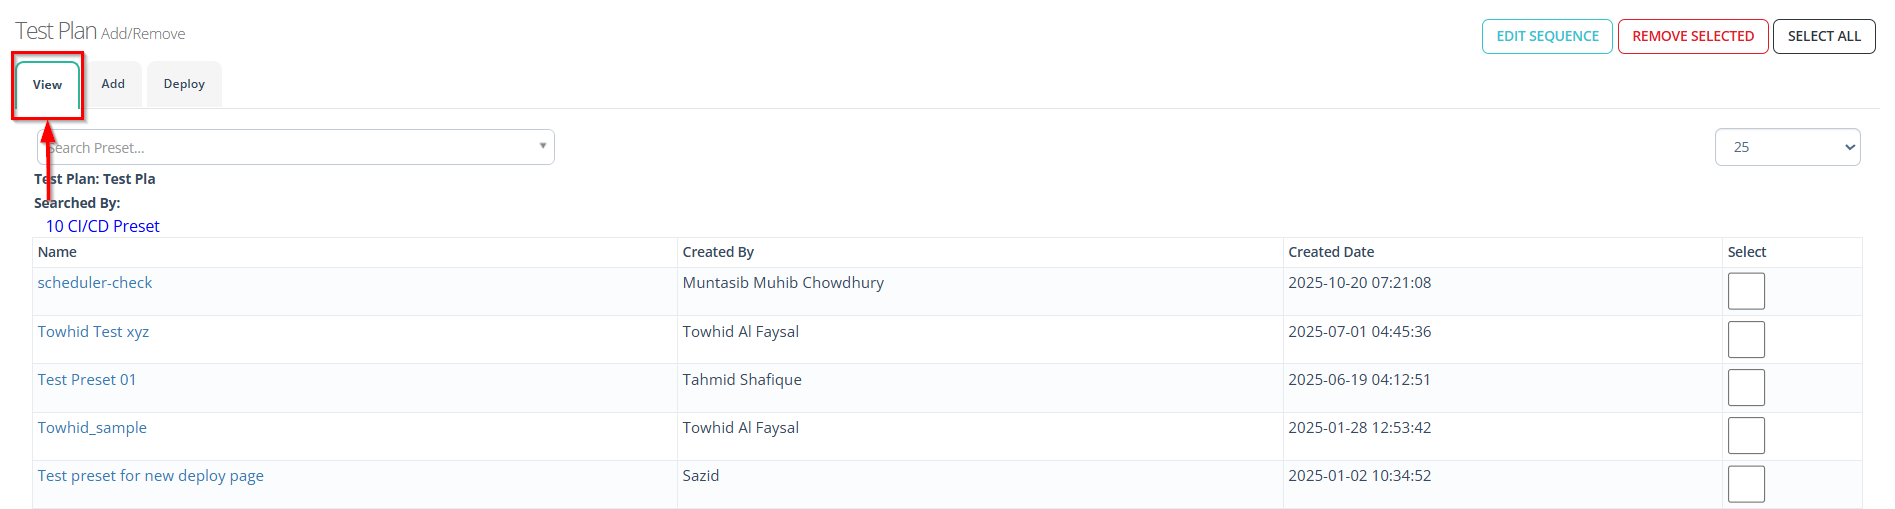
- To verify whether the required presets have been added, click the "View" tab on the Test Plan page.
- If it is necessary to select all presets for the required test plan, click the SELECT ALL button in the "Add" tab.
Edit the sequence of presets
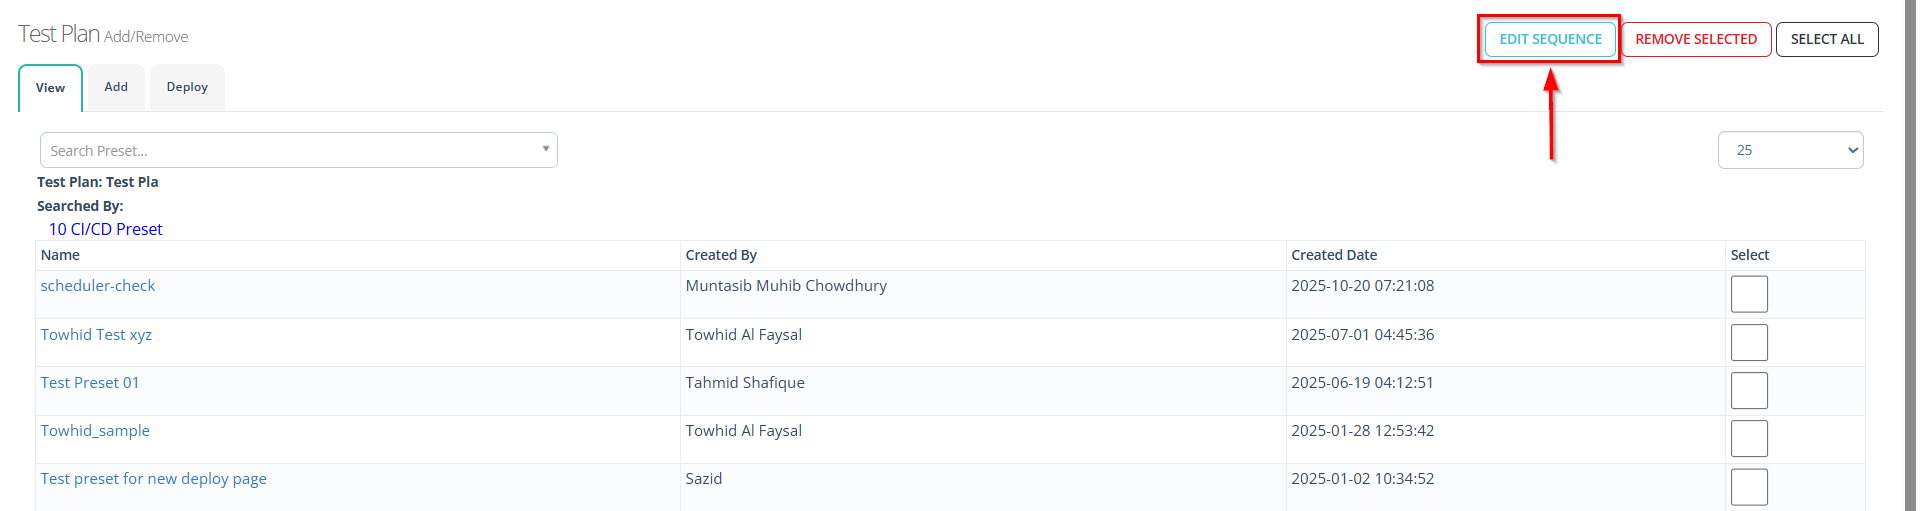
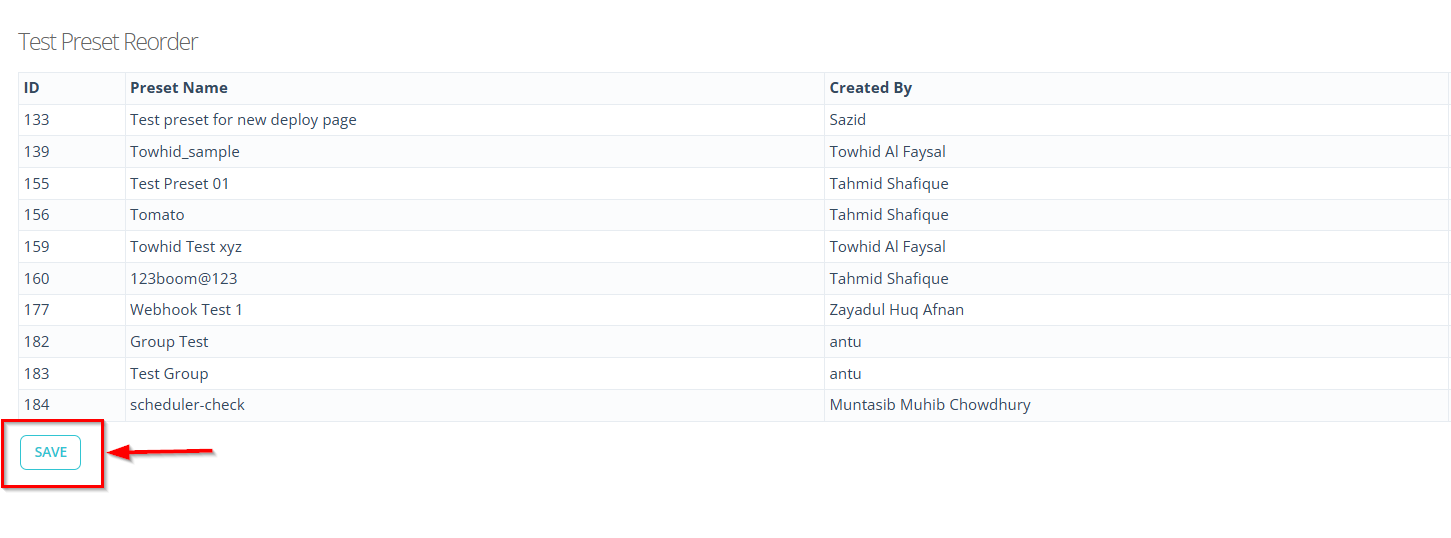
- If the sequence of presets needs to be modified, click the EDIT SEQUENCE button.
- After editing the sequence, click the SAVE button on the "Test Preset Reorder" page
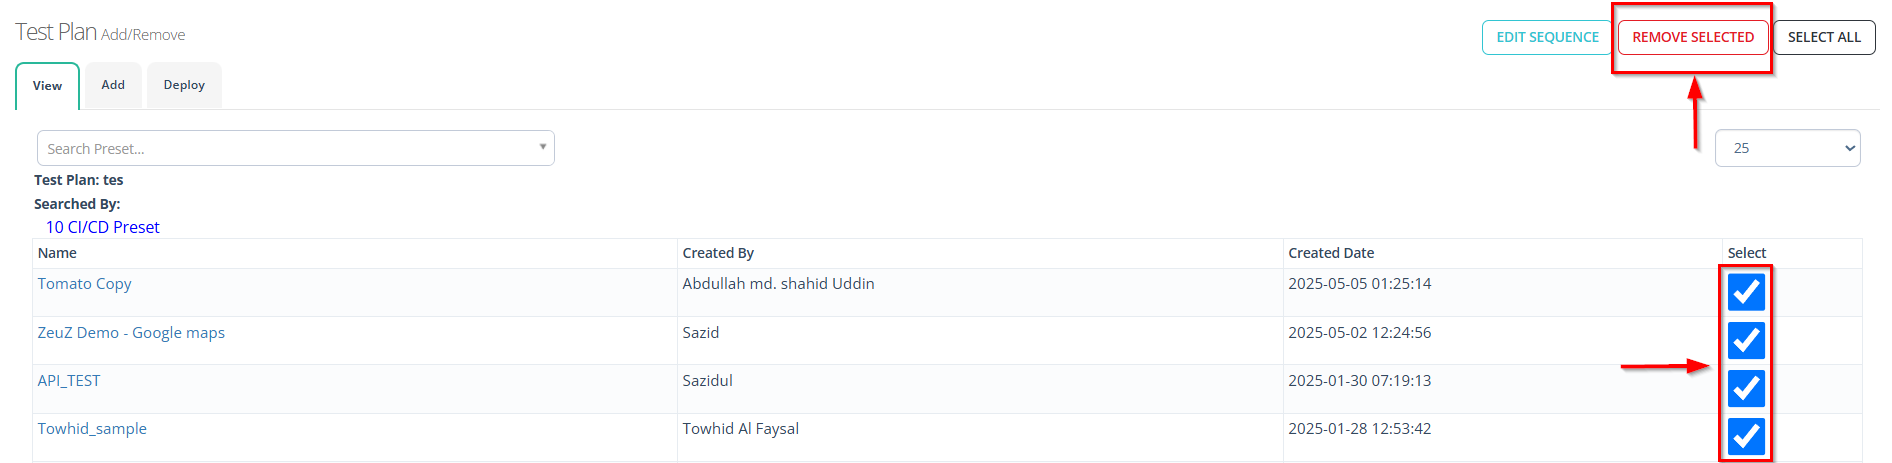
Removal of presets
- If it is necessary to remove any selected presets from the "View" tab, click the REMOVE SELECTED button.
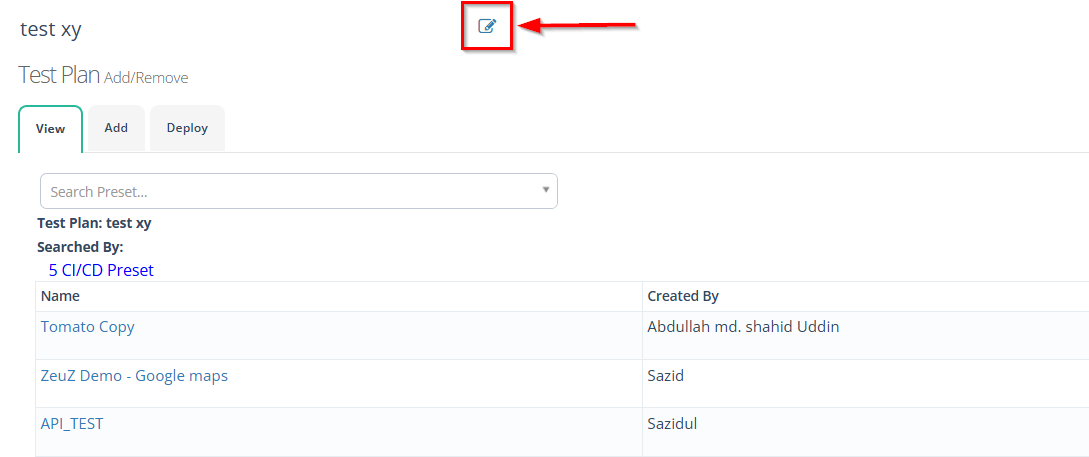
Rename the title of a plan
- If it is necessary to rename the plan title, click the Edit button next to the title on the Test Plan page.
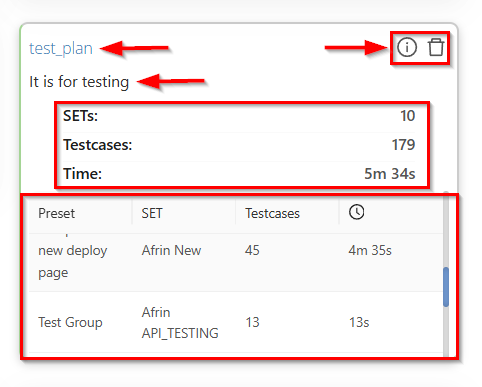
Plan card details
- It provides a quick summary of a specific test plan.
- It displays key information, such as:
- Plan Title at the top (e.g., test_plan).
- A short Description of the plan (e.g., It is for testing).
- Important statistics, including:
- SETs: The total number of test sets linked to the plan.
- Testcases: The total number of test cases included.
- Time: The estimated or recorded execution duration.
- Two action icons are visible in the upper-right corner:
- An information icon, used to view more detailed data about the plan.
- A trash (delete) icon, used to remove the plan if needed.
- The bottom portion shows the Presets section, listing the presets linked to the plan. Each row displays:
- The Preset name.
- The SET associated with the preset.
- The number of Testcases in that preset.
- The estimated Time for execution.
FAQs / Troubleshooting
FAQs
Can a plan be linked to multiple versions or milestones?
No, a plan cannot be linked to multiple versions or milestones. Each plan is associated with one milestone and one version only. This ensures clear traceability, accurate progress tracking, and proper alignment with project timelines.
What are presets, and how do they relate to plans?
Presets are reusable groups of test cases. They can be added to a plan to quickly include common sets of tests without creating them manually each time.
Can I edit a plan after creation?
Yes, a plan can be edited after creation. You can rename it, update its description, and add or remove presets.
Troubleshooting
- Test set issues in a plan: Ensure that the test set is properly created and linked to the plan before execution.
- Cannot create a plan: Ensure all required fields are filled and that you have the necessary permissions.
- Duplicate plans: Check for unintended duplicates and delete or rename any redundant plans.
- Plan execution issues: Ensure the plan is correctly linked to its version, milestone, and test sets before running tests.
- Issues adding presets: Presets must exist beforehand and be compatible with the plan's version/milestone.
Changelog
- Adopted a new card view [20250518]